Quick answer
Install a booking plugin such as Quill Booking (free on WordPress.org), create a host, add an event with its length and location, set your working hours, then put the booking calendar on a page with the Invalid ID shortcode or share the event’s booking link. The whole setup takes about 15 minutes, and clients can book, reschedule and cancel without emailing you.
A booking calendar turns “when are you free?” emails into a page where clients pick a time that suits both of you. It is one of the most useful things you can add to a service business website: you stop playing email tennis, bookings come in while you sleep, and every appointment lands in one place.
This guide walks you through the whole setup in WordPress, from installing the plugin to testing your first booking. We use Quill Booking for the screenshots, but the same steps apply to most booking plugins.
Disclosure: We make Quill Booking, so we use it for the screenshots and examples. The advice works with most booking plugins and scheduling tools.
Key takeaways
- A booking plugin keeps appointments, client details and your design on your own WordPress site. Calendly-style tools host them elsewhere.
- Set availability, buffers and minimum notice before you share the page; they prevent most scheduling headaches.
- Keep the booking form short: name, email and one or two questions convert best.
- Always test the full journey as a client, including the confirmation email, rescheduling and cancelling.
What you need before you start
- A WordPress site where you can install plugins (an administrator account).
- Your services and their lengths, for example a 30-minute discovery call and a 60-minute strategy session.
- Your working hours and any days you never take bookings.
- Where you will meet: in person, by phone, or on Zoom, Google Meet or Microsoft Teams.
- Whether clients pay up front. If they do, have a Stripe or PayPal account ready (see our payments guide).
Booking plugin or embedded Calendly?
You can also paste a hosted scheduler such as Calendly into a WordPress page. It works, but the booking data, emails and branding stay with the hosted service. Here is how the two approaches compare:
| WordPress booking plugin | Embedded hosted scheduler | |
|---|---|---|
| Where bookings are stored | Your WordPress database | The vendor’s servers |
| Design | Matches your theme | Vendor styling, limited branding on free plans |
| Pricing | Per site, often with a lifetime option | Per user, per month |
| Payments | Stripe, PayPal or WooCommerce on your site | Through the vendor’s integrations |
| Maintenance | You keep the plugin updated | None |
Calendly, for example, lists its Standard plan at $10 per seat a month and Teams at $16 per seat a month, billed yearly (Calendly pricing, checked November 5, 2026). A plugin is usually cheaper for a team because you pay per site, not per person. If you want to compare plugins first, see our guide to the best WordPress appointment booking plugins.
Step 1: Install a booking plugin
In your WordPress dashboard, go to Plugins → Add New Plugin, search for “Quill Booking”, then click Install Now and Activate. The free version from WordPress.org covers one-to-one appointments, availability, booking limits, booking questions and email notifications. A new Quill Booking menu appears in your sidebar.
Step 2: Create a host
A host is the person clients book time with. Go to Quill Booking → Calendars and click Add Host. Choose the WordPress user, their time zone and their weekly hours. Every event belongs to a host, so you need at least one before you can create events. If several people take bookings, add a host for each of them.
Step 3: Create your first event
An event is one thing clients can book, such as “Free discovery call”. In Calendars, click Add New Event (or the Create Event card under the host) and choose the format:
- One-to-one: one client books one slot with one host. This is the right choice for most services.
- Group: several people book the same slot, for example a class or workshop (Quill Booking Pro).
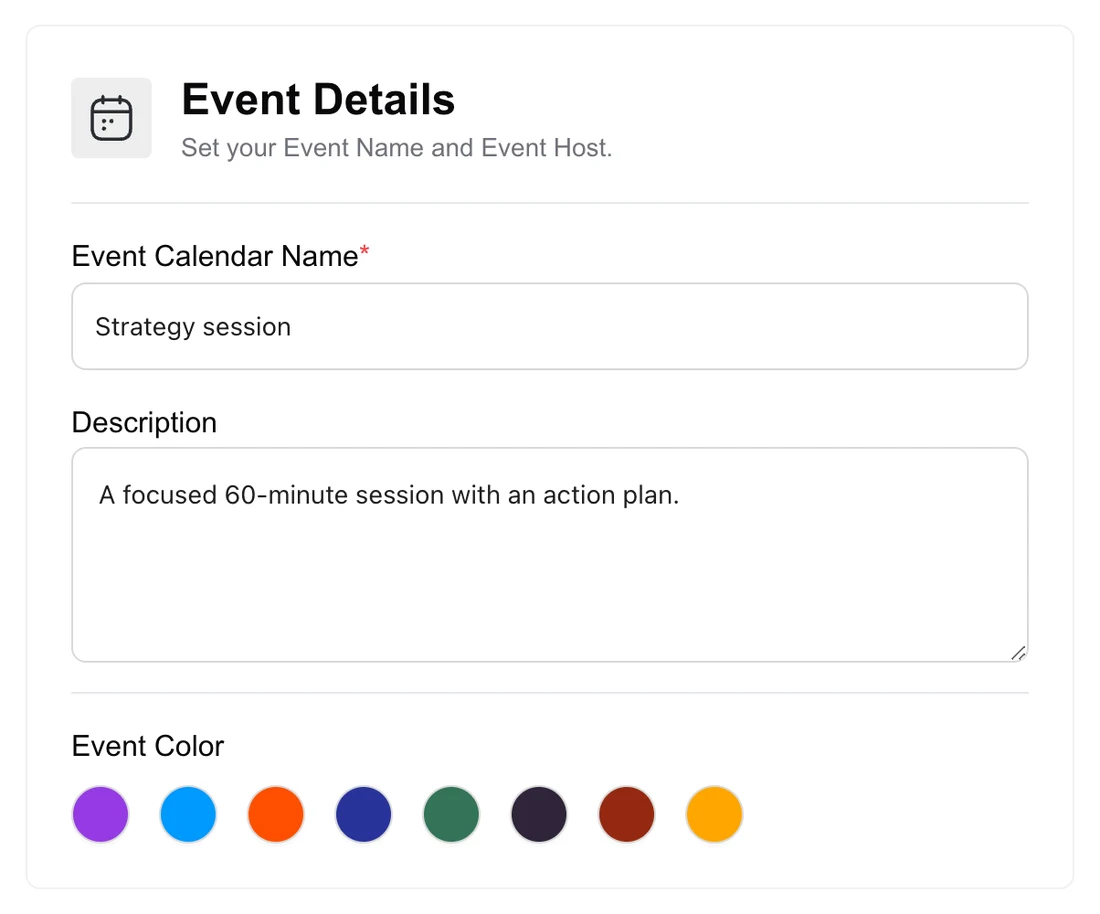
Then add the event name, a short description, the duration and a colour. The name and description appear on the booking page, so write them for your client: say what they get and how long it takes.
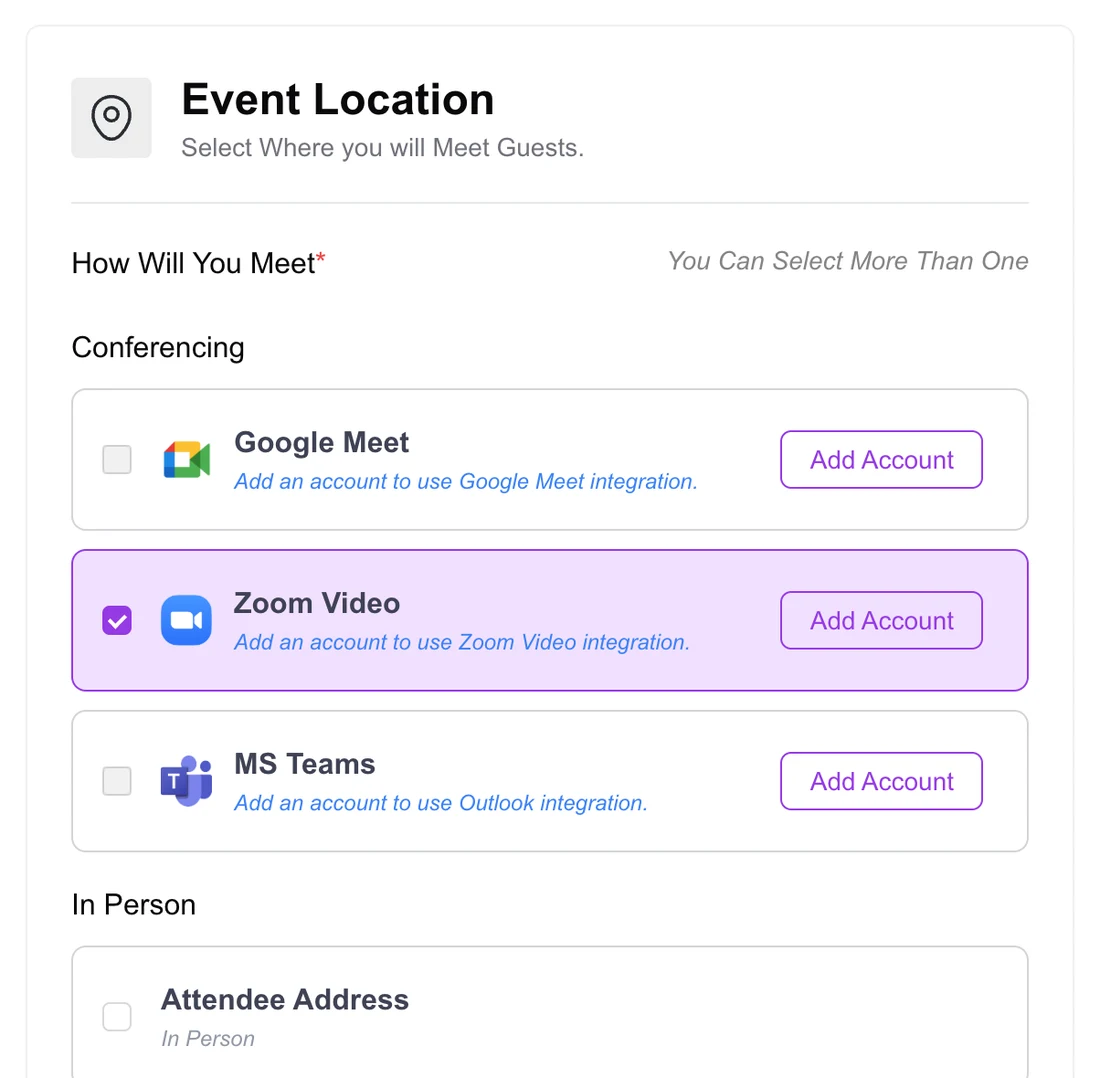
Next, choose where the meeting happens. You can pick a video platform, an in-person address or a phone call, and you can tick more than one so the client chooses. Video links are created automatically once you connect your account; our Zoom, Google Meet and Teams guide covers that setup.
Step 4: Set your availability and limits
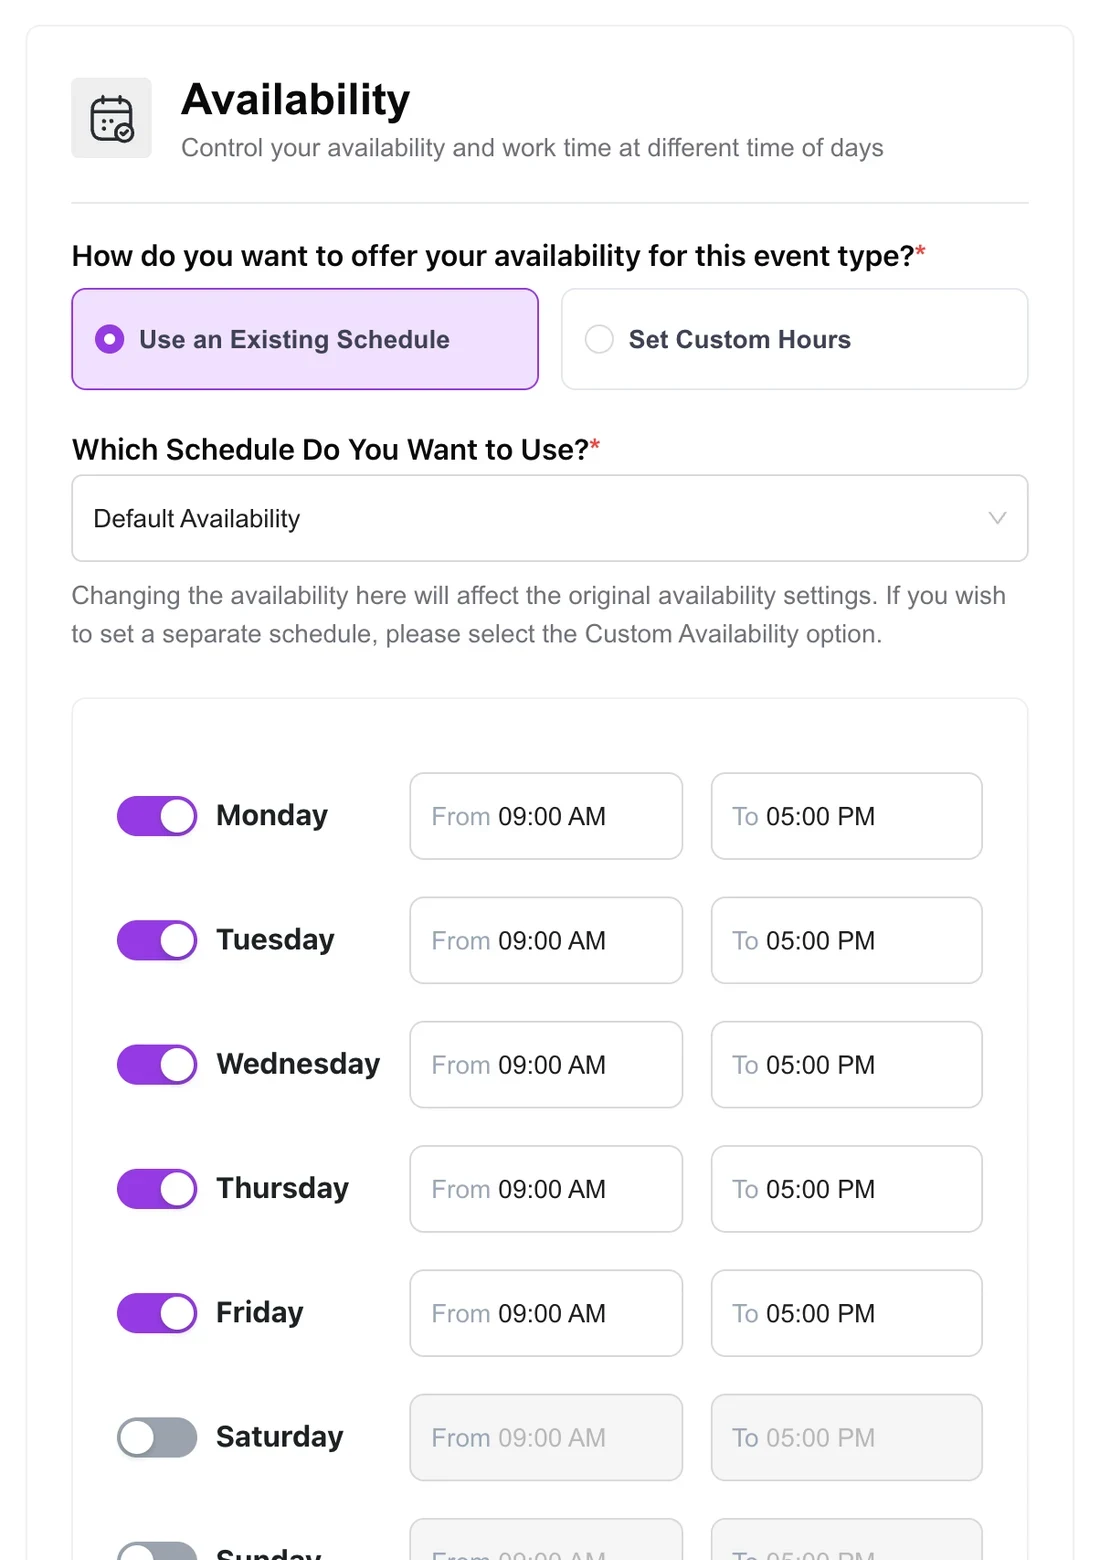
Open the Availability & Limits tab. Under Availability, either use an existing schedule or set custom hours just for this event. Switch each day on or off and set the hours you take bookings. Use Date-specific hours for one-off changes, such as a holiday or a late opening, and the availability range to control how far ahead people can book (for example, the next 60 days).
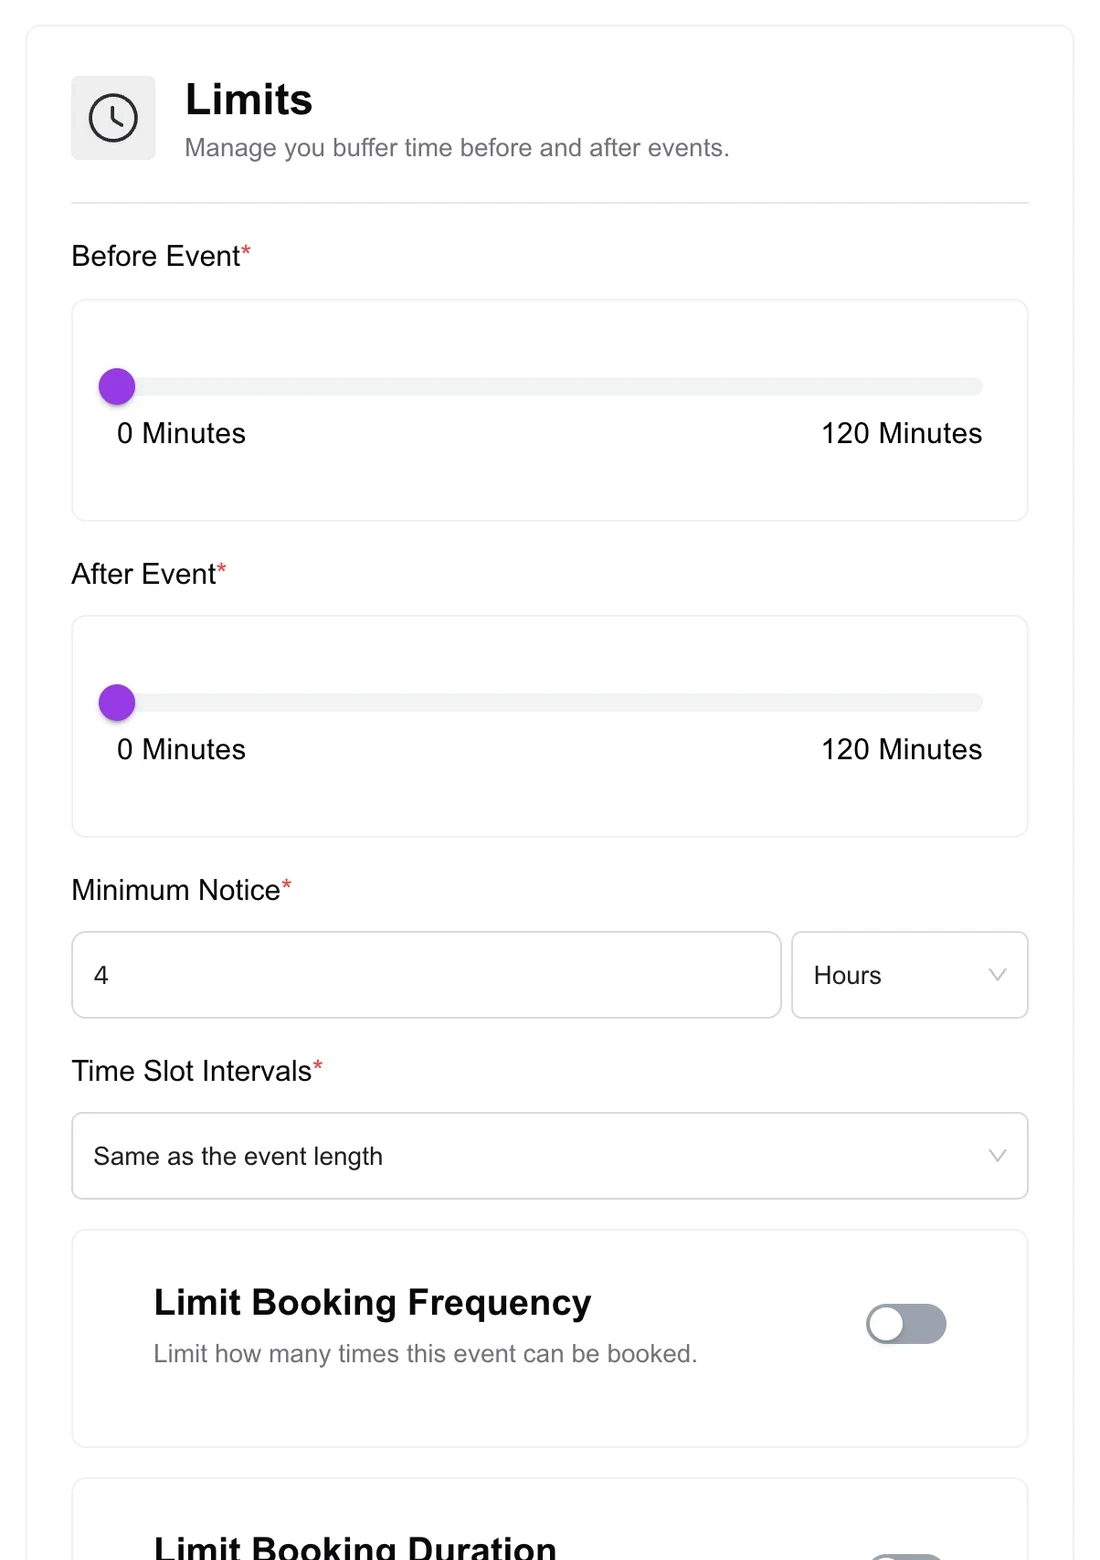
The Limits panel is where you protect your calendar:
- Before and after event buffers add breathing room between appointments, for travel, notes or a coffee.
- Minimum notice stops last-minute surprises. A 4-hour notice means nobody can book a slot that starts in the next 4 hours.
- Time slot intervals control which start times appear. A 30-minute interval shows 2:00, 2:30, 3:00 and so on.
- Limit booking frequency caps bookings per day, week or month, and limit booking duration caps the total booked time.
- Lock time zone shows times in one fixed zone, which is useful for in-person appointments.
Step 5: Add booking questions
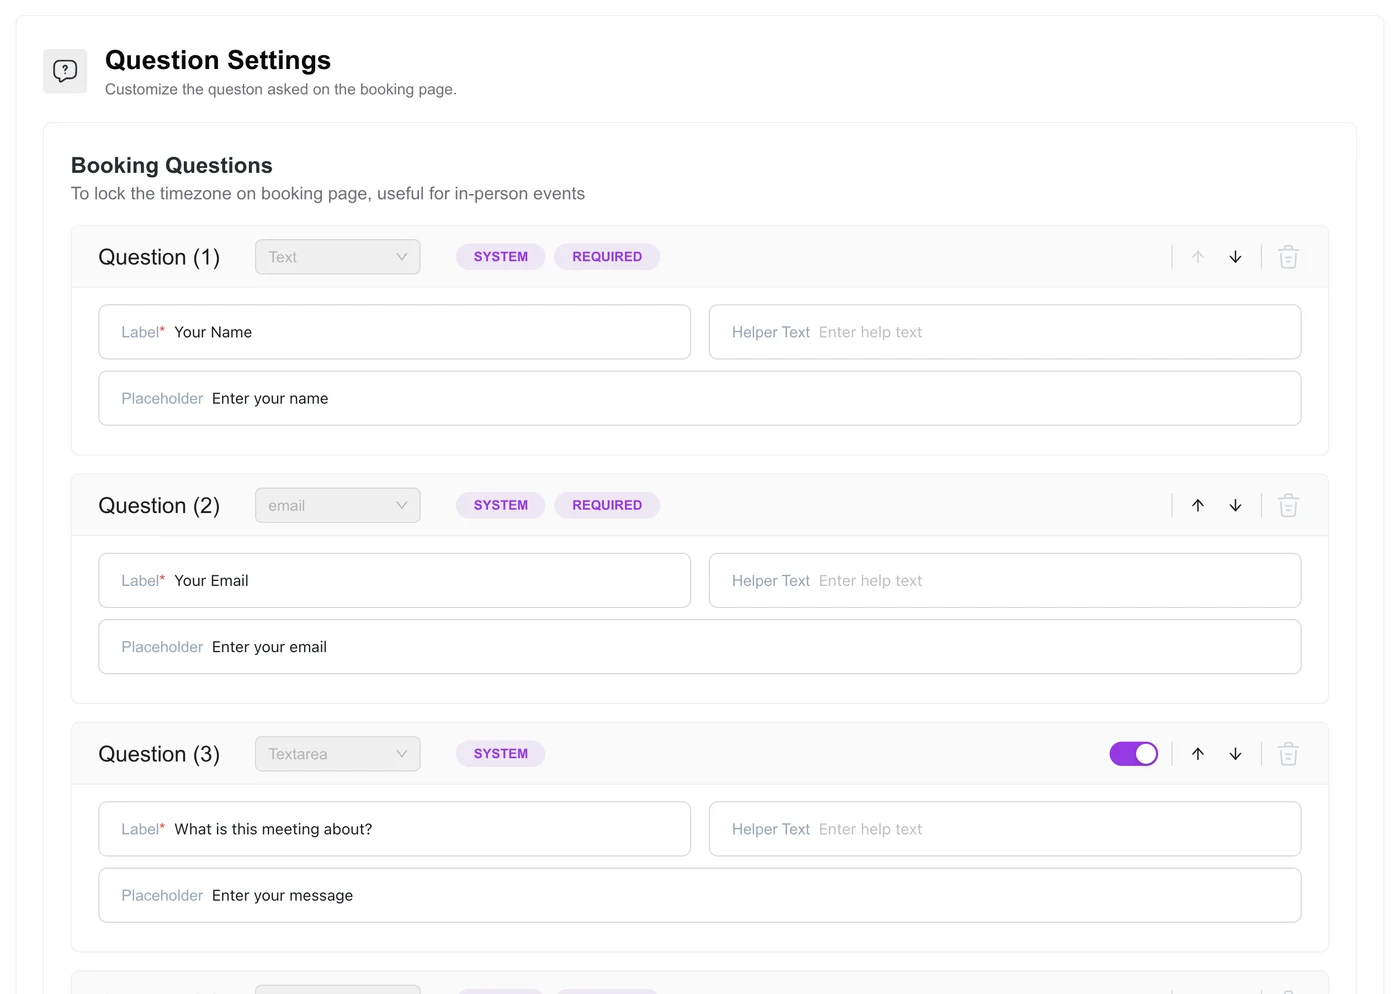
On the Questions tab you decide what clients fill in. Name and email are required and cannot be removed. Add only what you need to prepare, such as “What would you like to cover?” or a phone number for text reminders. Each extra field lowers the number of people who finish the form, so keep it short.
You can also ask why someone cancels or reschedules, which is useful feedback. If you need a longer intake form with conditional logic, connect a form builder such as Quill Forms.
Step 6: Turn on confirmations and reminders
The Email Notification tab lists every automatic email: the attendee confirmation, the organizer notification, reminders for both sides, and cancellation and reschedule messages. Click one to edit its subject and body, and use the <> button to insert booking details such as the guest’s name, start time and meeting link.
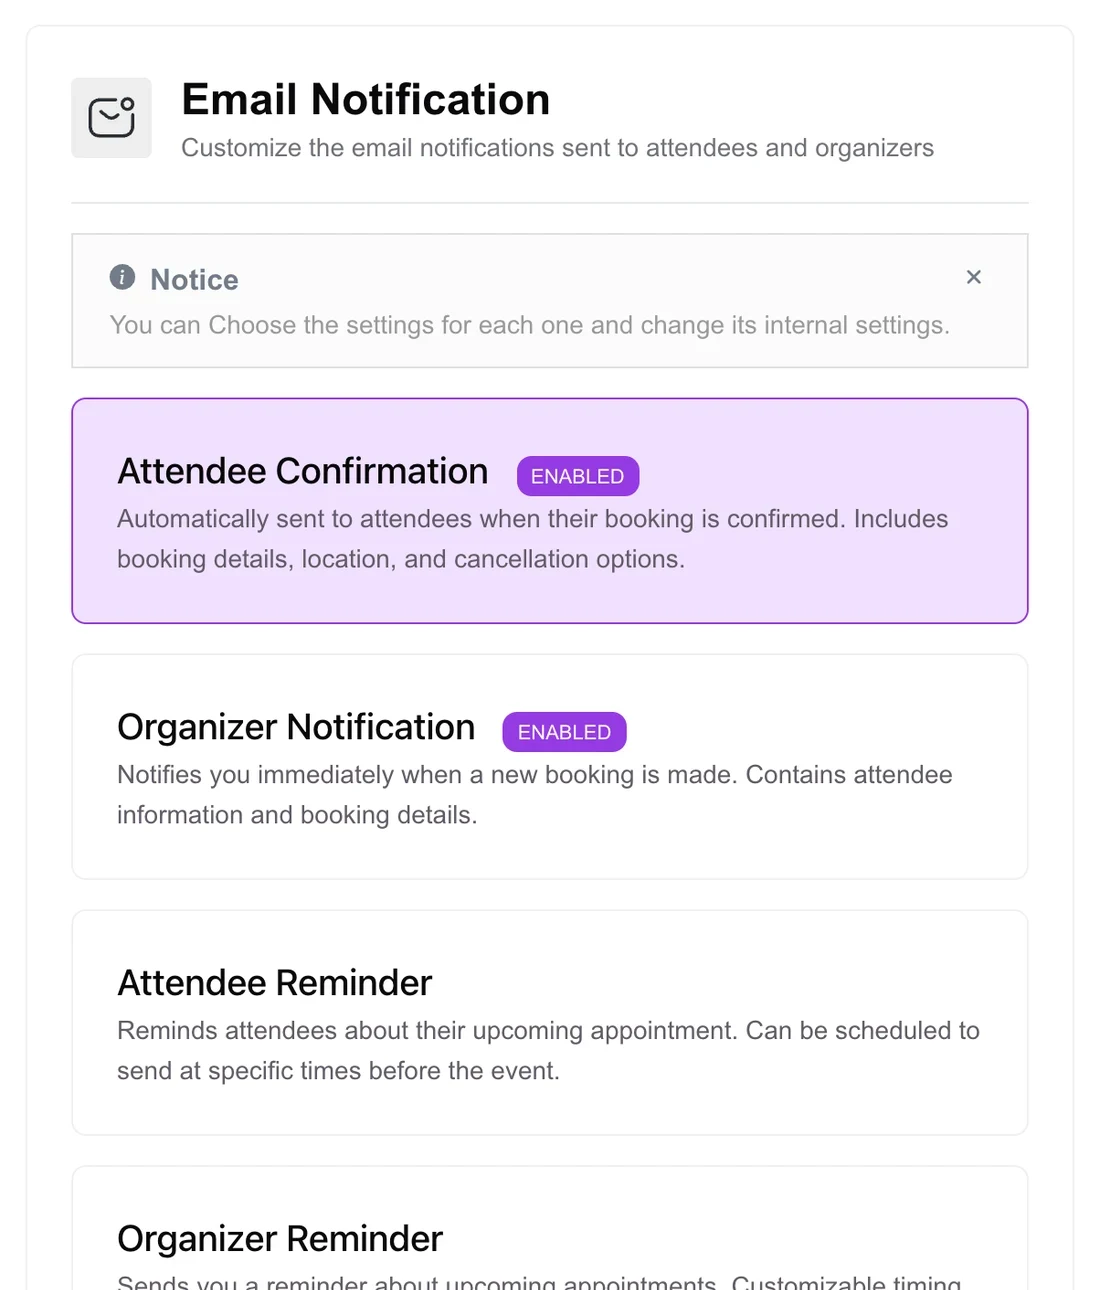
Switch on the Attendee Reminder. Reminders are the single most effective way to cut missed appointments (see how to reduce no-shows), and you can borrow wording from our appointment reminder templates. Text and WhatsApp reminders through Twilio are available in Quill Booking Pro.
Step 7: Add the booking calendar to your site
You have four ways to publish the calendar:
- Shortcode. Edit a page, add a Shortcode block and paste the event’s shortcode. Page builders such as Elementor have a shortcode widget that works the same way.
- Booking link. Every host has a landing page, and every event has its own link. Use Copy Link on the event card to share it in emails, social bios or your email signature.
- Embed code. An iframe lets you show the calendar on a site that is not WordPress.
- QR code. Handy for flyers, business cards and your front desk.
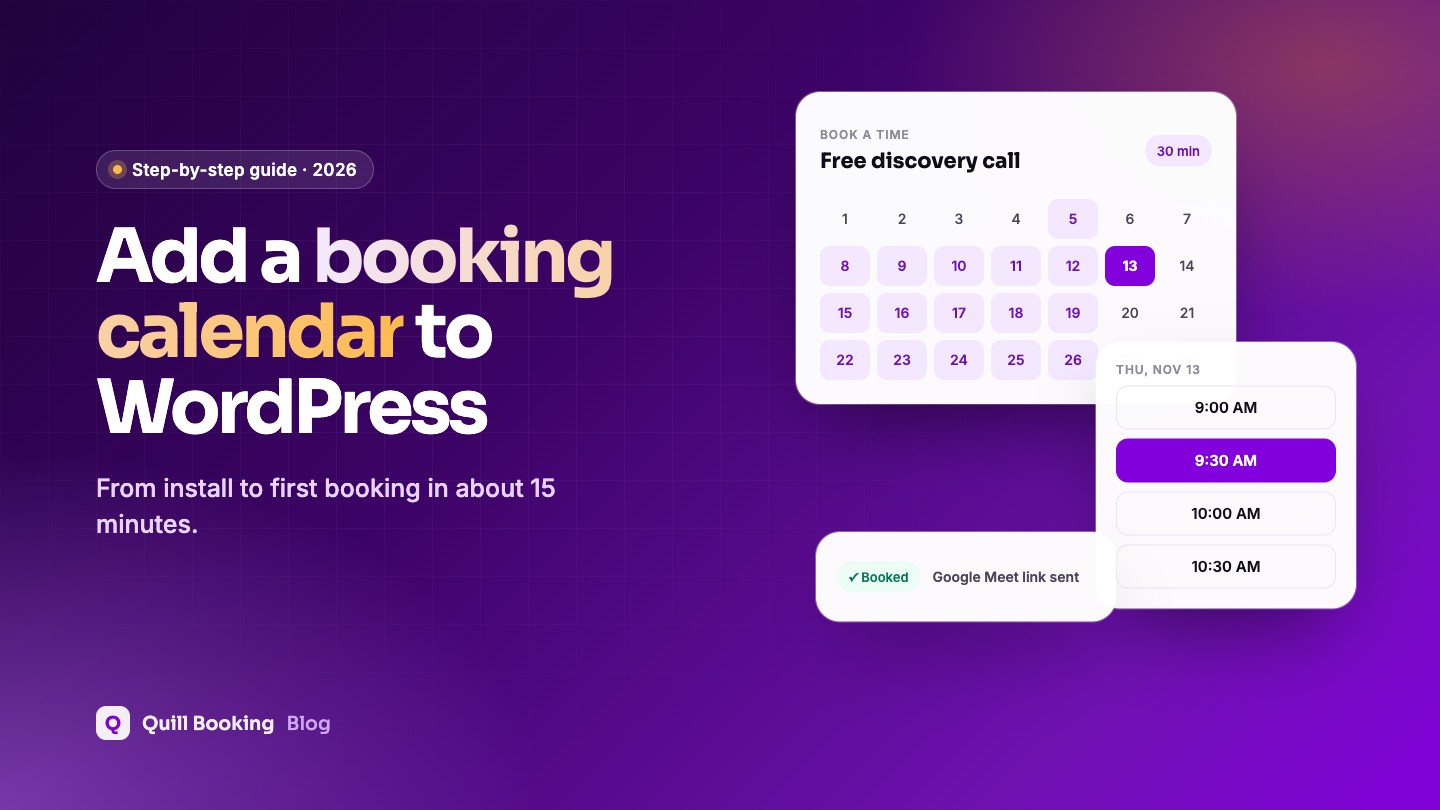
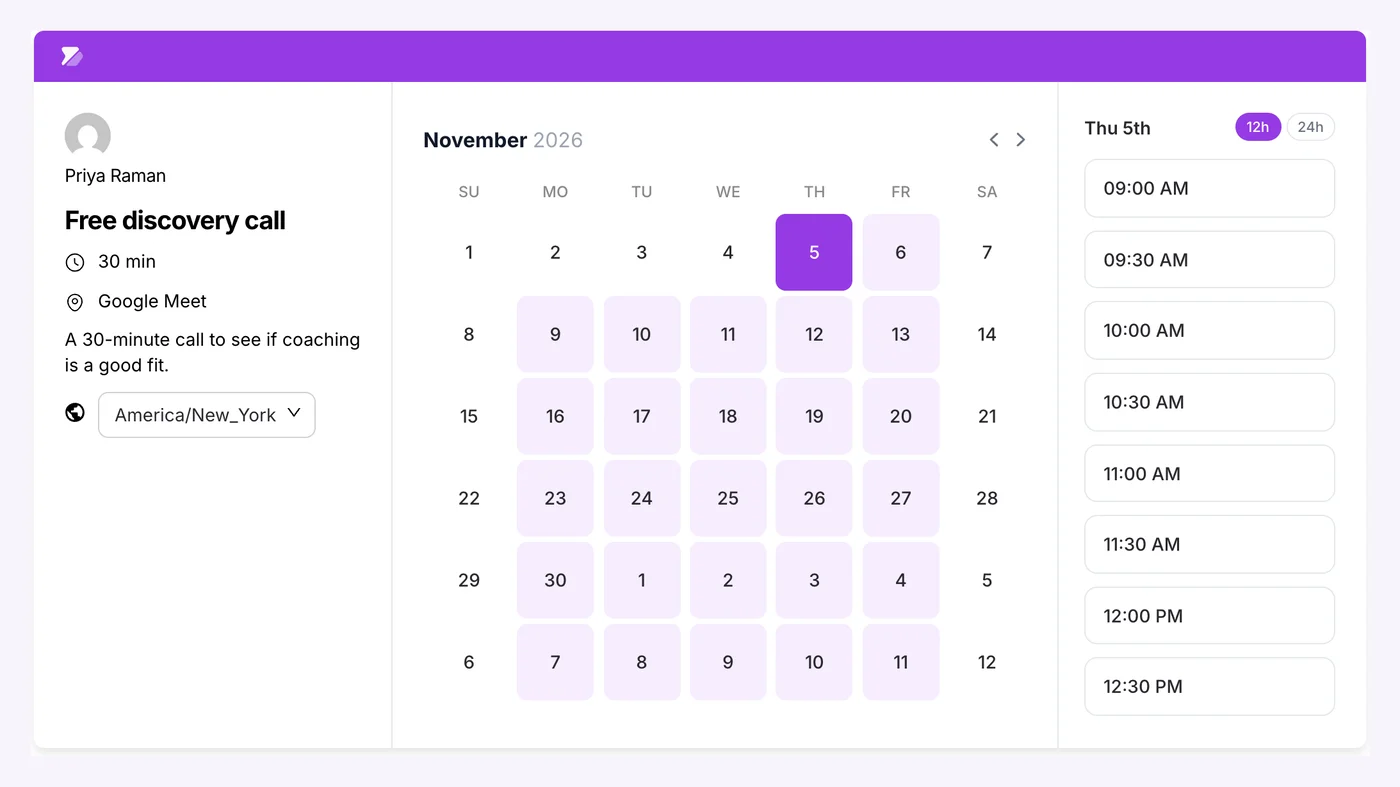
Event not foundReplace 7 with your event’s ID. Here is what your clients see:
Step 8: Test it like a client
Before you announce the page, book a real appointment yourself, ideally from your phone:
- The booking page loads quickly and looks right on mobile.
- Available times match your hours, buffers and minimum notice.
- The time zone is correct, so try it from a different time zone if you can.
- You receive the confirmation email, and the organizer email reaches you.
- The reschedule and cancel links in the email work.
- If you take payments, a test payment goes through in test mode.
Optional upgrades
Once the basics work, these features save the most time. They are part of Quill Booking Pro, which starts at $39 a year or $109 for a lifetime licence:
- Calendar sync with Google, Outlook and Apple Calendar, so personal events block booking slots.
- Automatic Zoom, Google Meet and Teams links for online meetings.
- Payments through Stripe, PayPal or WooCommerce.
- SMS and WhatsApp reminders through Twilio.
- Round-robin team scheduling, group events and collective events.
Tips for a booking page that converts
- Lead with the outcome. “Get a 30-minute plan for your launch” beats “Meeting”.
- Offer fewer, clearer options. Two or three events are easier to choose from than ten.
- Show the essentials: duration, location or video platform, and price if any.
- Ask fewer questions. Collect the rest after the booking is confirmed.
- Link to the page everywhere: your menu, contact page, email signature and social bios.
Frequently asked questions
Can I add a booking calendar to WordPress for free?
Yes. Quill Booking’s free version on WordPress.org lets you create one-to-one events with availability, booking limits, booking questions and email notifications, and add them to any page with a shortcode. Paid features such as payments, calendar sync and SMS reminders are in Quill Booking Pro.
How do I add a booking calendar to Elementor?
Copy your event’s shortcode, then add Elementor’s Shortcode widget to the page and paste it in. The calendar renders inside your Elementor layout.
How do I stop double bookings?
Connect your Google, Outlook or Apple calendar and tick the calendars to check for conflicts, so busy times are hidden. Buffers between appointments and booking frequency limits also help.
Can clients reschedule or cancel by themselves?
Yes. Confirmation emails include reschedule and cancel links by default. You can turn either option off for an event in its Advanced Settings tab if you prefer clients to contact you.
Can I embed Calendly in WordPress instead?
Yes, by pasting Calendly’s embed code into a Custom HTML block. Bookings, client details and branding then stay with Calendly, and pricing is per user. A WordPress plugin keeps everything on your own site.
Related guides
- 30 appointment reminder templates
- How to reduce no-shows
- How to take payments for appointments in WordPress
- How to sync WordPress bookings with Google Calendar
- 9 best WordPress appointment booking plugins
Start taking bookings todayQuill Booking is free on WordPress.org. Pro adds payments, calendar sync, video links and SMS reminders.
Get it free