Collect Payment During Booking
QuillBooking allows you to set up a way for clients to pay for your booking services, whether you prefer Stripe, PayPal, WooCommerce. Follow the simple steps to get it done.
Enable Payment Settings
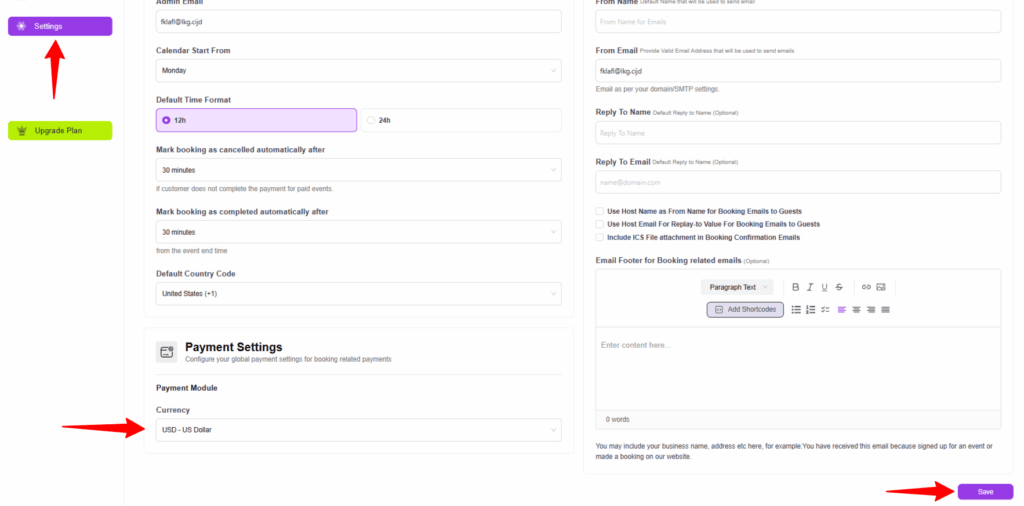
Before you start accepting payments, you’ll need to choose Currency.
Start by going to the Settings menu. scroll down until you see Payment Settings.
choose the Currency you’d like to use for your bookings from the dropdown menu. Then, click the Save button. That’s it!
Configure Payment Settings
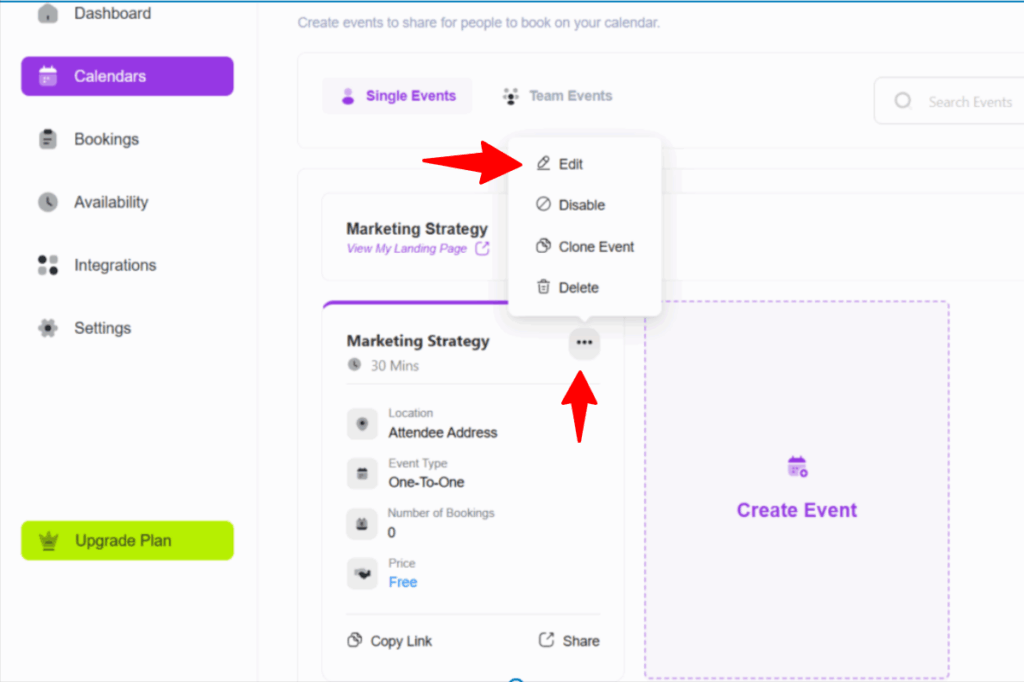
To set up payments for a specific booking, click the Calendars section in your QuillBooking dashboard. Find the booking you want to update, then click the Edit button.
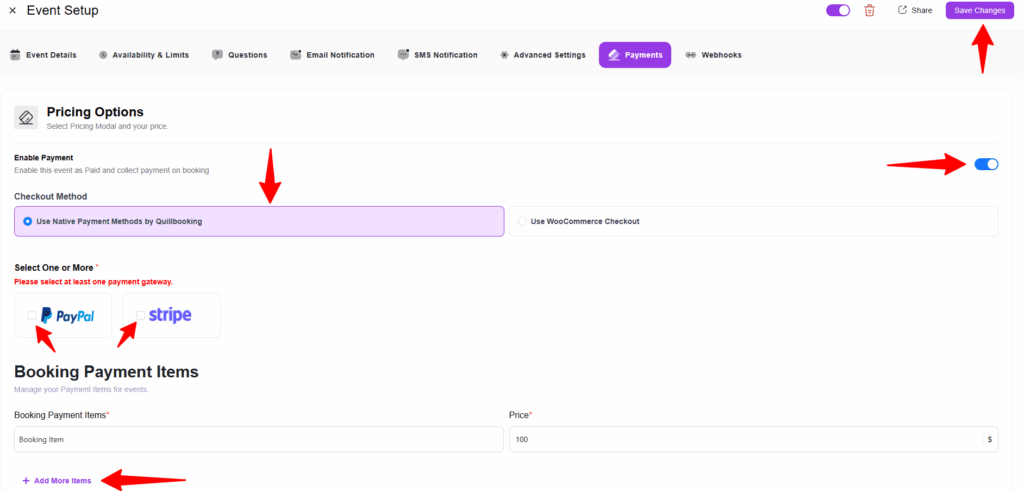
Now, select the Payment option and choose the checkbox that says Enable this event as Paid and collect payment on booking.
Use Native Payment Methods by QuillBooking
QuillBooking lets you accept payments using built-in options like Stripe and PayPal.
Once you’ve selected your preferred payment method, head to the Booking Payment Items section. Here, you can enter the name of your service or items and set the price.
If you need to add more services or items, click the Add More Item button and fill in the details. After setting everything up, click the Save Changes button to save your settings.
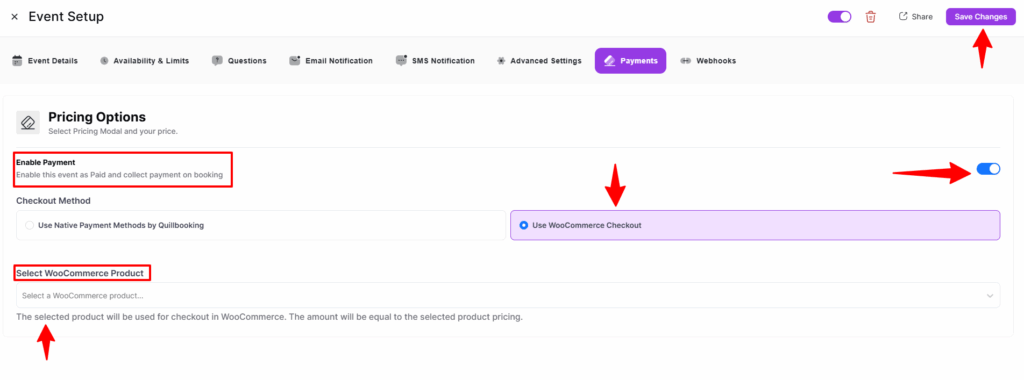
Use WooCommerce Checkout
If you’d like to use WooCommerce Checkout to accept payments for your bookings, you’ll first need to enable the WooCommerce plugin.
Now, go back to your booking event and select Use WooCommerce Checkout. You can only choose from existing products in your WooCommerce store. The booking price will match the product price in your store.
When all is done, click the Save Changes button.
Set up your Payment Gateway
To make the system work, you need to connect at least one payment method. QuillBooking supports multiple payment methods for a single booking.