Google Tag Manager
Welcome to the documentation guide for integrating QuillBooking with Google Tag Manager (GTM). This guide will walk you through the process of setting up and utilizing Google Tag Manager to track user interactions and events within QuillBooking.
What is Google Tag Manager?
Google Tag Manager is a tag management system that simplifies the process of deploying and managing various tracking codes, scripts, and snippets on your website. It provides a centralized platform to add, update, and remove tags without modifying the website’s code directly.
Why Integrate QuillBooking with Google Tag Manager?
Integrating QuillBooking with Google Tag Manager offers several benefits:
- Efficient Tracking: By using Google Tag Manager, you can streamline the process of implementing tracking codes and scripts within QuillBooking. It provides a user-friendly interface that simplifies tag management and reduces dependency on developers.
- Flexibility: With Google Tag Manager, you can easily add and modify tracking tags without editing the QuillBooking code directly. It gives you the flexibility to adapt your tracking requirements as your needs evolve.
- Advanced Tracking Capabilities: Google Tag Manager offers a wide range of built-in tags and triggers to track various user interactions and events within QuillBooking. You can track form submissions, welcome screen passing and field answering.
- Third-Party Integrations: Google Tag Manager integrates seamlessly with various third-party analytics tools, such as Google Analytics, Facebook Pixel, and many others. You can leverage these integrations to gain deeper insights into user behavior and optimize your forms accordingly.
Getting Started
To integrate QuillBooking with Google Tag Manager, you will need to perform the following steps:
1- Create a Google Tag Manager Account: If you don’t already have a Google Tag Manager account, you’ll need to create one. Visit the Google Tag Manager website (tagmanager.google.com) and follow the instructions to set up your account.
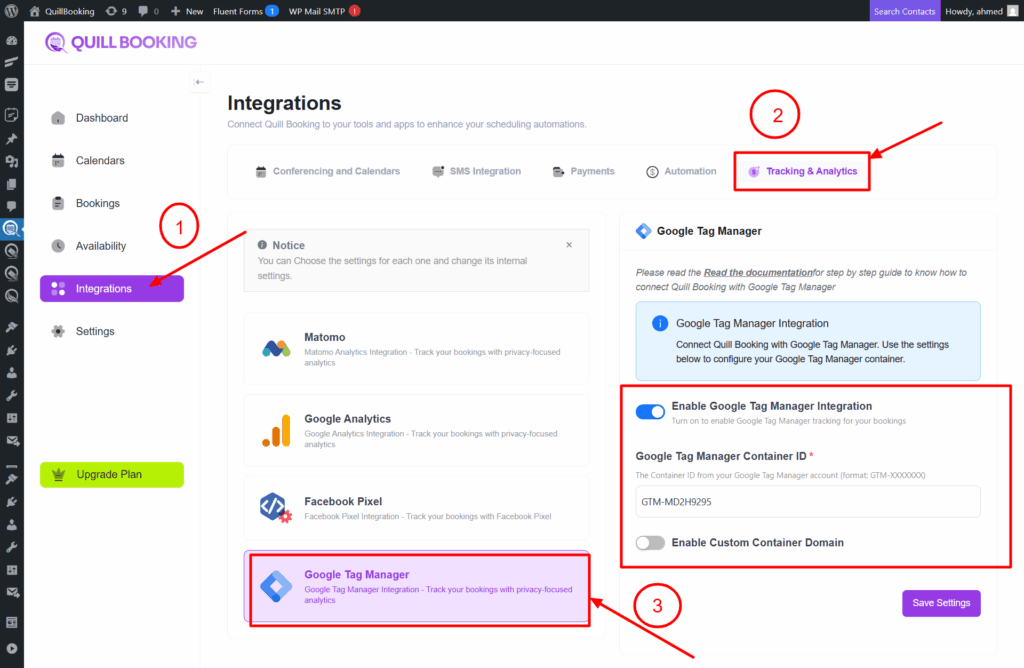
2- Configure Google Tag Manager in QuillBooking: Once you have your Google Tag Manager account, you’ll need to install and configure the Google Tag Manager container on QuillBooking.
To get your container ID, navigate to your Google Tag Manager dashboard and get it from there like in the following screenshot:

Copy this container id and insert it in QuillBooking and click save:
QuillBooking sends 2 types of event actions to Google Tag Manager:
1. QuillBooking.BookingCompleted
This event action fires after clicking the submit button.
- Category – calendar_{calendar_id}_event_{event_id}.
- Action – QuillBooing.BookingCompleted.
- Label—Booking Completed.
2. QuillBooking.BookingStarted
This event action fires after choosing a time slot.
Label—Booking Started.
Category – calendar_{calendar_id}_event_{event_id}.
Action – QuillBooing.BookingStarted.