Create Single Events
Welcome to the guide for creating new booking events in QuillBooking. Follow these simple steps to set up a new event and start accepting bookings right away!
Before You Begin
Ensure you’ve already created at least one host in QuillBooking—events must be linked to a host.
Creating a New Event
- From the QuillBooking navigation menu, go to the Calendars section.
- Click the “Add New Event” button located in the middle of the screen.

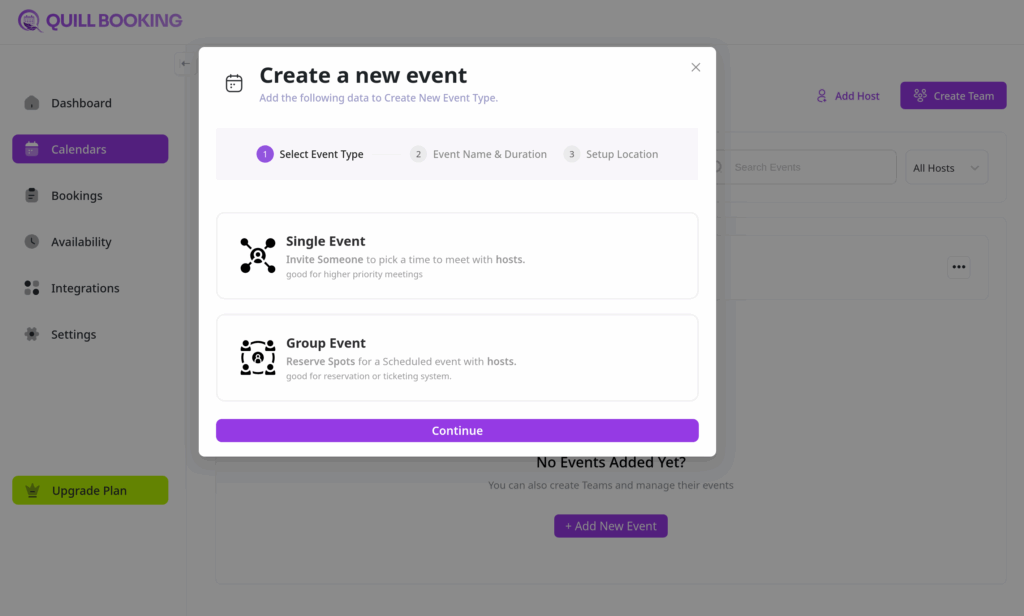
Choose Event Type
A pop-up window will appear asking you to choose your meeting format:
- One-to-One Meeting
- Group Meeting
Select the one that fits your event.
Enter Event Details
Next, provide the details of your booking event:
- Event Name: This will appear on your public booking page.
- Description: A short description to give attendees context.
- Meeting Duration: Select how long the meeting will last.
- Event Color: This will appear on your public booking page.
Click “Continue” when you’re done.

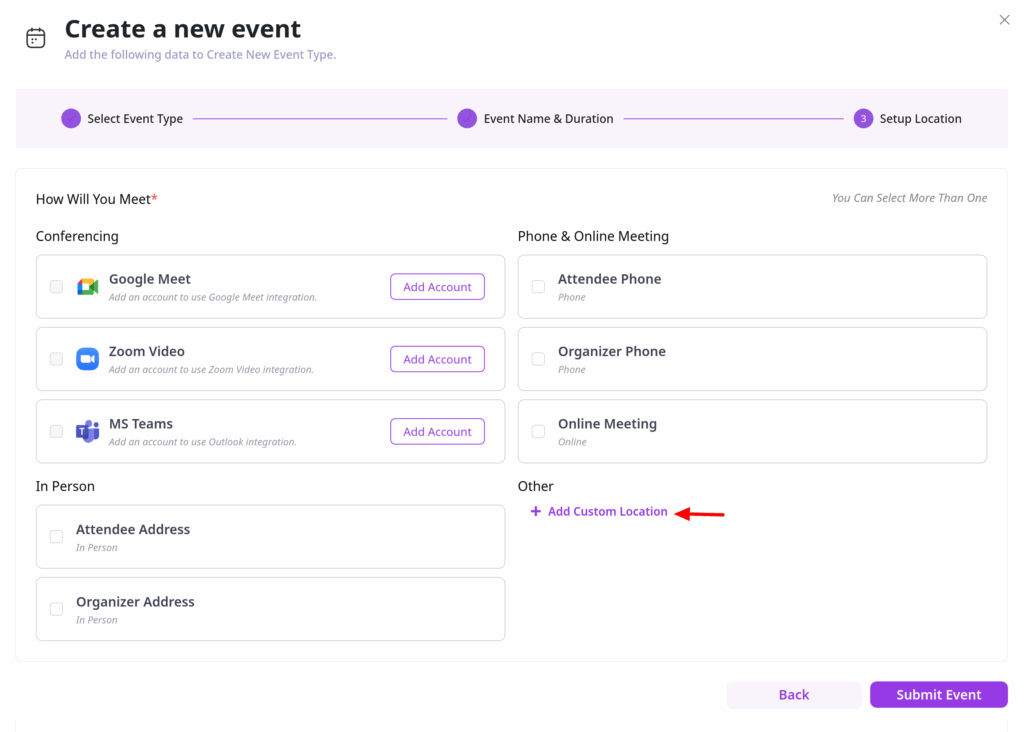
Configure Event Location
Choose the platform (e.g., Zoom, Google Meet, Phone Call). You can add multiple locations using “+ Add custom location”.
Configure Event Settings
In the next step, you’ll have access to the full settings panel, including:
- Event Details
- Availability
- Booking Limits
- Question Settings
- Email Notifications
- SMS Notifications
- Advanced Settings
- Payment Options
- Webhooks
Customize these settings based on your preferences and workflow. Once finished, click “Save Changes”.