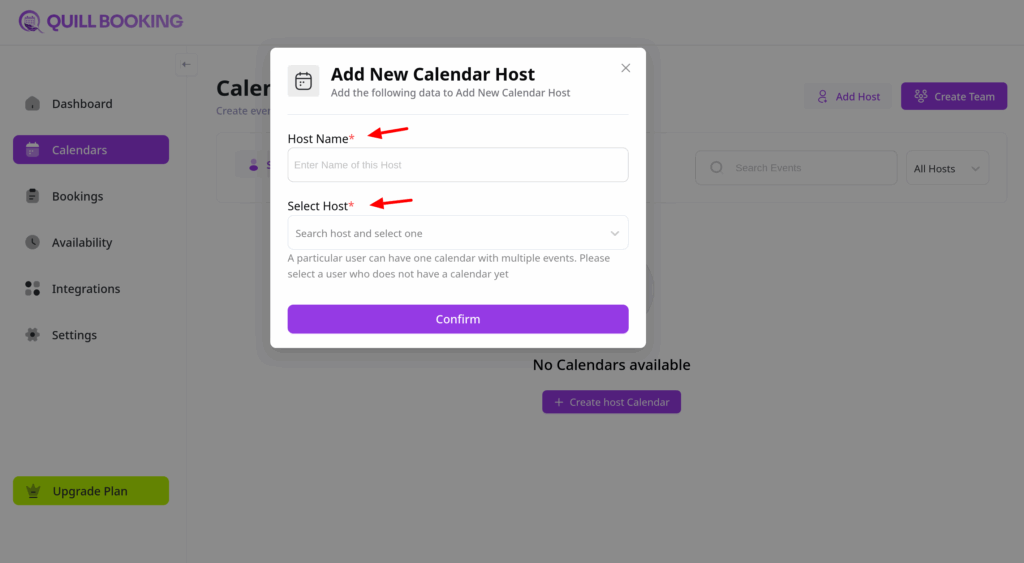
Create a New Host
With QuillBooking, you can define availability for yourself or your team, allowing attendees to book time slots that work for everyone. In QuillBooking, you can create hosts—each with their own calendar—for streamlined meeting management. This guide walks you through the simple steps to create a new host.
Creating a Host in QuillBooking
To get started:
- Click on Calendars from the side navigation menu.
- Click the “Add Host” button or the “Create Host Calendar” button

Select a Host
A pop-up window will appear where you can choose a host. QuillBooking will display a list of users from your WordPress site. Simply click the name of the user you want to assign as the host.
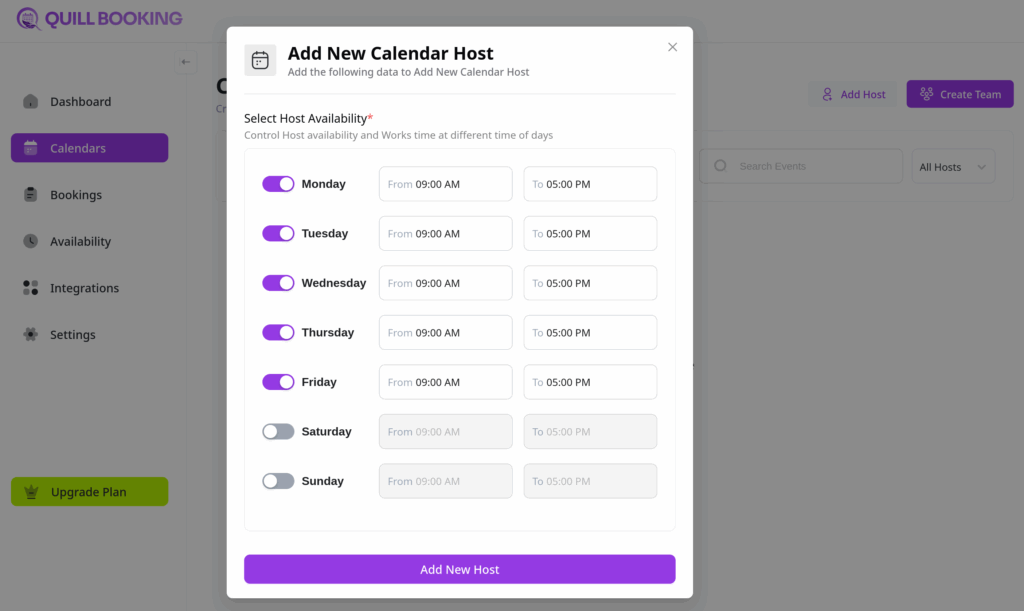
Next, create the availability for this host:
And that’s it, you can now create new events.