Configure Availability for Events
Whether you’re a solo professional or part of a larger team, setting up a clear availability schedule is key to managing your appointments efficiently. In this guide, you’ll learn how to configure a booking availability schedule in QuillBooking.
Schedule Availability
To set up availability for a booking event:
- Open the Calendars section from your QuillBooking navigation bar.
- Choose the specific event you want to configure and click the Edit button.
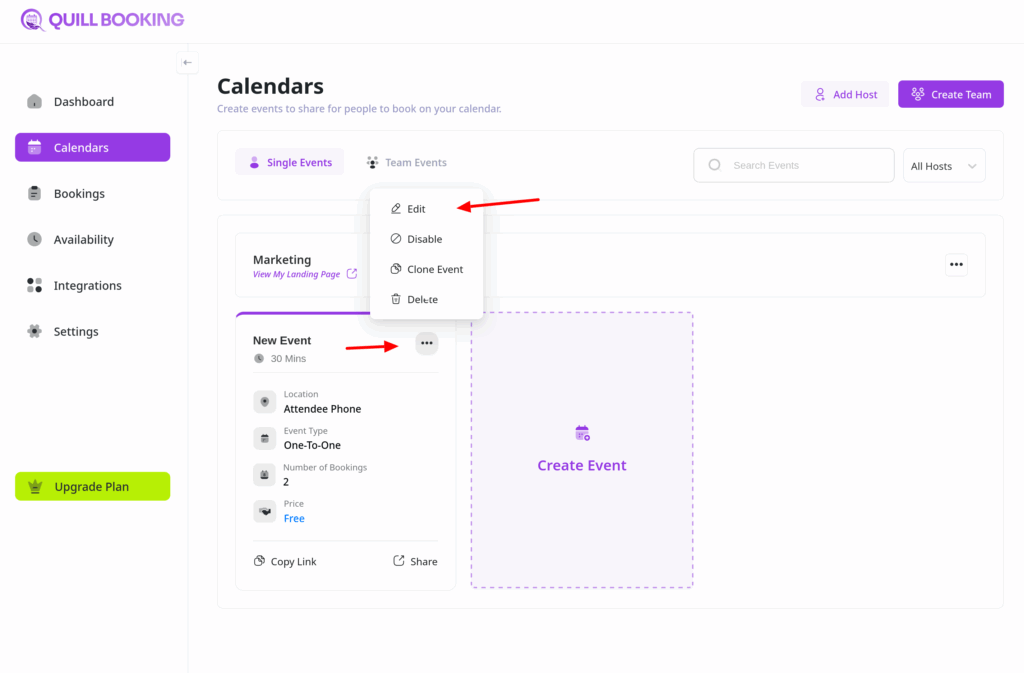
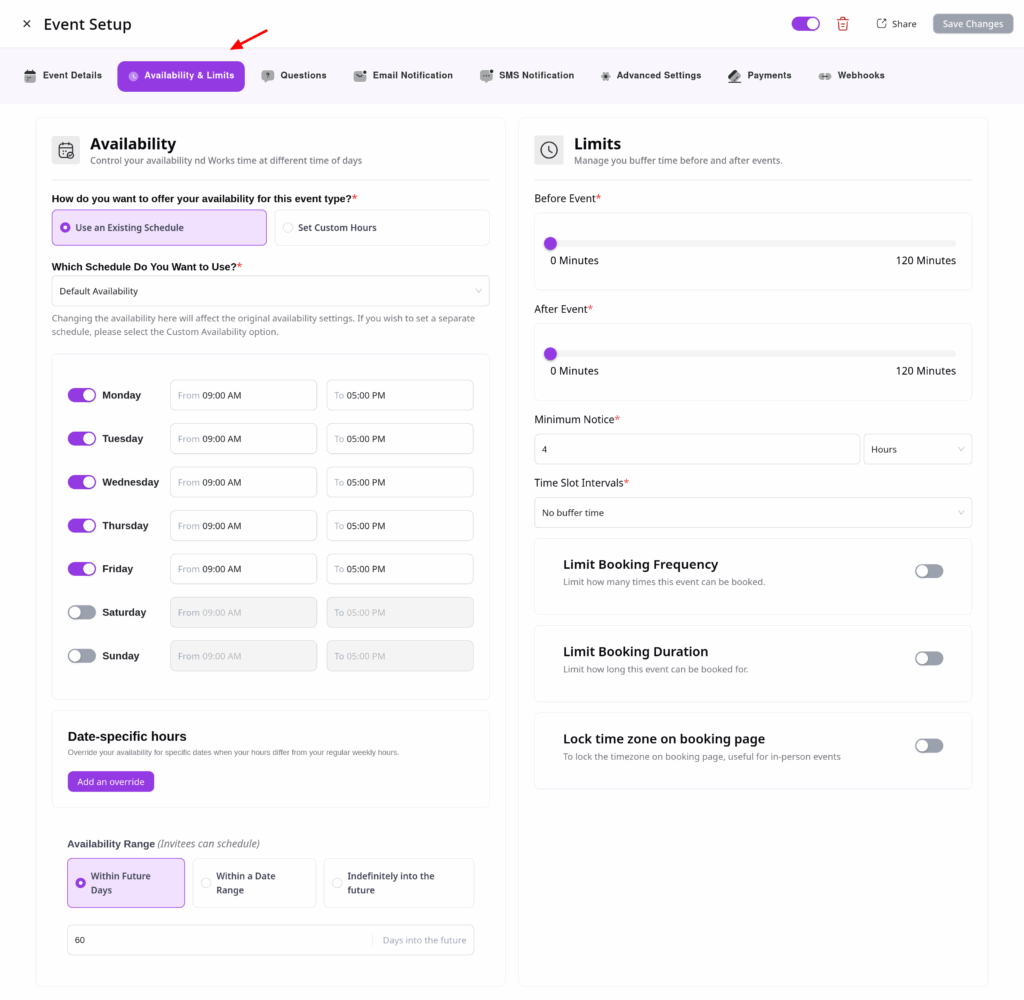
From the tabs, select the Availability & Limits tab.
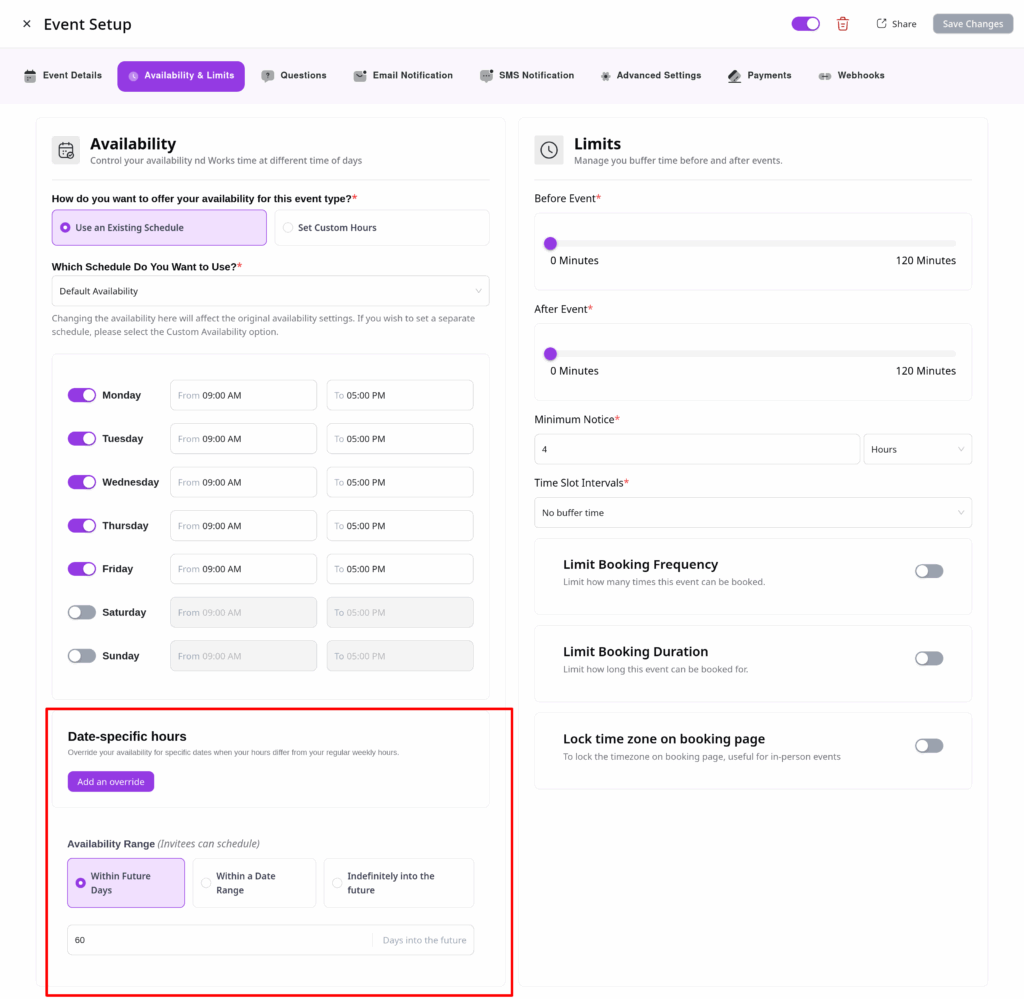
Availability Range Settings
In the Availability Range Settings section, choose how far into the future you want to allow bookings:
- Within Future Days: Set a rolling window (e.g., next 30 days).
- Within a Date Range: Set a fixed start and end date for availability.
- Indefinitely into the Future: Keep bookings open with no end date.
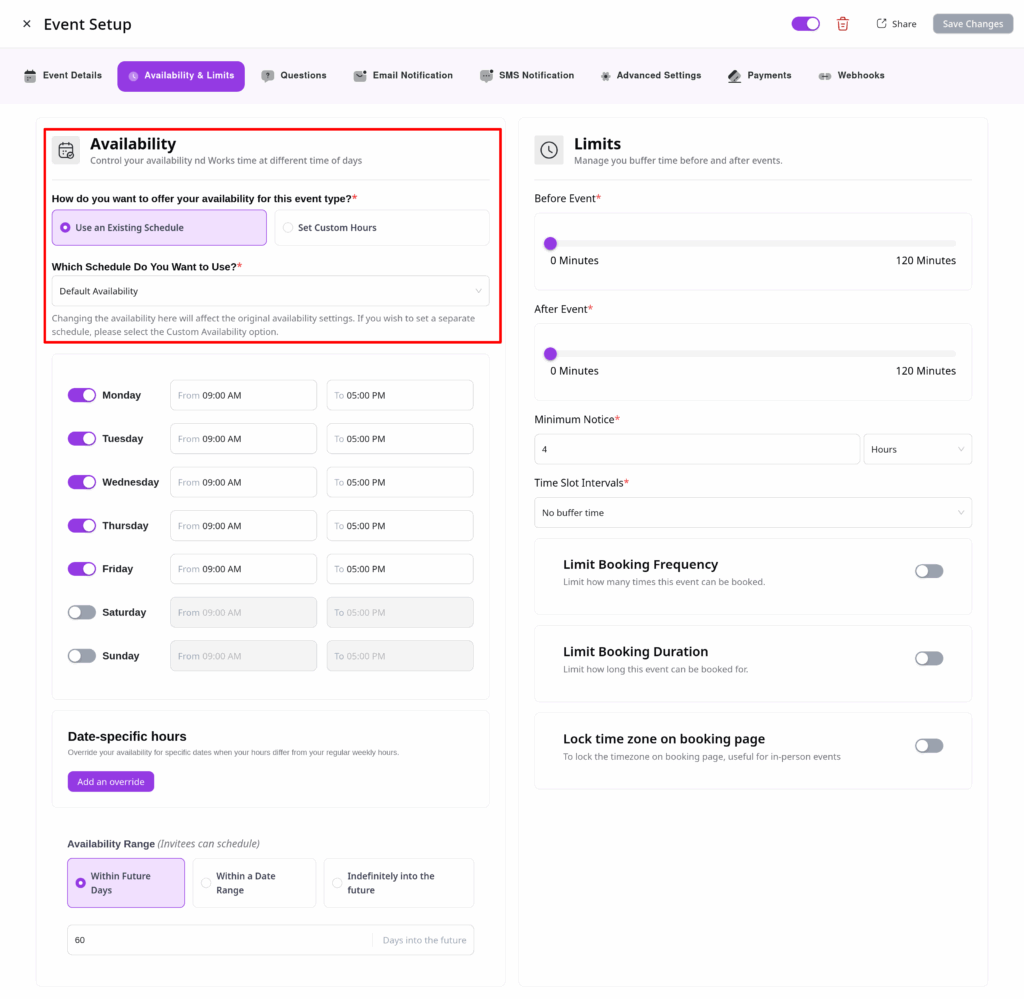
Configuring Availability Hours
You can either:
- Use an Existing Schedule: Apply a prebuilt schedule template.
- Set Custom Hours: Define unique hours just for this event.
✅ Tip: To create reusable schedule templates, visit the Availability section in your dashboard.
When setting Custom Hours, you can:
- Specify which days and hours you’re available.
- Mark certain days or times as unavailable (e.g., for holidays).
- Fine-tune each weekday individually.
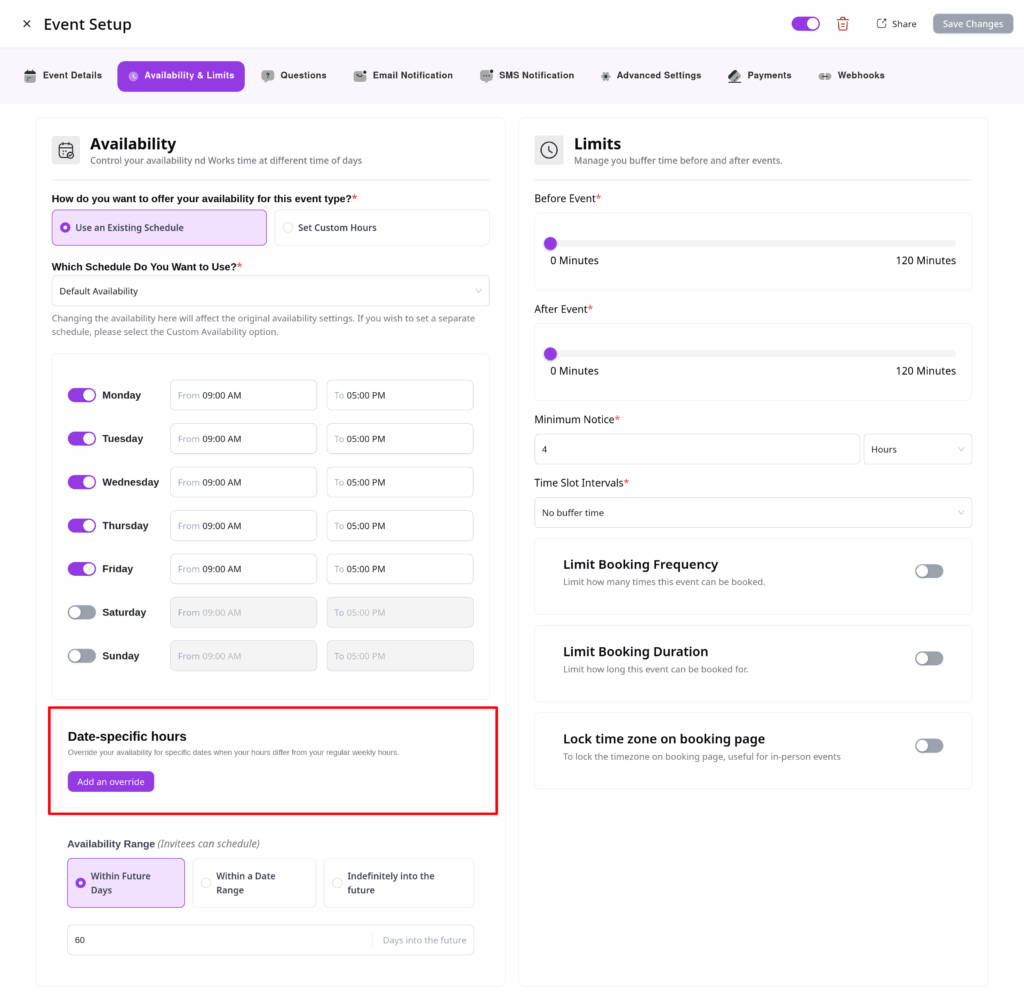
Add Date Overrides
Need to make a one-time change?
Use the Add Date Overrides feature to mark specific dates as available or unavailable—ideal for exceptions to your regular schedule.
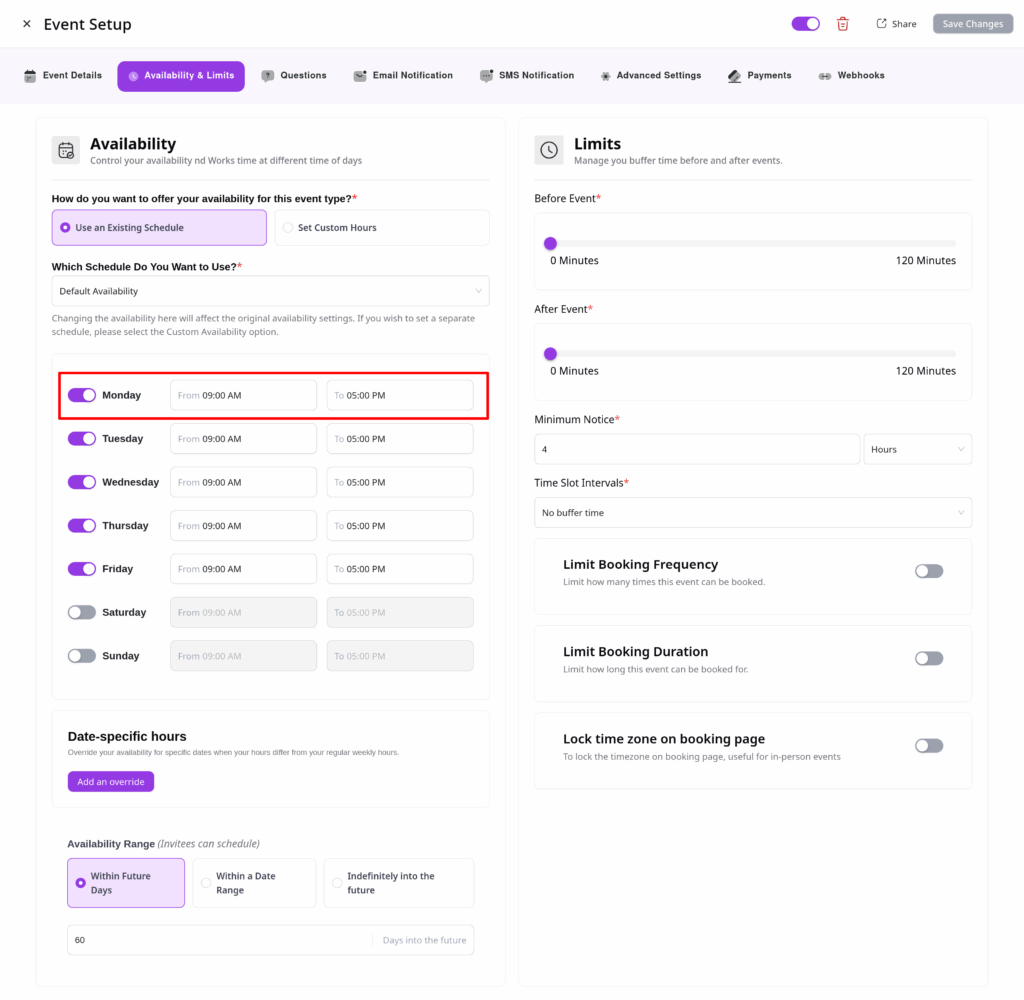
What Hours Are You Available?
For each selected day, set your available time range.
To block availability for the whole day, simply check the “Mark as Unavailable” box.
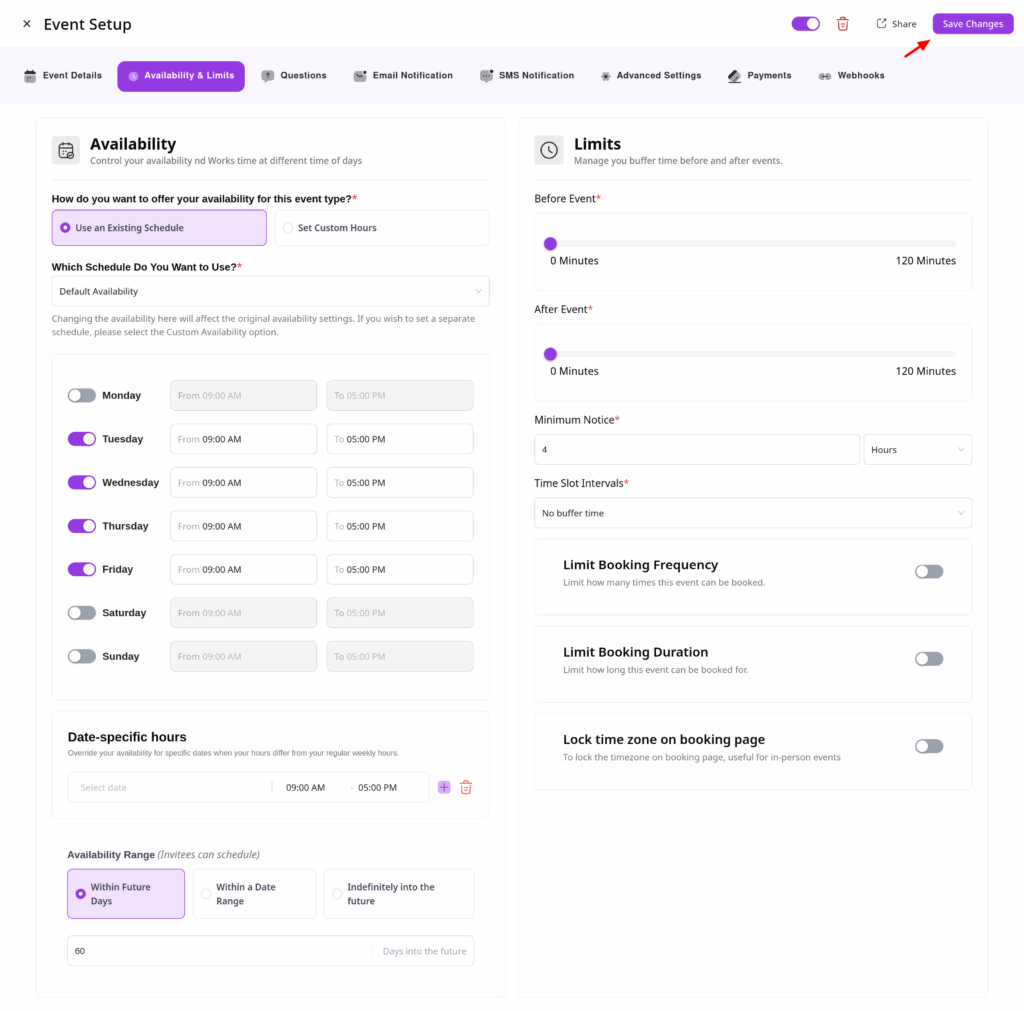
Final Step
Once your availability is set, click Save Changes to apply your configuration.
By following these steps, you’ll have a reliable and flexible availability schedule in QuillBooking—ensuring your customers and team members can book time with confidence.