Facebook Pixel
If you’re using QuillBooking and want to leverage Facebook ads to track user interactions, you can integrate Facebook Pixel to gain insights into how many people view, open, and submit your QuillBooking booking Facebook sources. Follow these simple steps to add Facebook Pixel tracking to your QuillBooking:
You should have a Facebook Business account with Pixel set up (here’s how to set up Facebook Pixel)
Let’s get started:
Step 1: Find your Pixel ID in Facebook
- Open your Facebook Business account and click the hamburger menu icon, then select Events Manager.
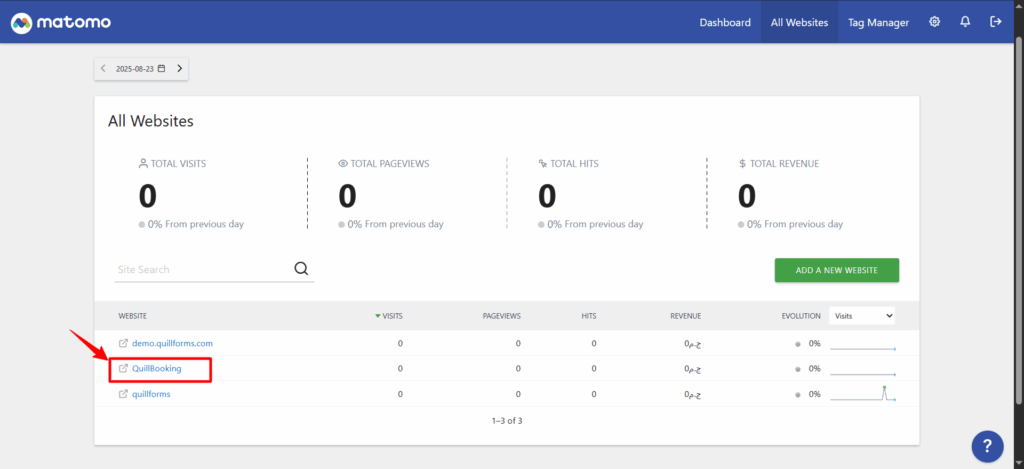
- In the Events Manager interface, you’ll see your pixels named, along with their corresponding ID numbers.
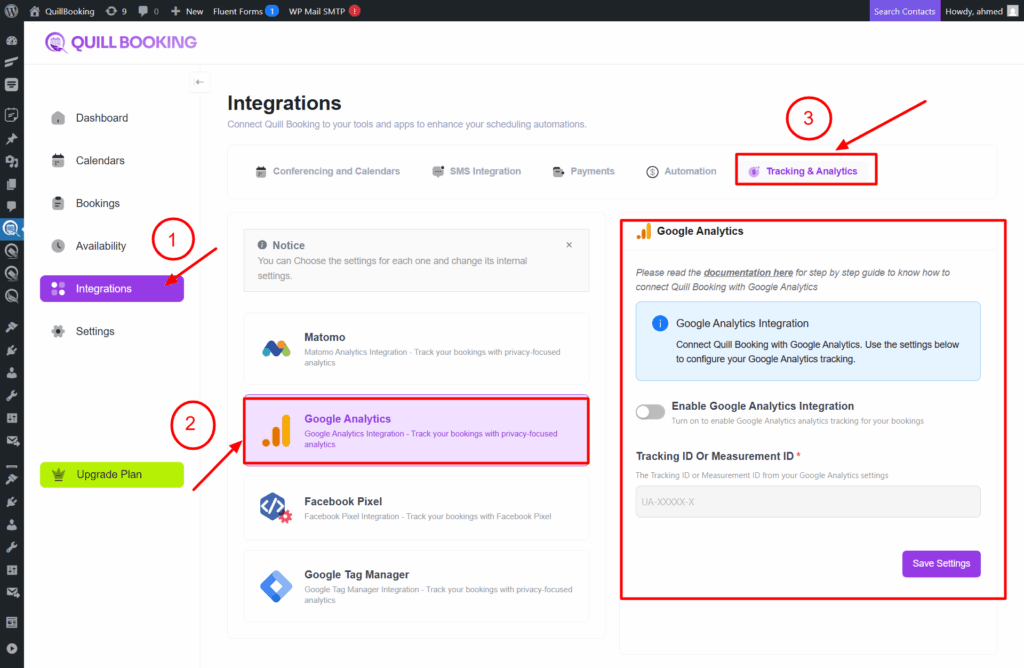
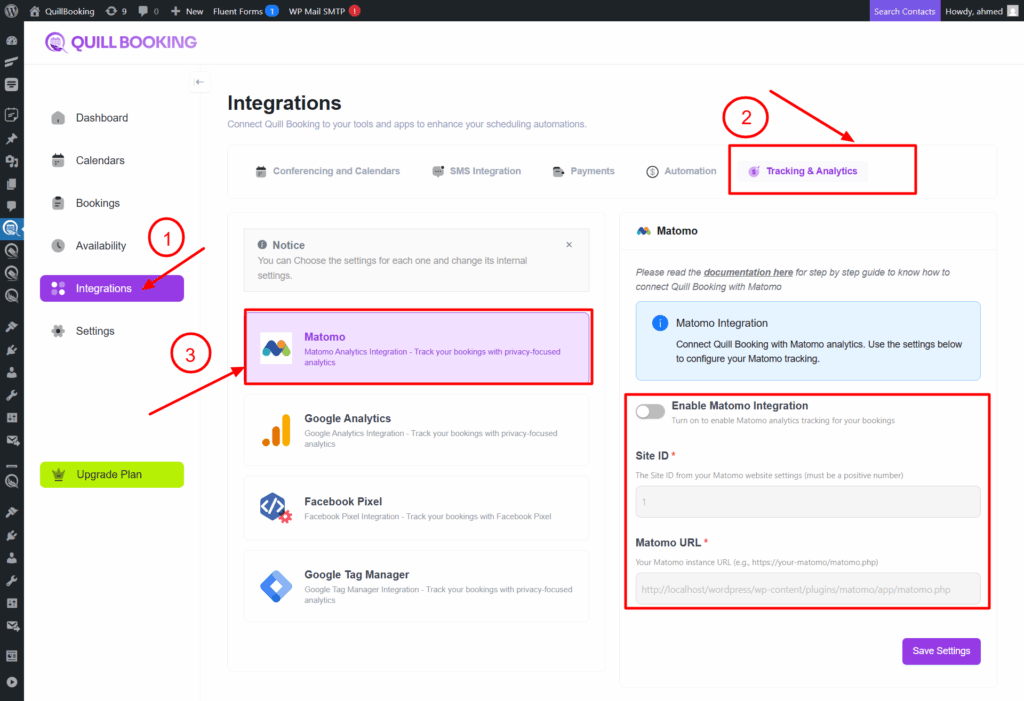
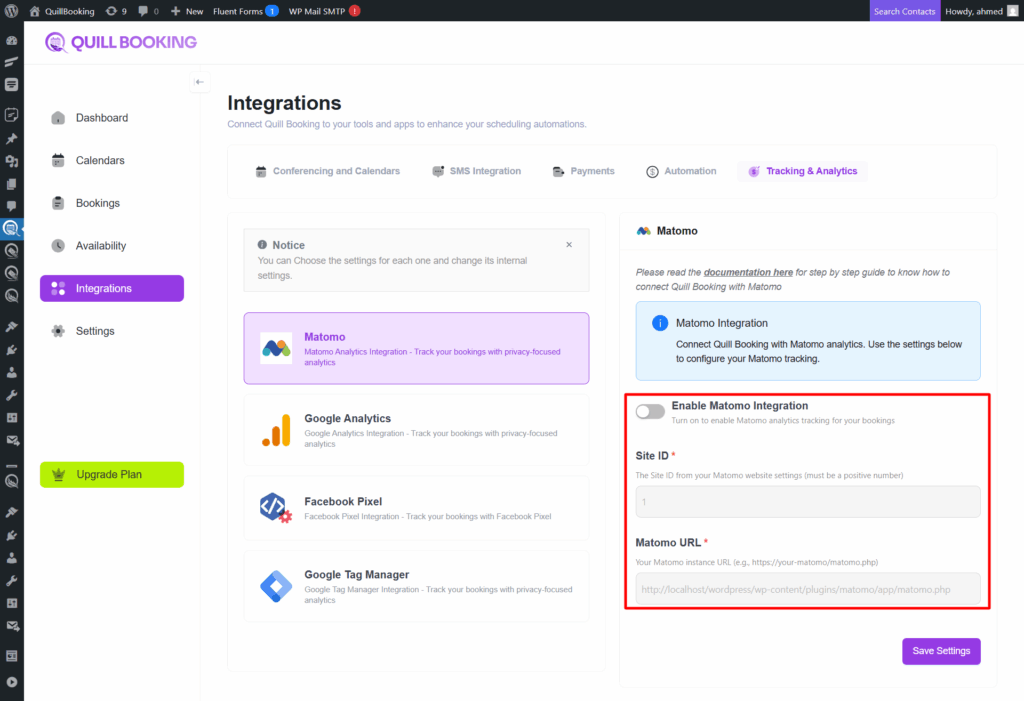
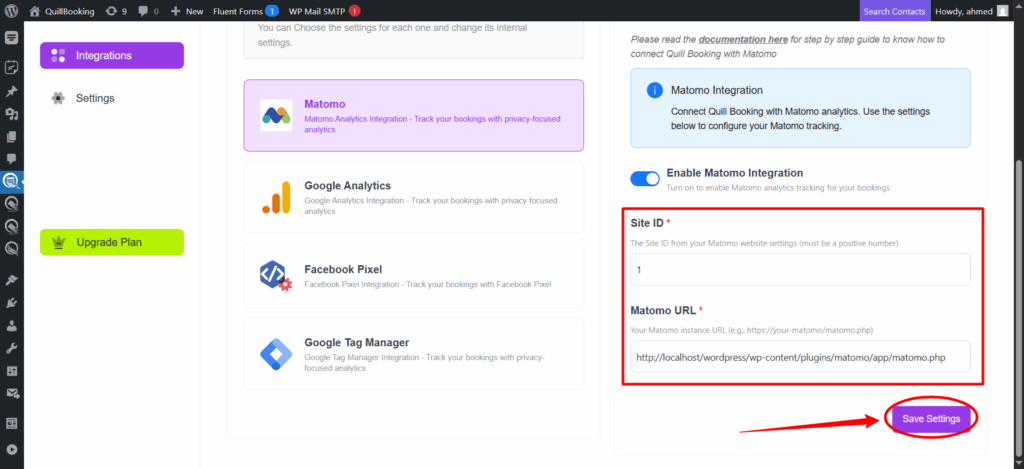
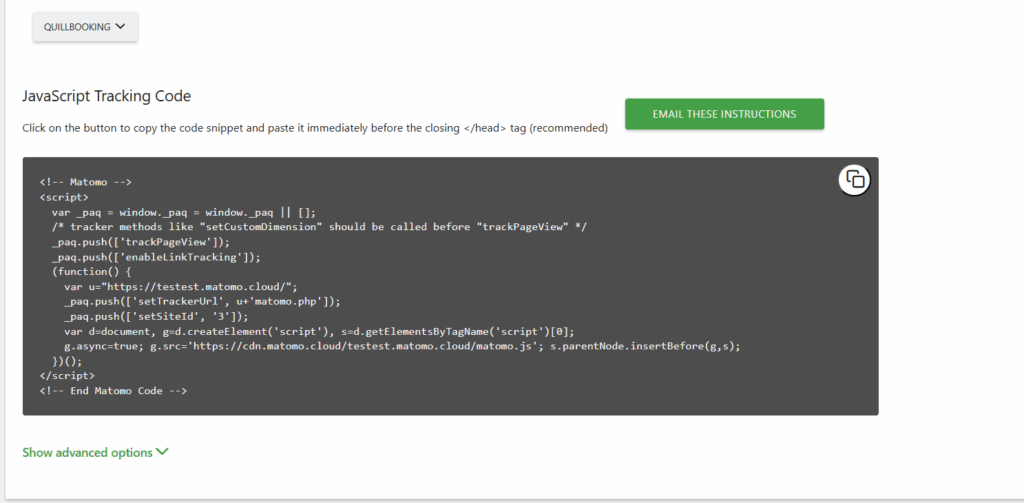
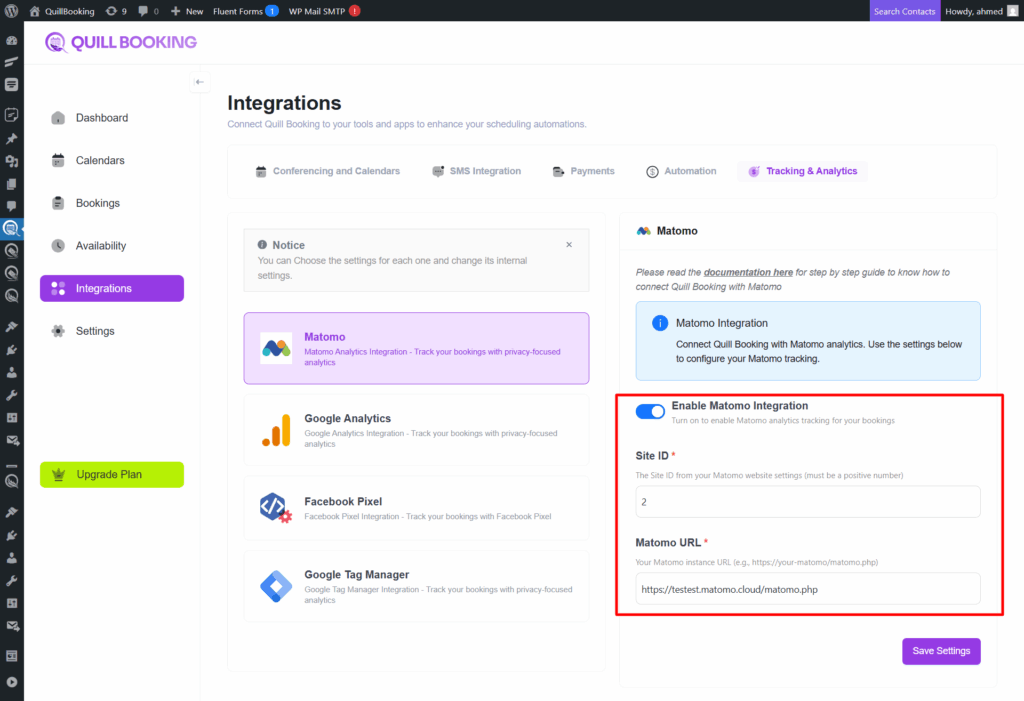
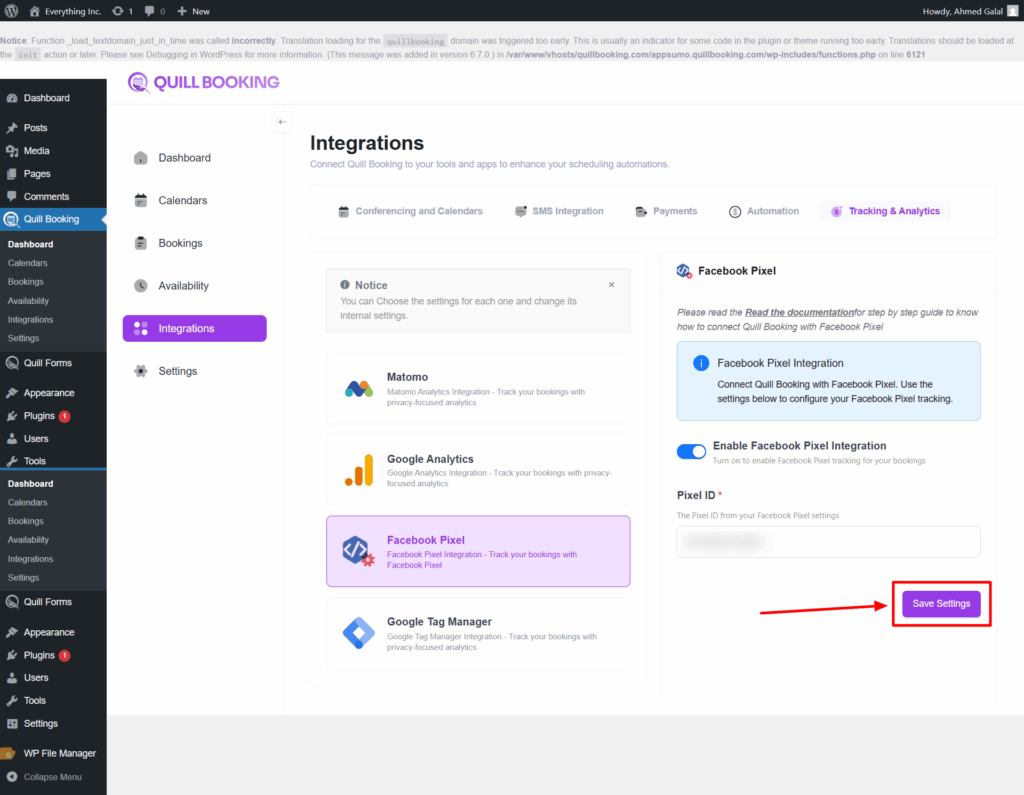
Step 2: Get the Pixel ID from Facebook, paste it here, and then click the Save Settings button.
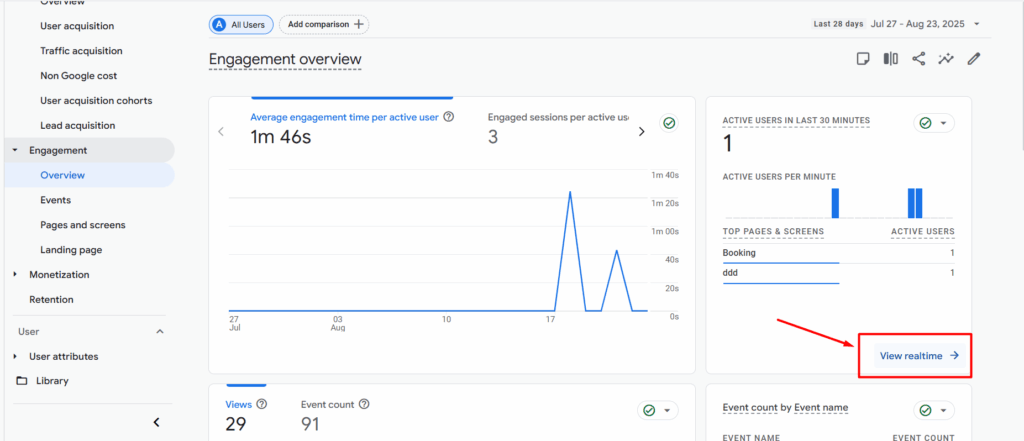
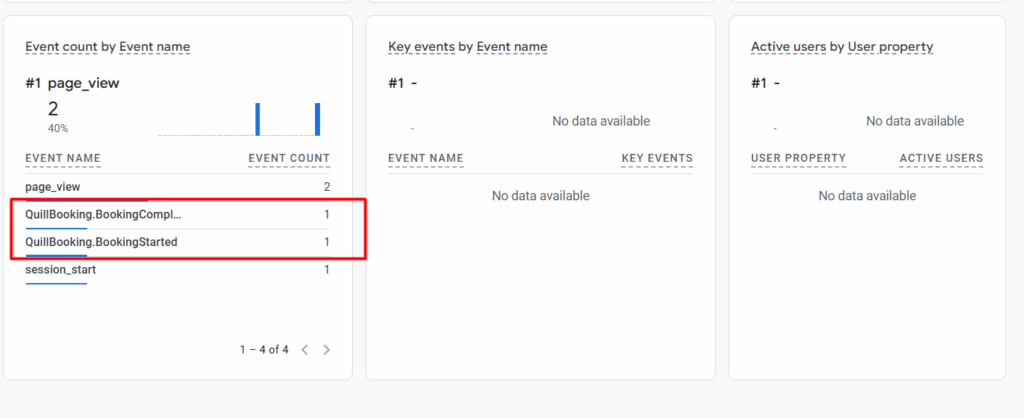
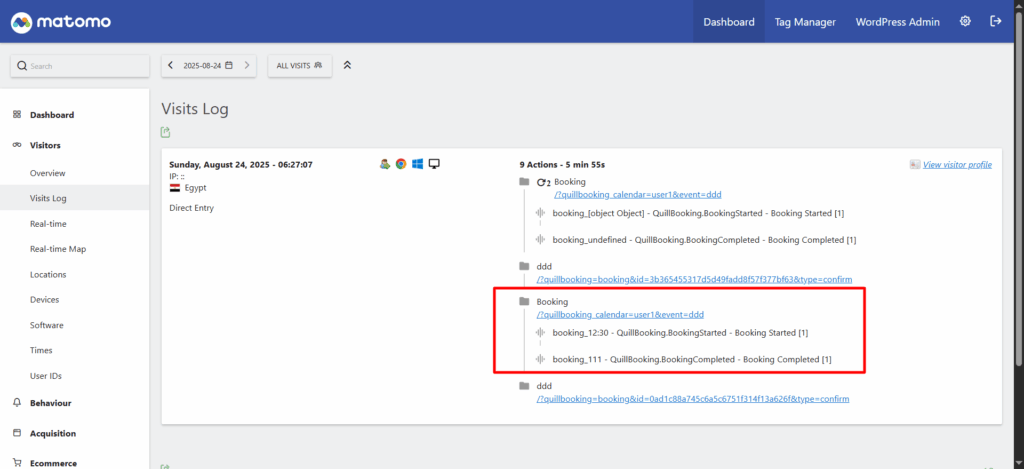
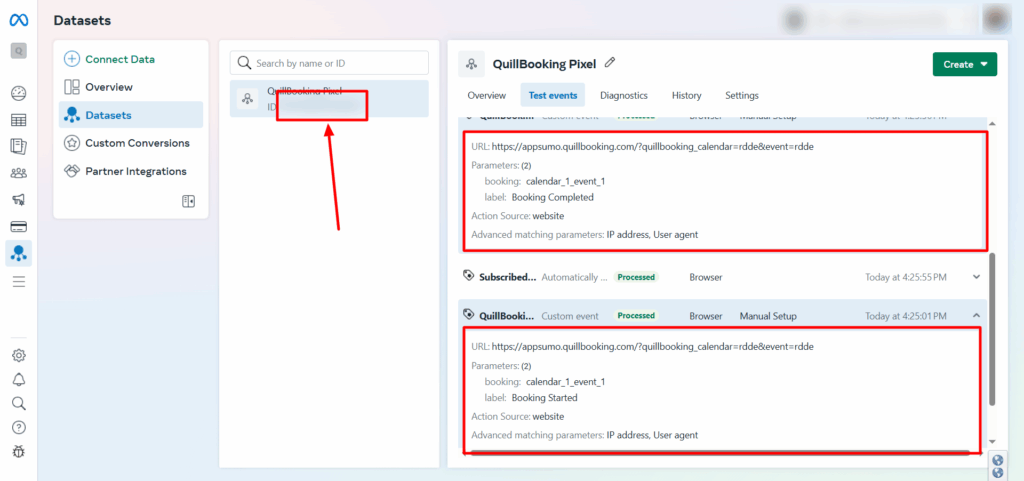
QuillBooking sends 2 types of event actions to Google Analytics:
1. QuillBooking.BookingCompleted
This event action fires after clicking the submit button.
- Category – calendar_{calendar_id}_event_{event_id}.
- Action – QuillBooing.BookingCompleted.
- Label—Booking Completed.
2. QuillBooking.BookingStarted
This event action fires after choosing a time slot.
- Category – calendar_{calendar_id}_event_{event_id}.
- Action – QuillBooing.BookingStarted.
- Label—Booking Started.