Apple
Intro
Want to simplify your booking process and stay perfectly in sync across all your Apple devices? Introducing the QuillBooking Apple Calendar, a seamless integration that automatically syncs your bookings from WordPress to Apple Calendar. QuillBooking is a modern and flexible booking system built on top of QuillForms, designed to make managing appointments and events effortless. Apple Calendar, the built-in scheduling tool across macOS, iOS, and iPadOS, helps you keep your schedule organized and accessible from anywhere.
With the QuillBooking Apple Calendar, every new booking is automatically added to your Apple Calendar—complete with event details, client information, and time slots. Whether you’re managing personal appointments, business meetings, or service bookings, this integration ensures your calendar is always up-to-date and synced across all your devices.
By connecting QuillBooking with Apple Calendar, you eliminate manual calendar entries, reduce scheduling errors, and keep your workflow efficient and mobile-friendly—so you can focus more on what matters.
In this guide, we’ll walk you through how to set up the QuillBooking Apple Calendar and show you how to use it to automate scheduling, enhance accessibility, and improve your productivity across the Apple ecosystem.
How to setup
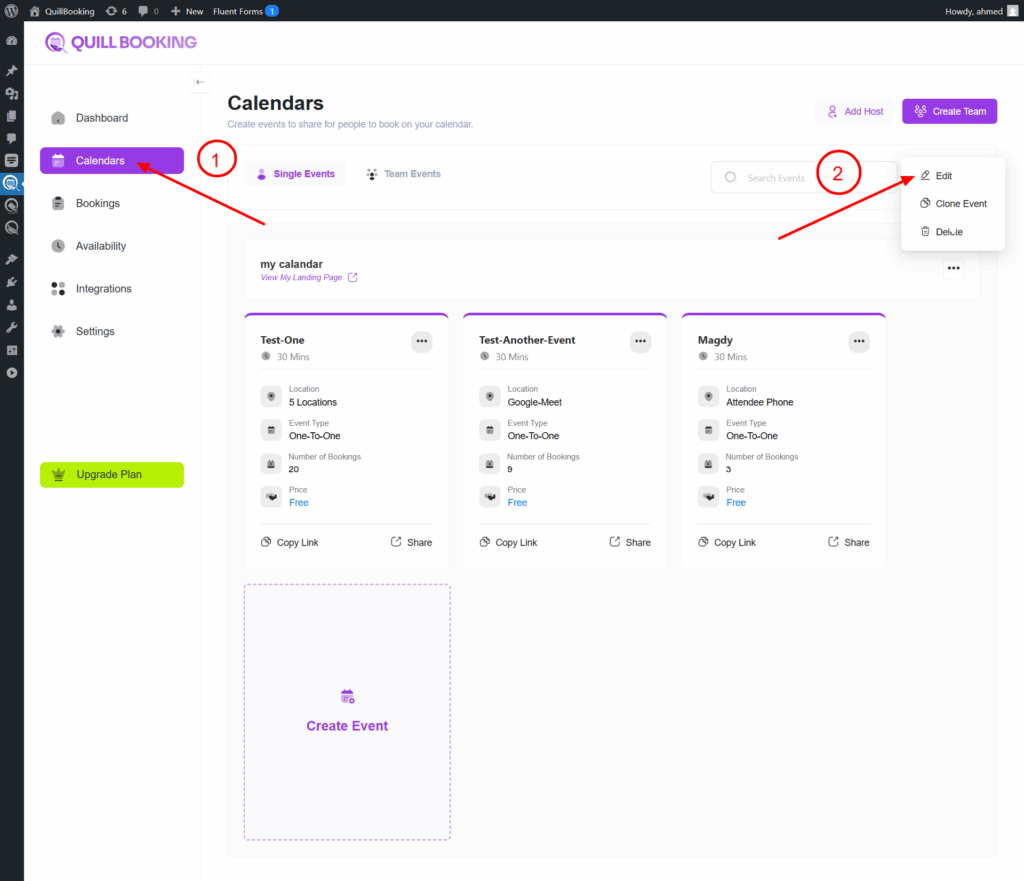
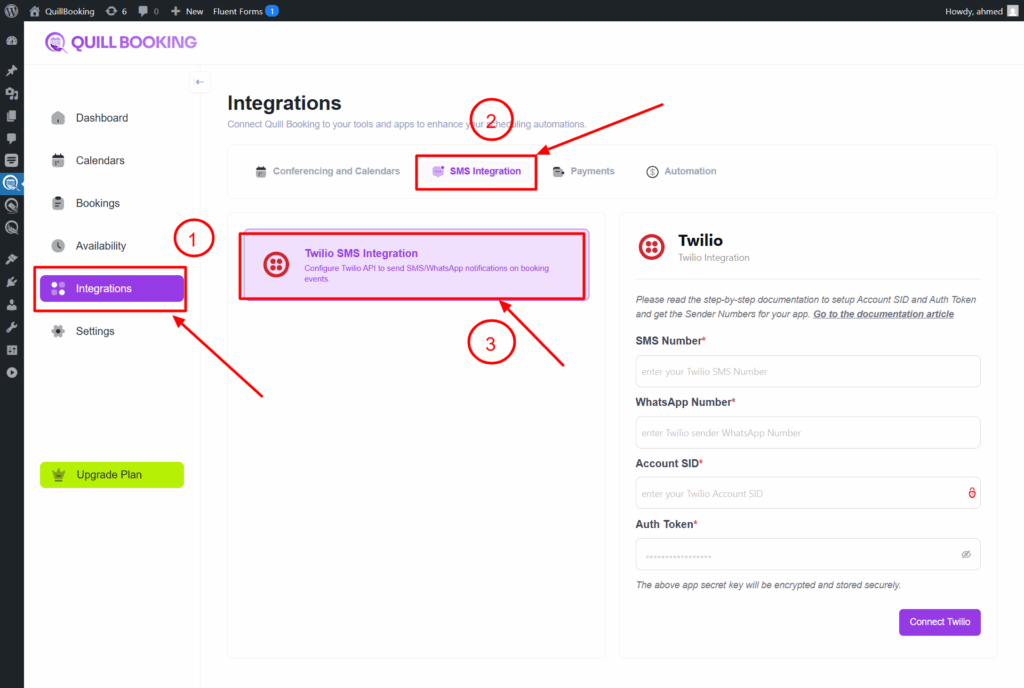
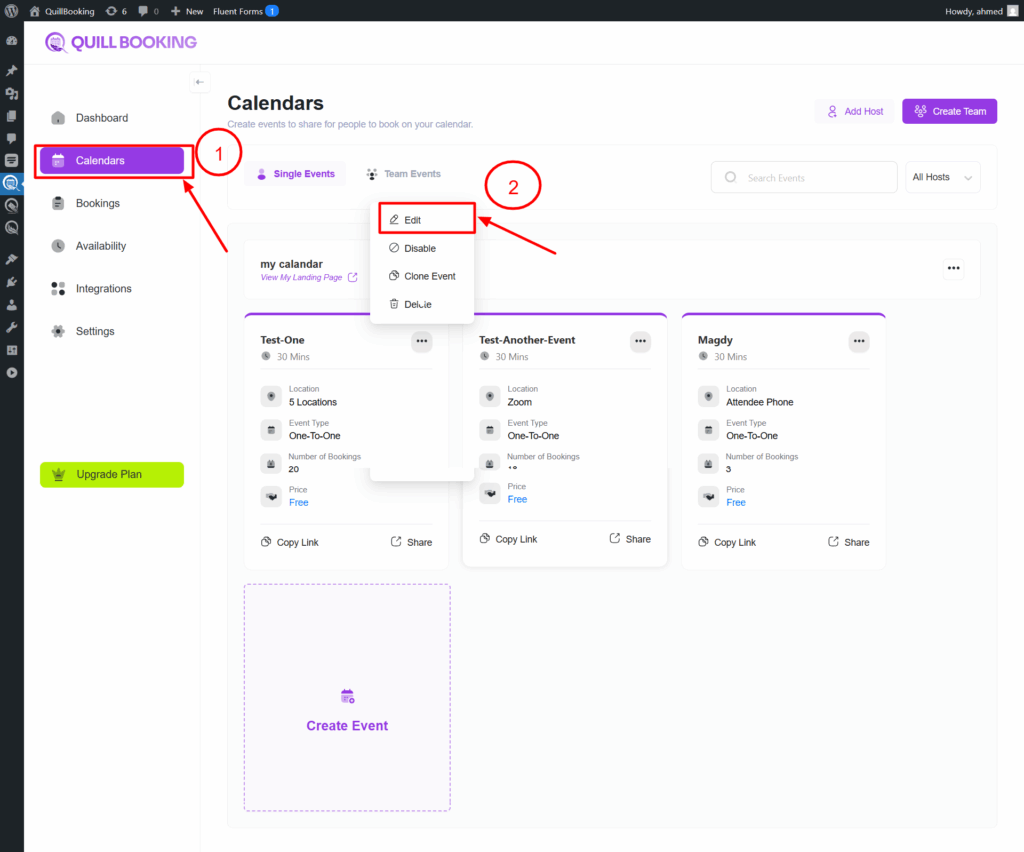
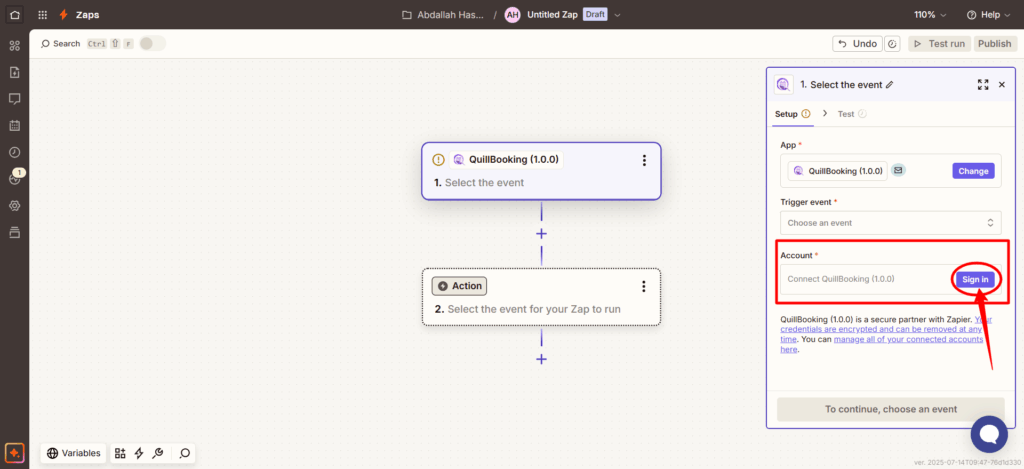
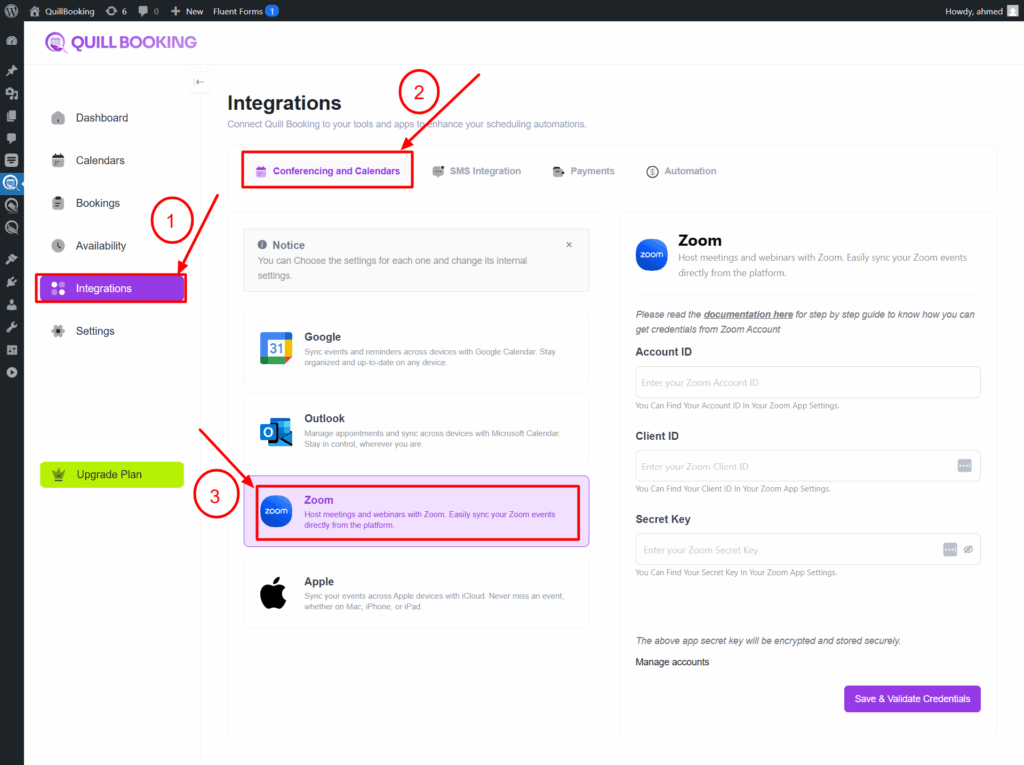
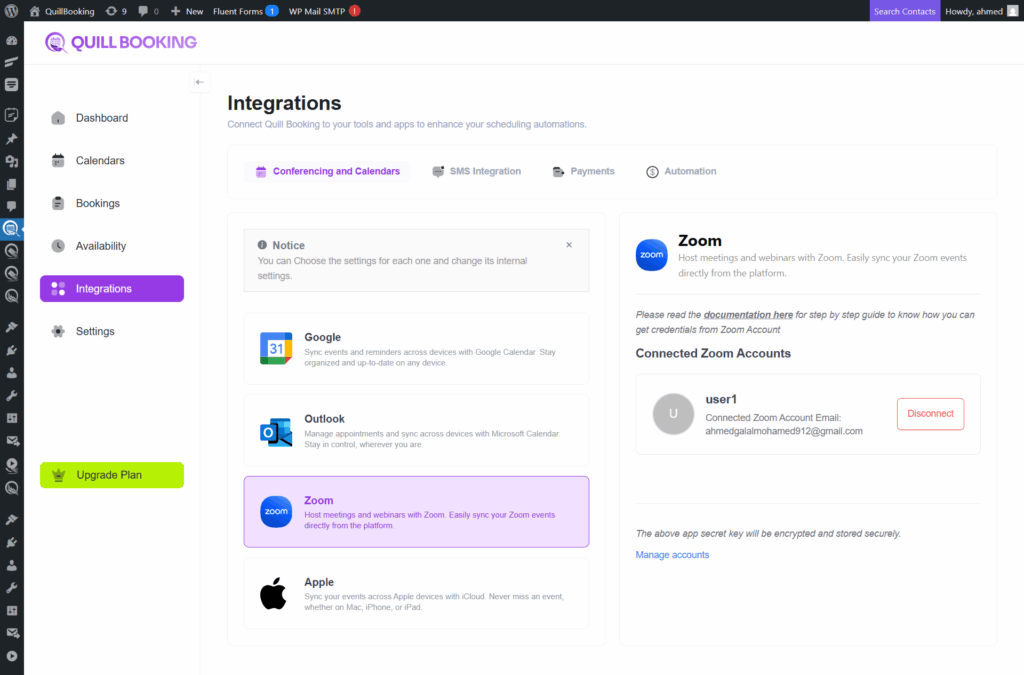
1. Go to the Calendars tab, select the calendar you want to connect to your Apple account, and click the Edit button.
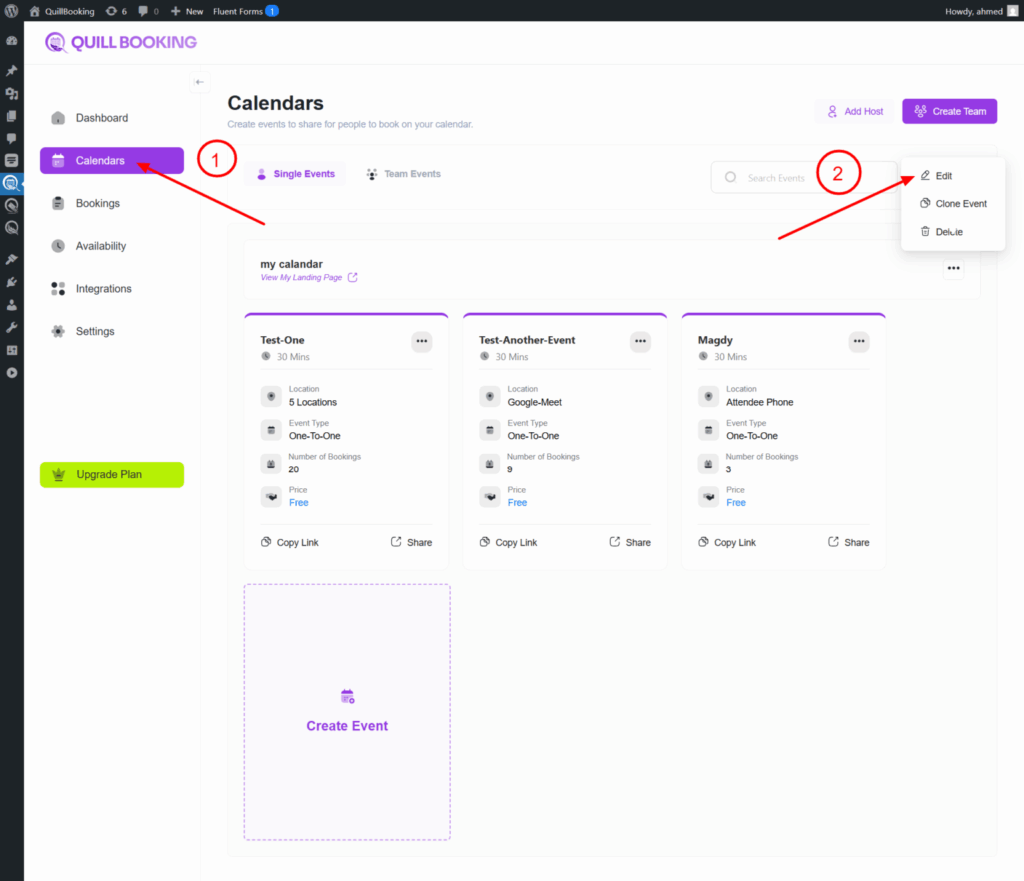
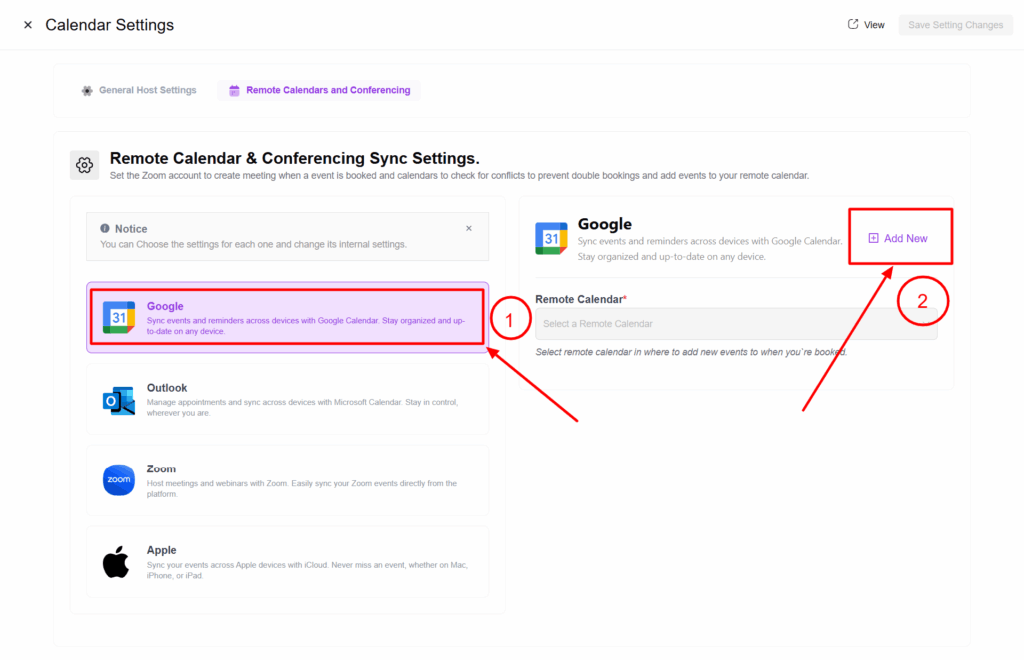
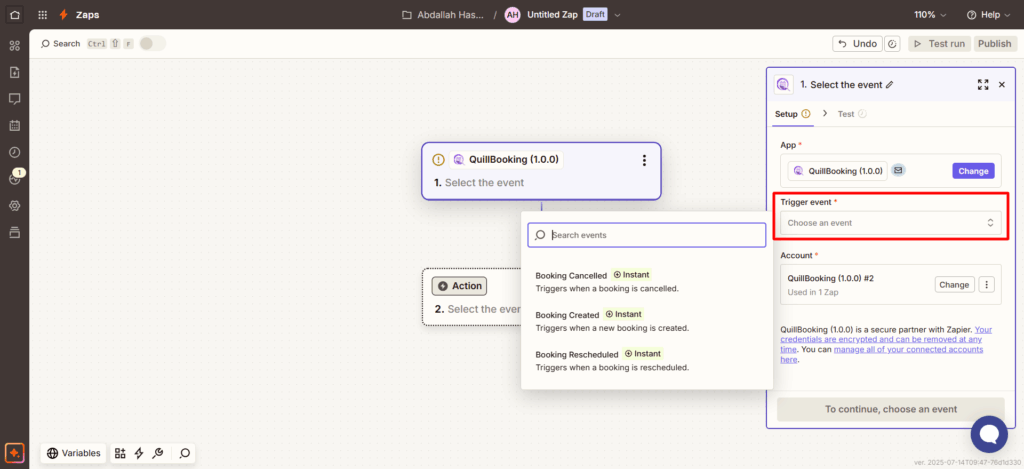
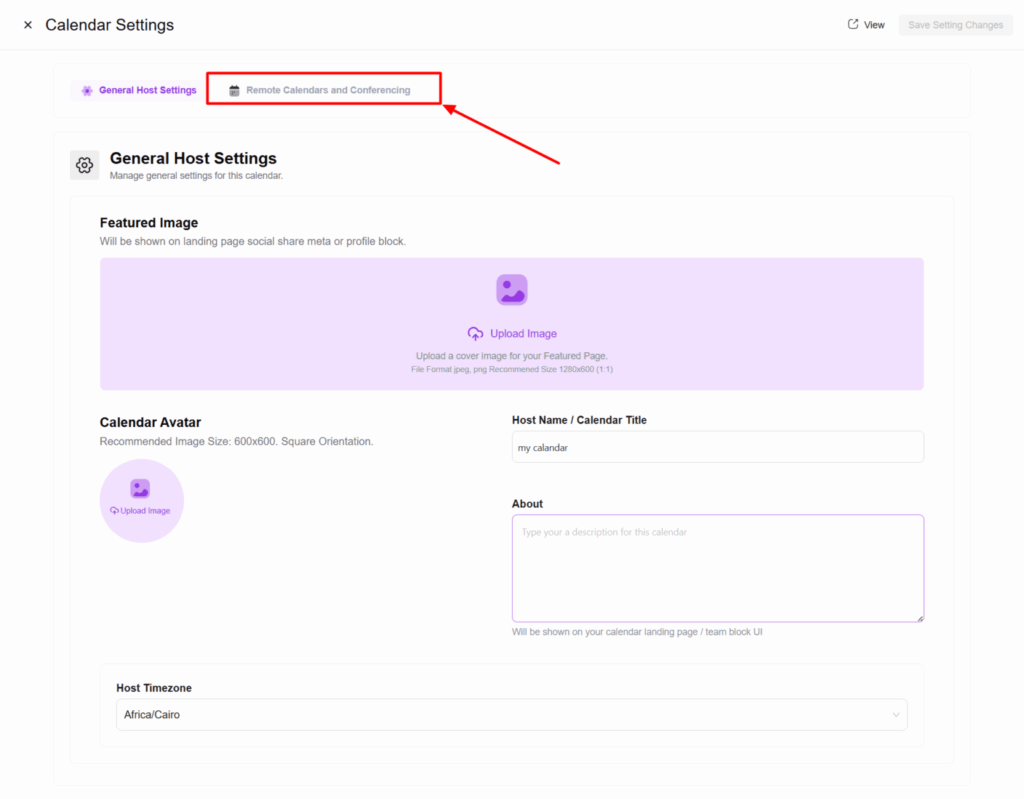
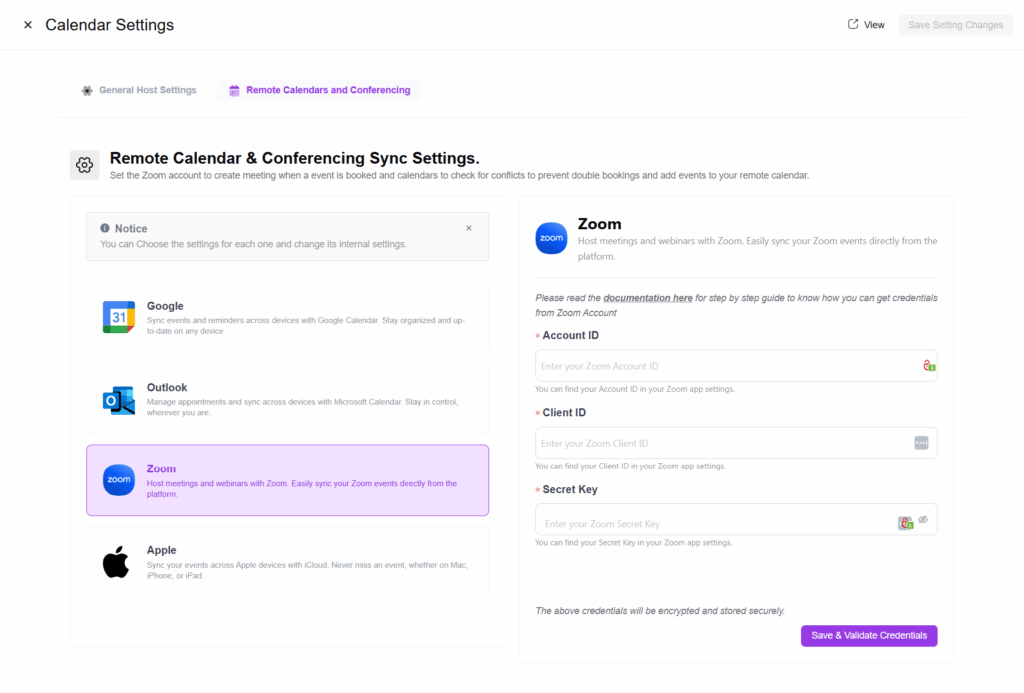
2. Select the Remote Calendars and Conferencing tab. A new section will appear showing all the integrations you can connect with.

Here’s the corrected version of your sentence:
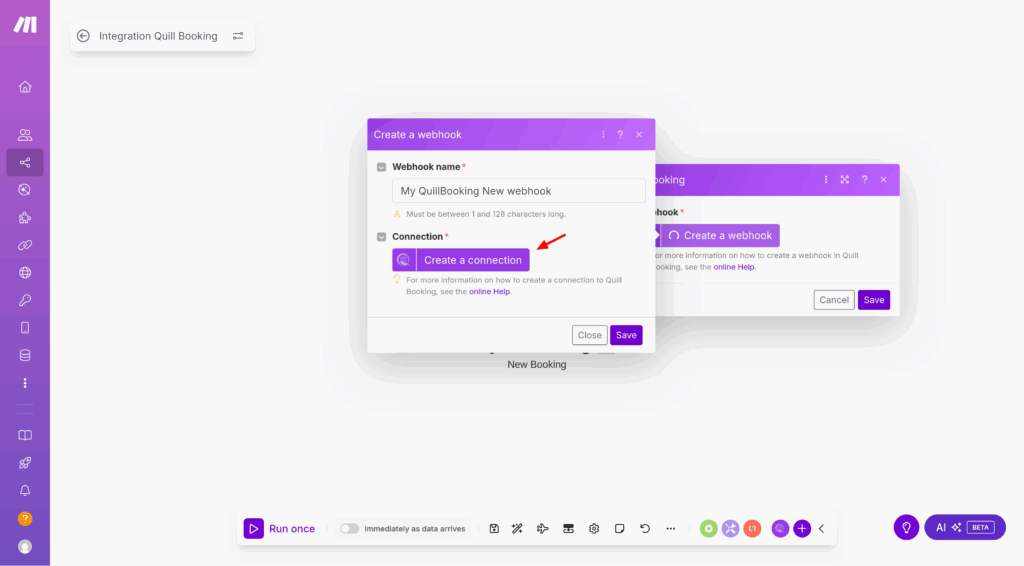
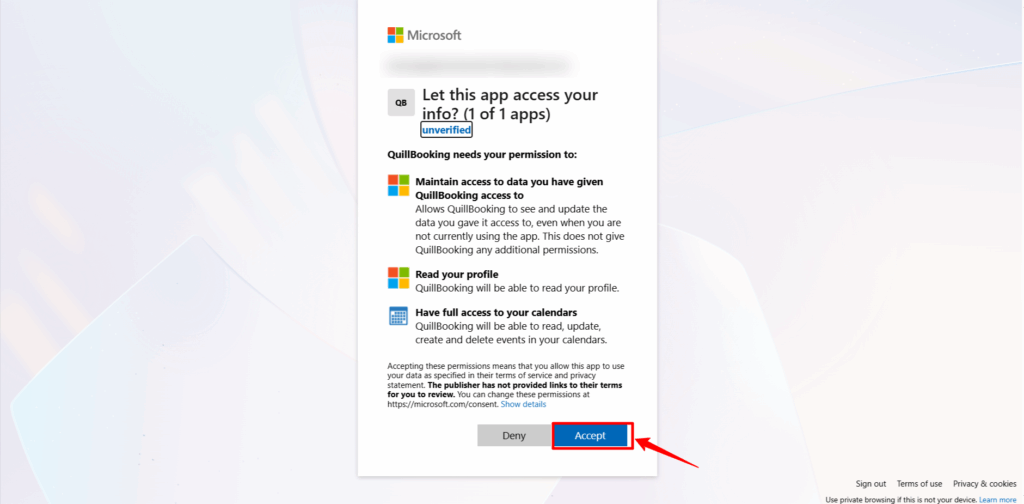
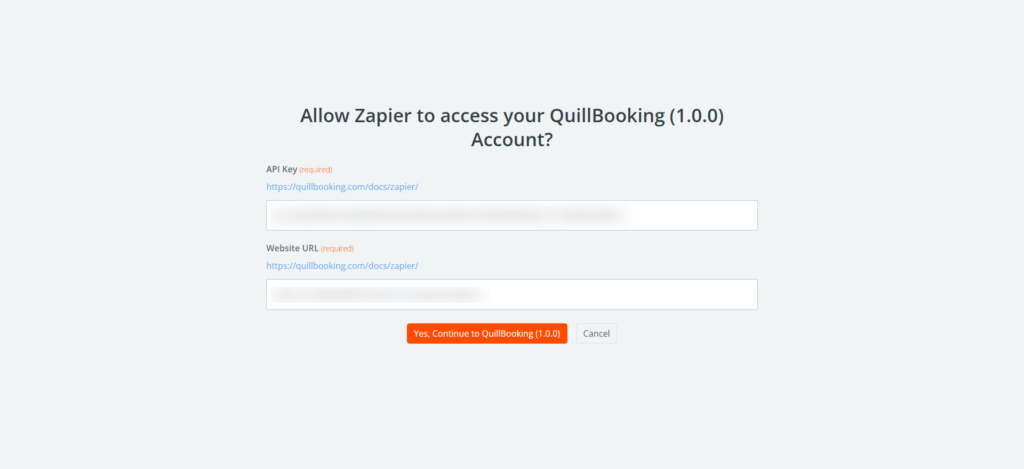
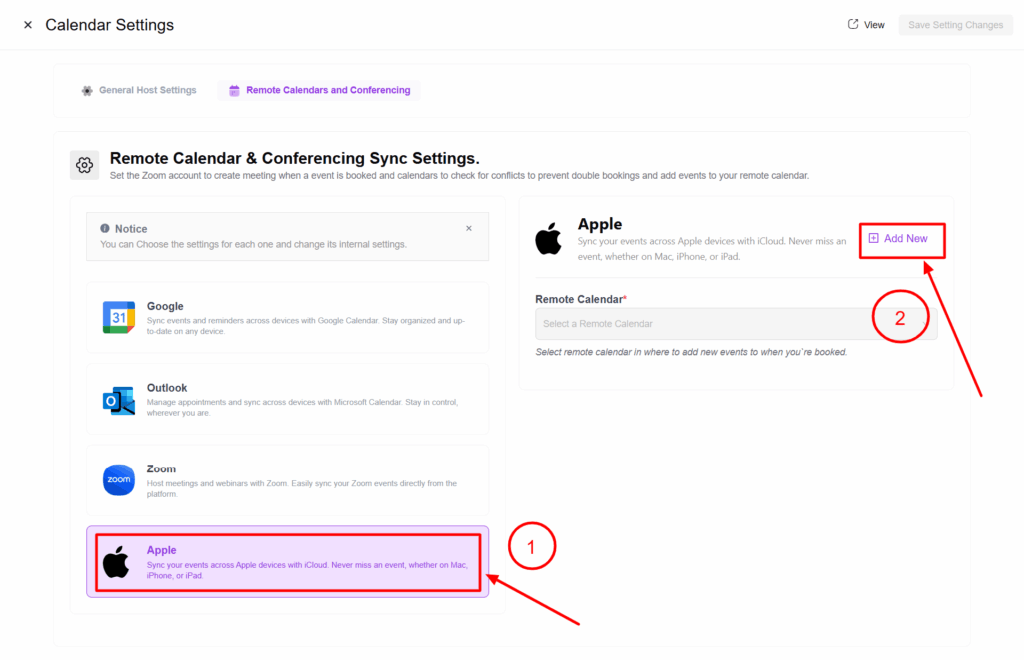
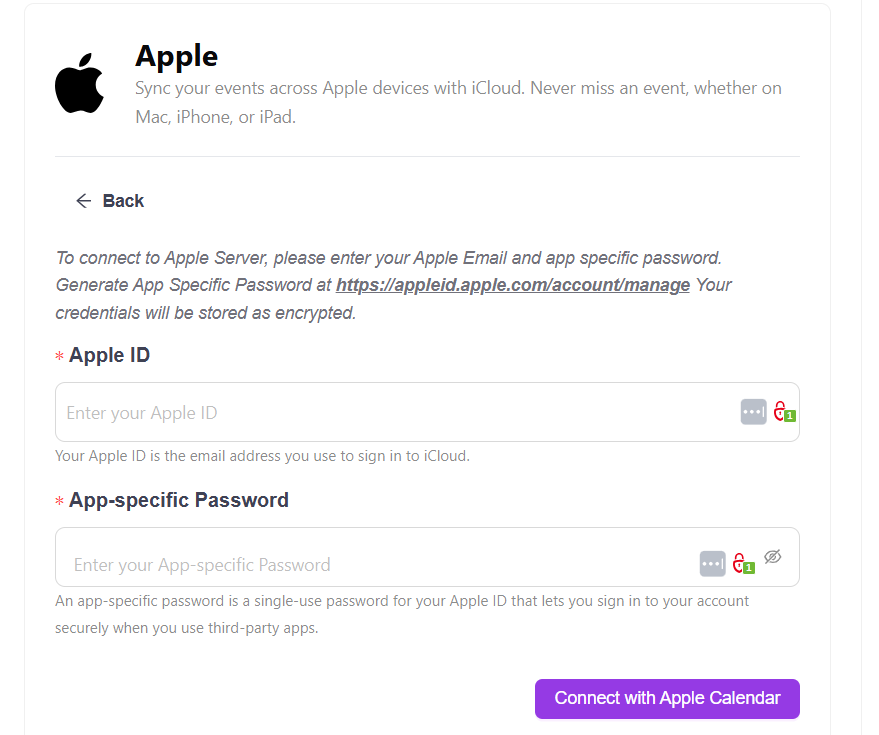
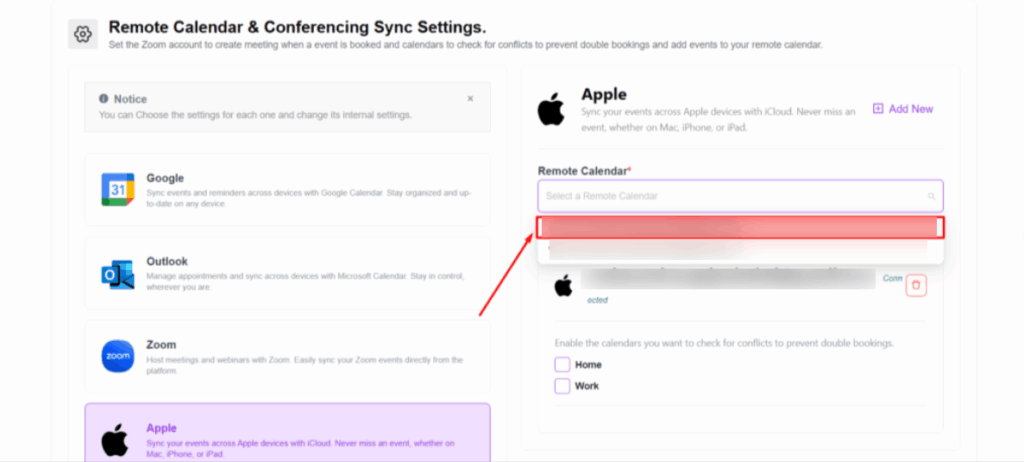
3. Select the Apple tab, then click the Add New button. This will prompt you to enter your Apple ID and App-Specific Password.
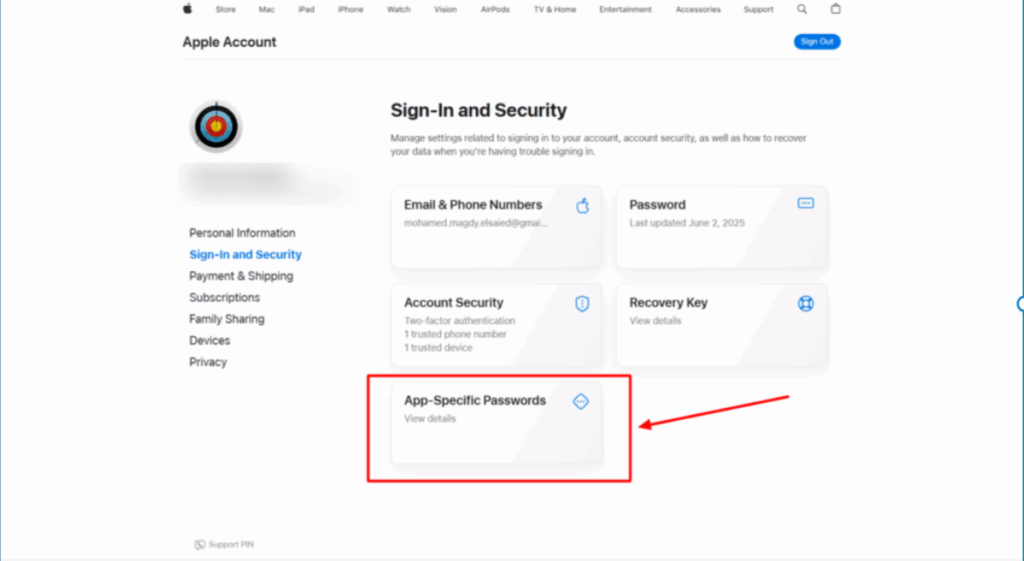
5. To get this information, go to the link: Manage your Apple Account.
6. From the Sign-In and Security section, click on the App-Specific Passwords card.
Here’s the corrected version of your sentence:
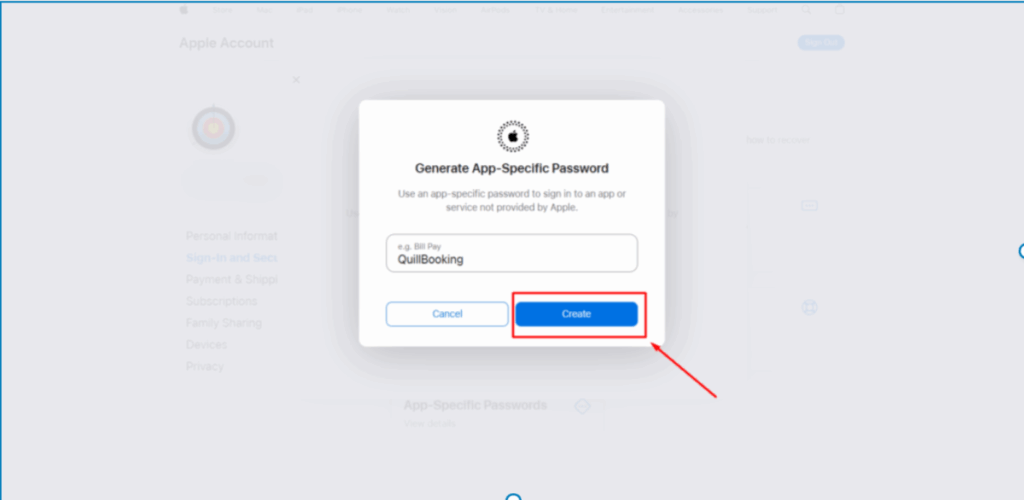
7. Click the Generate an app-specific password button.

8. Then click the Create button and enter a name for your app.
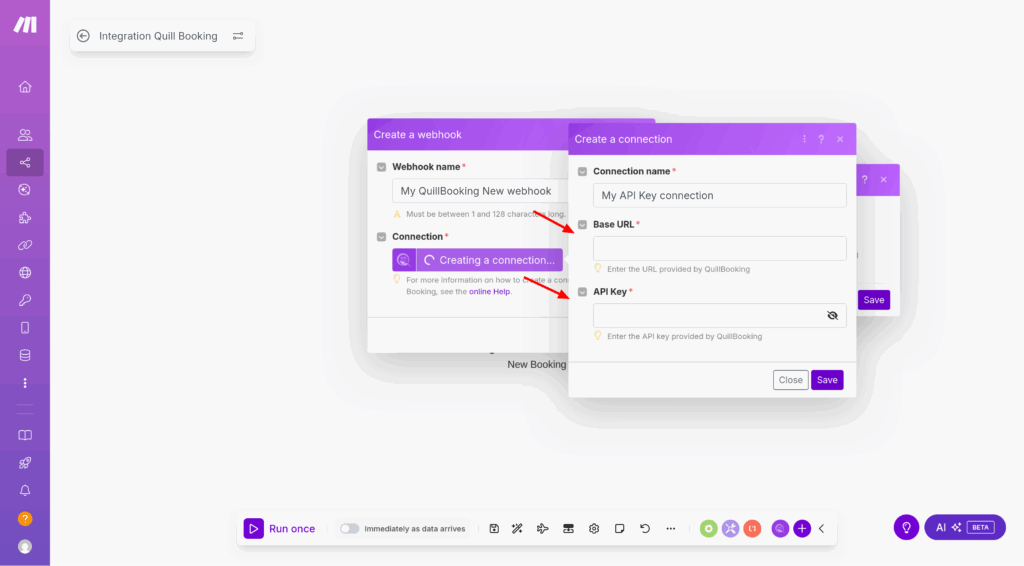
9. Copy the app-specific password and your email (used as your Apple ID), then paste them into the corresponding fields in the form.

Here’s the corrected version of your sentence:
10. Paste this information into the form fields provided.
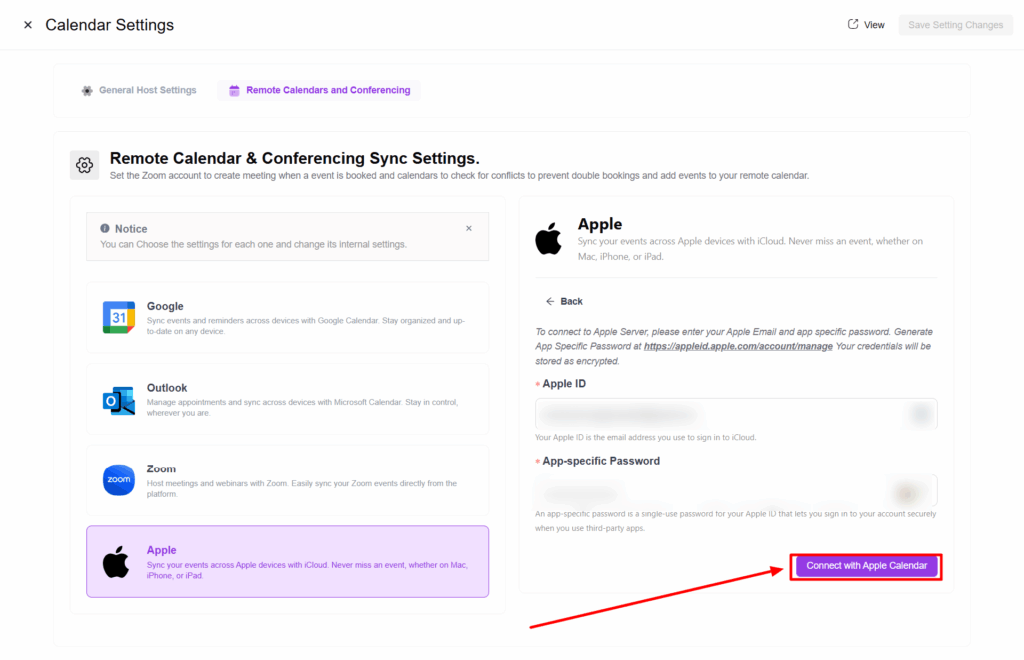
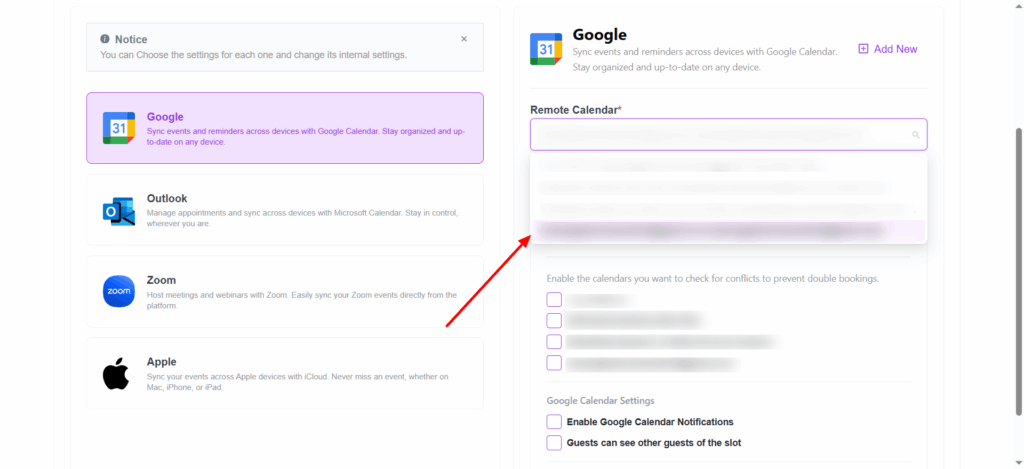
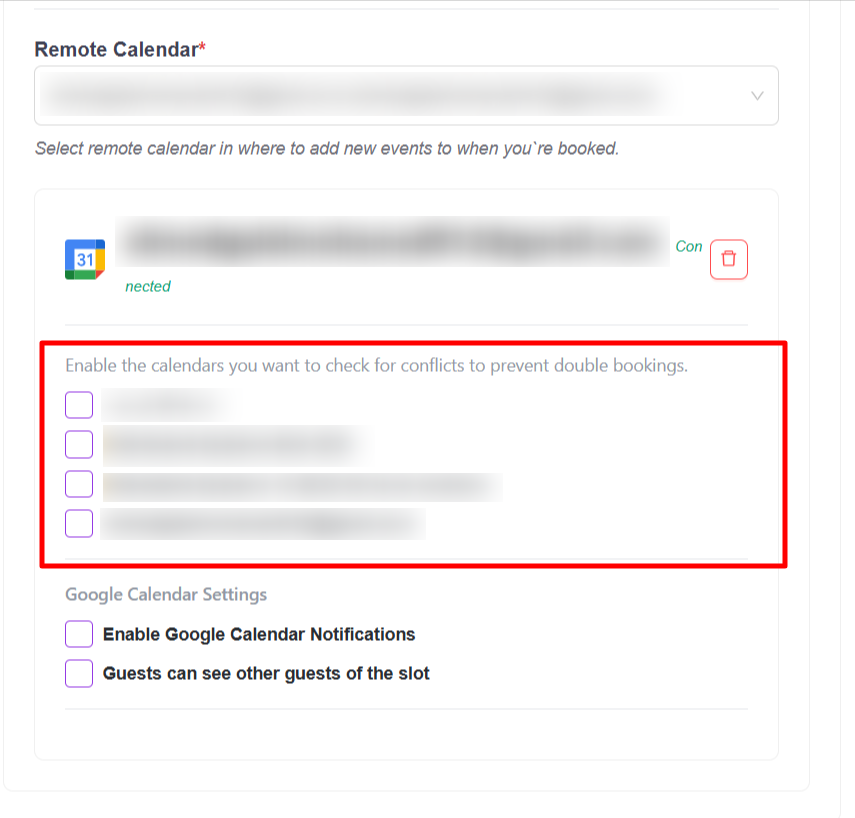
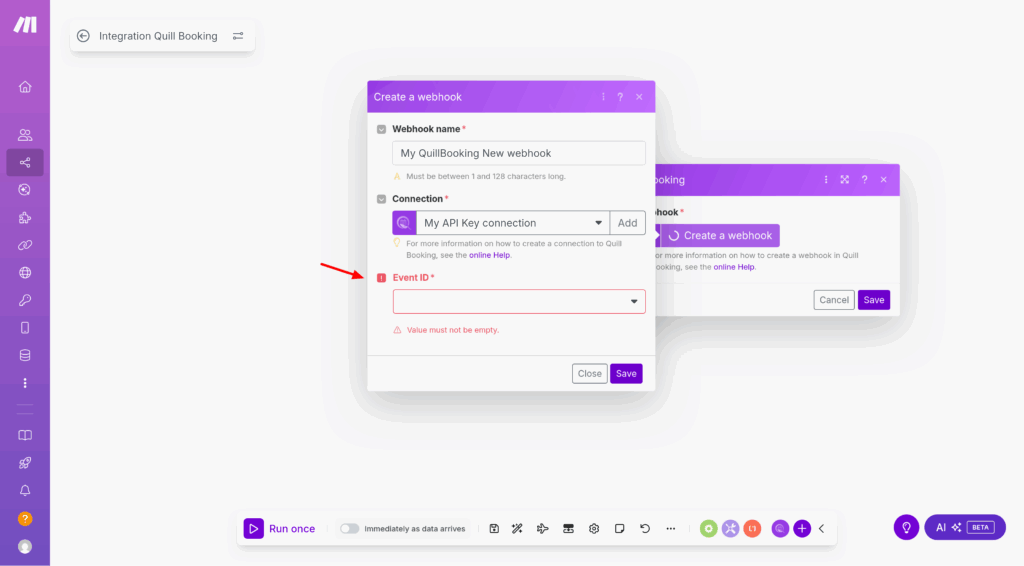
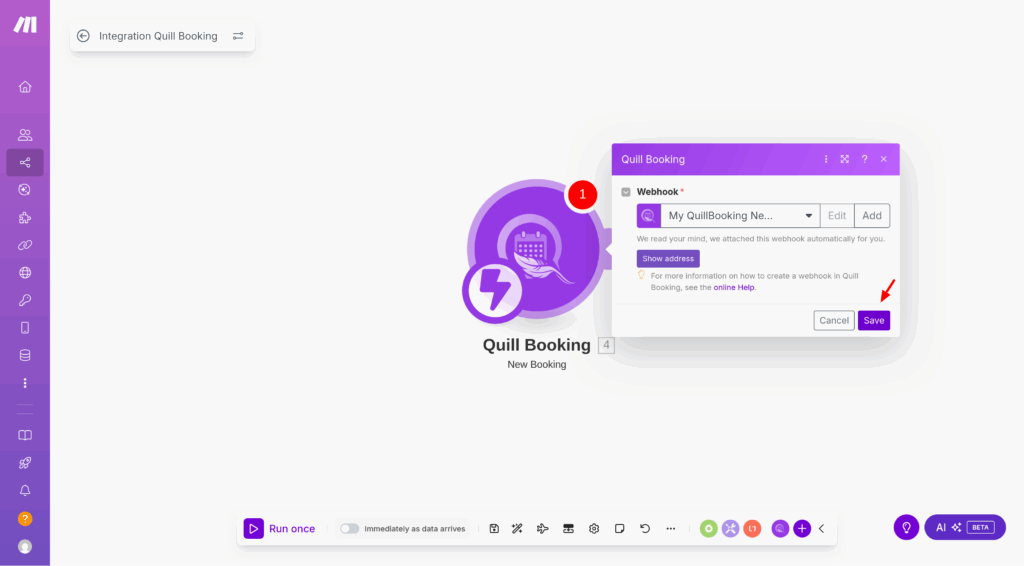
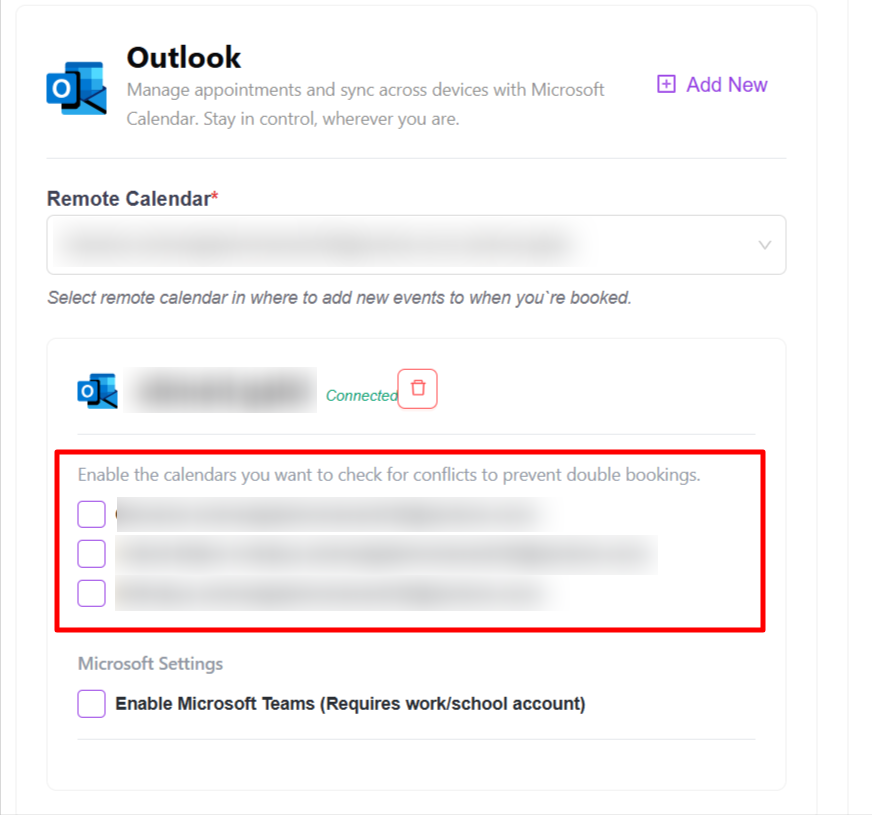
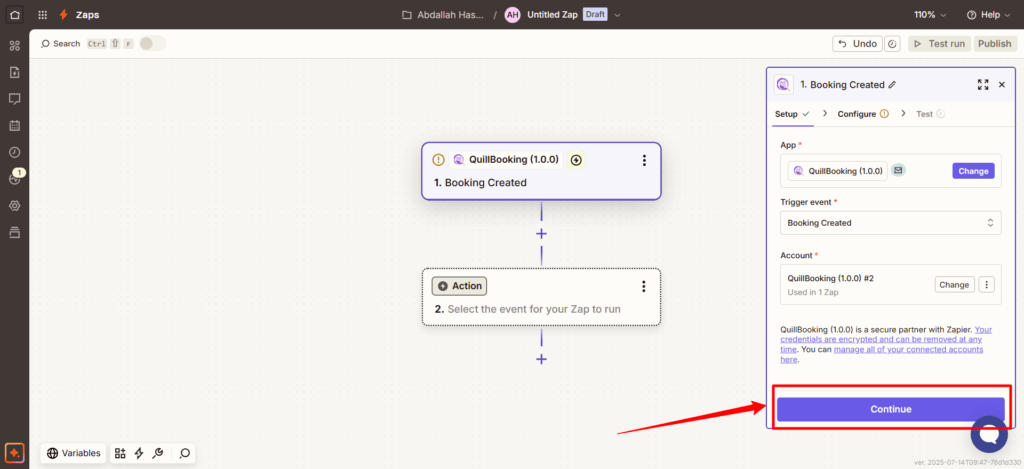
11. From the Remote Calendar dropdown menu, select the calendar where you want to create the event.
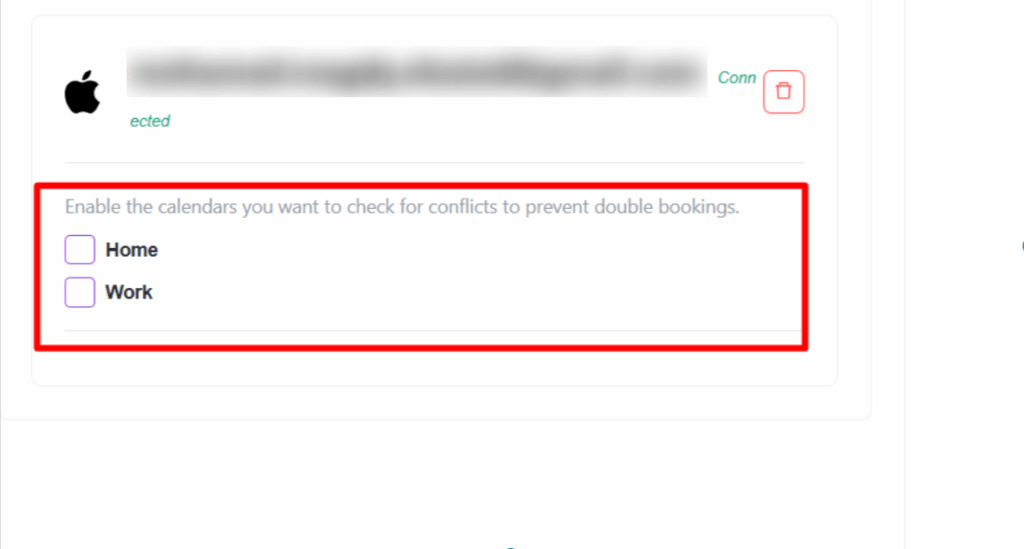
12. In the checkbox fields, you can enable the calendars you want to check for conflicts to prevent double bookings.
Conclusion
With the QuillBooking Apple Calendar, managing your schedule becomes effortless and fully integrated across all your Apple devices. By seamlessly connecting your booking forms to Apple Calendar, every appointment is automatically added to your calendar—no more manual entries, double bookings, or missed events. This powerful integration keeps your schedule organized, enhances time management, and ensures a smooth experience for both you and your clients. Stay in sync, reduce no-shows, and keep your workflow running seamlessly—all within the Apple ecosystem you already use and trust.