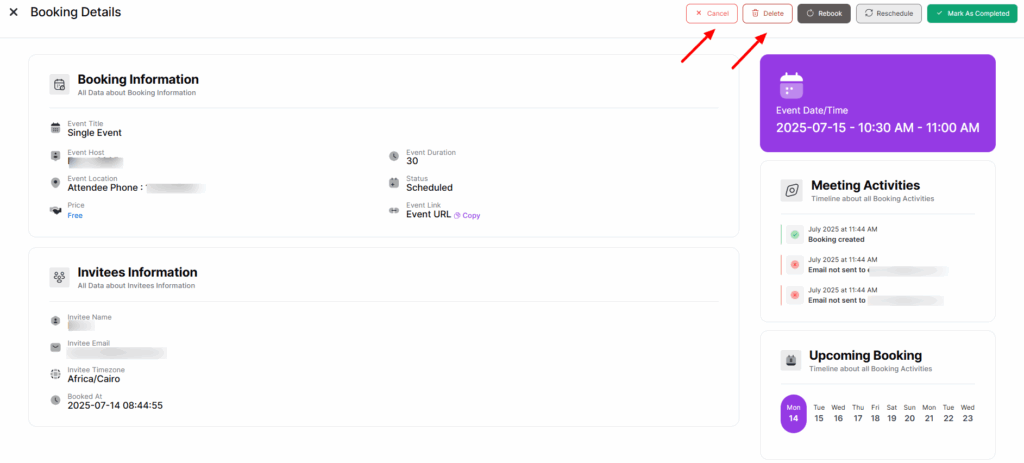
Booking Details
The Bookings section in QuillBooking gives you full control over all your reservations. Whether you’re managing appointments for yourself or overseeing bookings across multiple hosts, everything is clearly organized and easy to access.
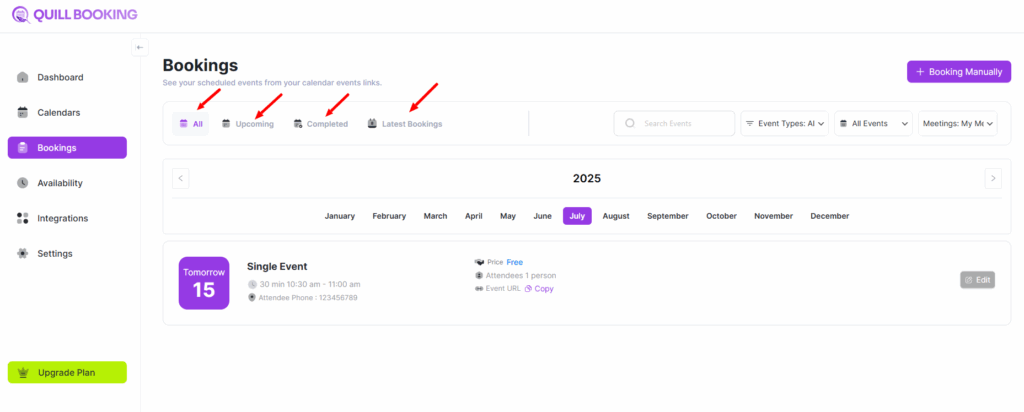
Viewing Bookings
All of your reservations are accessible from the Bookings section. From here, you can browse through:
- Upcoming Bookings – See what’s scheduled next. Each booking includes a quick-view option for more details.
- Completed Bookings – Find past reservations easily in the completed section, serving as your booking history.
- Latest Bookings – Recently made bookings are highlighted here so you can track new activity.
- All Bookings – This section displays every reservation, giving you a full picture of all activity.
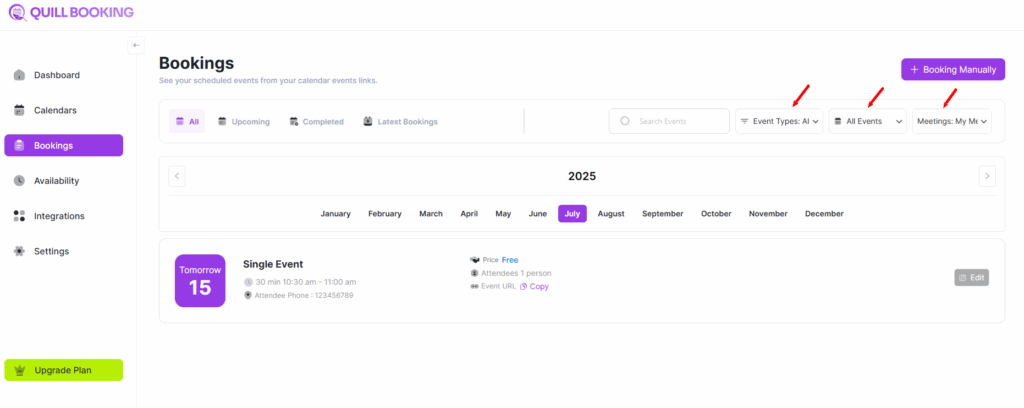
Filter Bookings by Host, Event Type, or Specific Events
QuillBooking gives you flexible filtering options so you can quickly find the bookings you need. From the top-right dropdown menus, you can:
- Filter by Host – View bookings managed by a specific host.
- Filter by Event Type – Narrow down bookings based on event categories (e.g., meetings, consultations, or demos).
- Filter by Specific Event – Focus on a single event to view all related bookings.
These filters make it easier to organize and manage your schedule, especially when handling multiple events or team members.
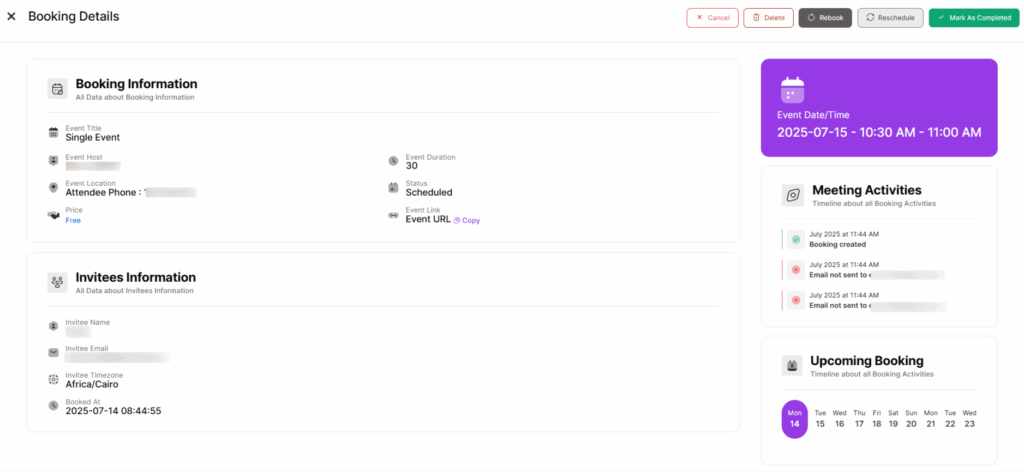
Detailed Booking Insights
QuillBooking provides a complete view of each reservation, including:
- Invitee & Meeting Information – Includes the attendee’s name, contact details, and meeting title.
- Event Date & Time – Clearly displays when the event is scheduled to take place.
- Meeting Activities – Tracks actions like reschedules, cancellations, and any third-party integrations (e.g., Zoom).
- Upcoming Bookings – Shows any future appointments related to the same invitee or event, so you have full visibility of what’s next.
This comprehensive view helps you stay informed and manage every booking more effectively.
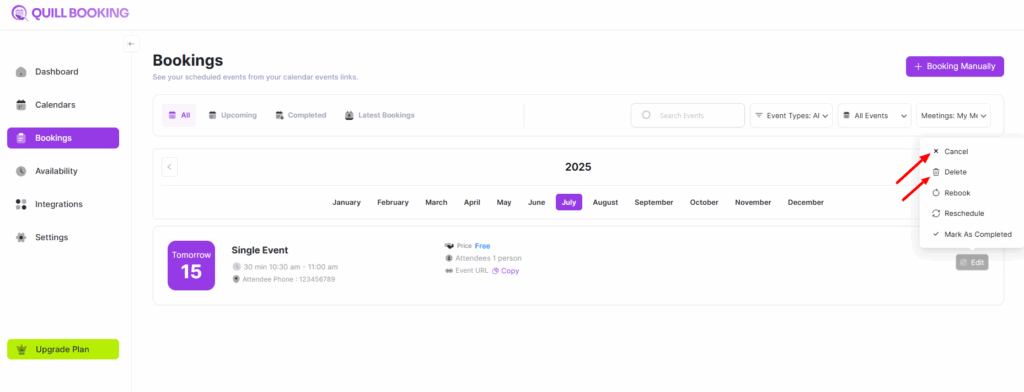
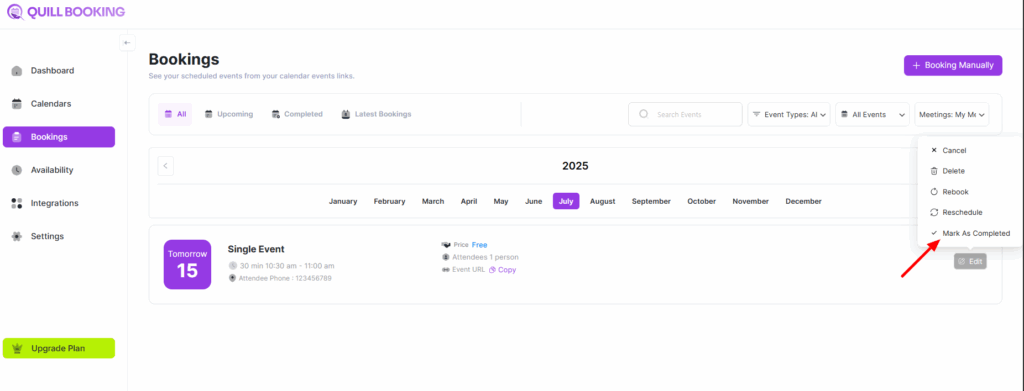
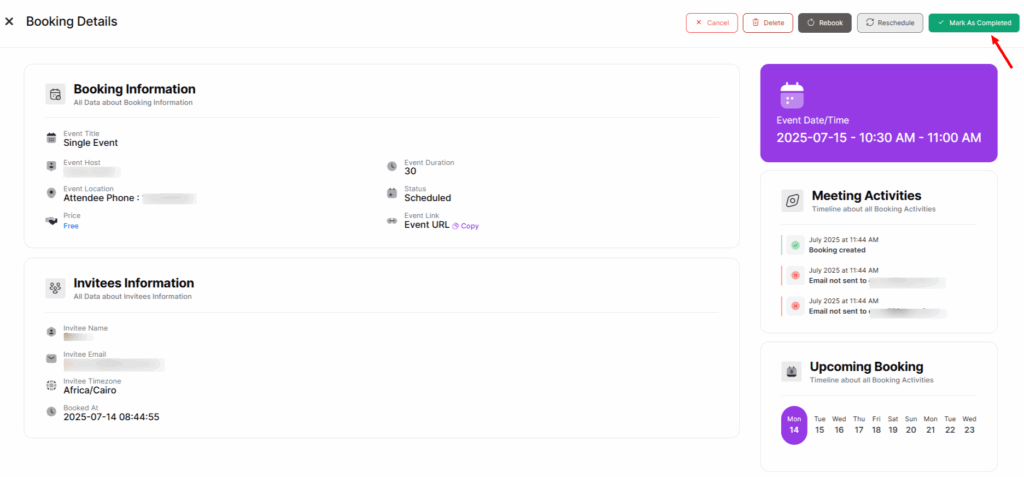
Mark a Booking as Completed
You can manually mark a booking as completed in two simple ways:
- From the Bookings list, click Edit button and select Mark as Completed.
- Or, open the booking’s details page and click the Mark as Completed button directly from there.
Once marked, the booking status will update, and it will automatically move to the Completed Bookings section for easy reference.
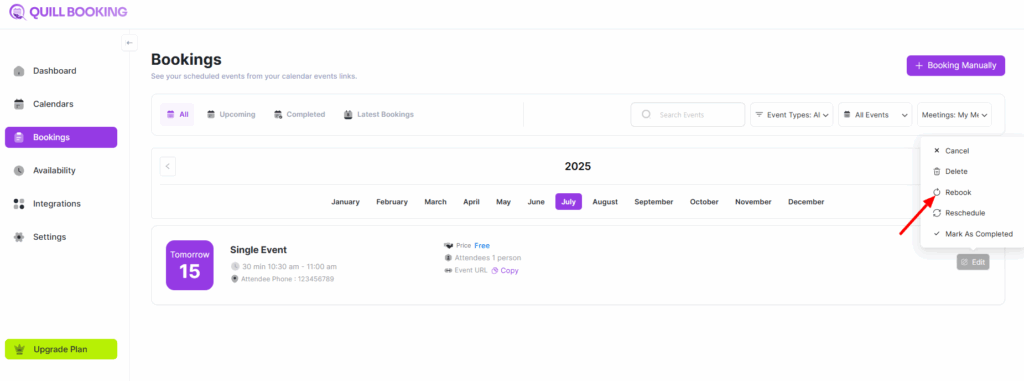
Rebooking an Appointment
QuillBooking gives you two convenient ways to rebook an appointment:
- From the Bookings Page: Click Edit button and select Rebook.
- From the Details Page: Open the full booking details and click the Rebook button.
In both cases, a “Add Booking Manually” modal will appear, pre-filled with the original booking data. You can then adjust any details—such as date, time, or invitee—and confirm the new booking.
This makes it easy to recreate appointments without re-entering all the information from scratch.


Rescheduling a Booking
You can reschedule an appointment in QuillBooking using either of the following methods:
- From the Bookings Page: Click Edit button and choose Reschedule.
- From the Details Page: Open the booking details and click the Reschedule button.
In both cases, you’ll be redirected to the Scheduling Page, where you can select a new available time slot for the attendee. Once confirmed, the booking will update automatically with the new date and time.
This flow ensures a smooth rescheduling experience for both admins and invitees.
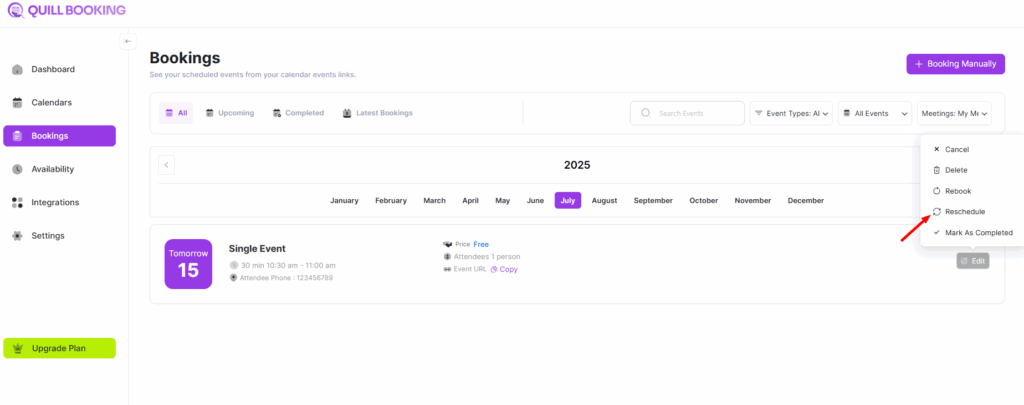

Canceling or Deleting Bookings
- To delete a booking entirely, select Delete and confirm in the popup.
- To cancel without deletion, click Cancel. This updates the status but keeps the record.