Zapier
Intro
Looking to automate your workflows and save valuable time? Introducing the QuillBooking Zapier Integration—a powerful tool that connects your WordPress-based booking system to thousands of apps without writing a single line of code. Built on the modern and flexible QuillBooking platform, QuillBooking lets you streamline your scheduling, while Zapier acts as the bridge to automate actions across your favorite tools like Google Sheets, Slack, Gmail, Notion, and more.
With the QuillBooking Zapier Integration, every new booking can instantly trigger customized workflows—such as sending confirmation emails, adding rows to spreadsheets, updating your CRM, or notifying your team. Whether you’re handling client appointments, interviews, or service calls, this integration ensures every task is handled automatically and consistently.
By connecting QuillBooking with Zapier, you remove repetitive manual tasks, reduce human error, and create a smooth, connected experience across your digital tools—allowing you to focus more on growing your business.
In this guide, we’ll show you how to set up the QuillBooking Zapier Integration and walk you through creating automated workflows (Zaps) that enhance your productivity and keep everything running like clockwork.
How to setup
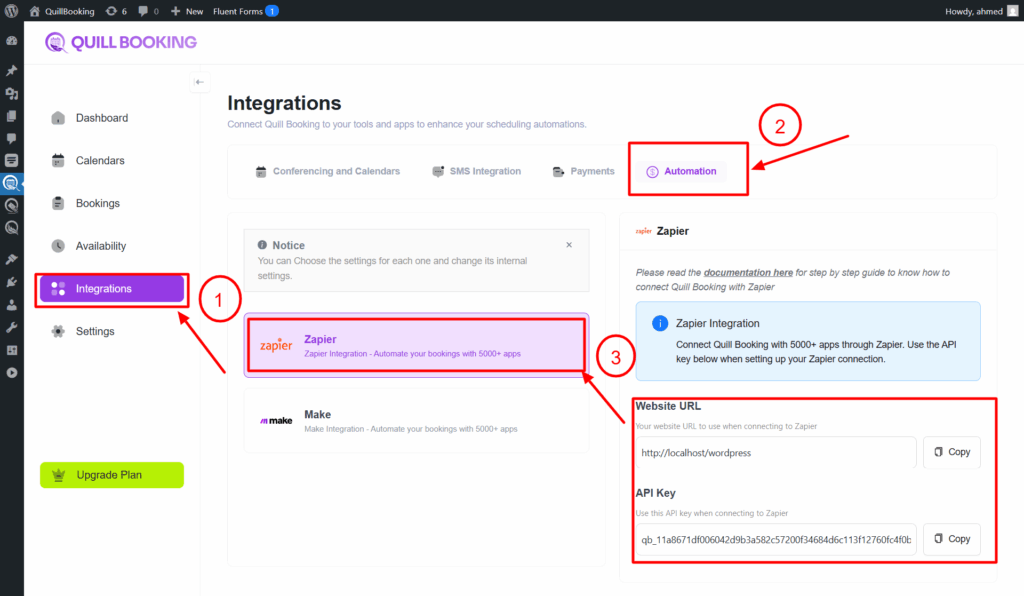
1. Go to the Integrations tab, then select the Automation tab and open the Zapier section. Copy both the Website URL and the API key.
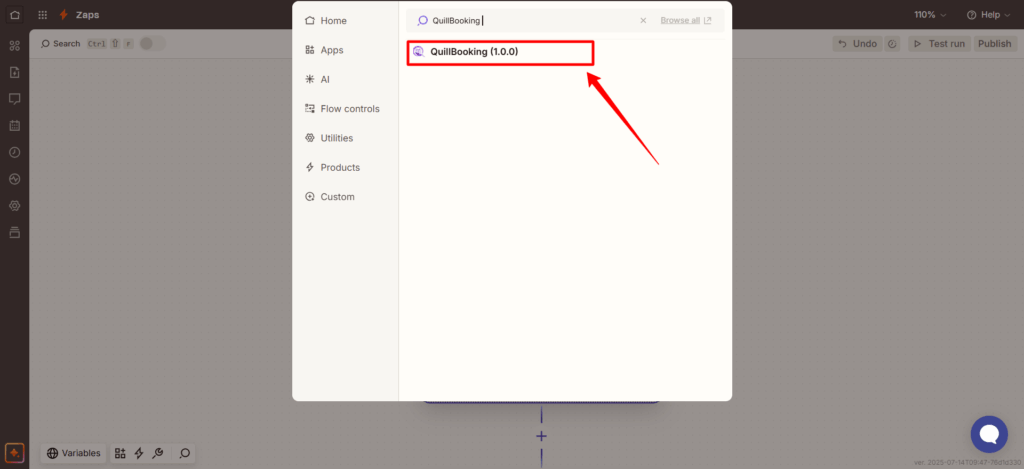
2. Then, go to this link to create a new Zap. In the Trigger section, search for and select QuillBooking as your trigger app.
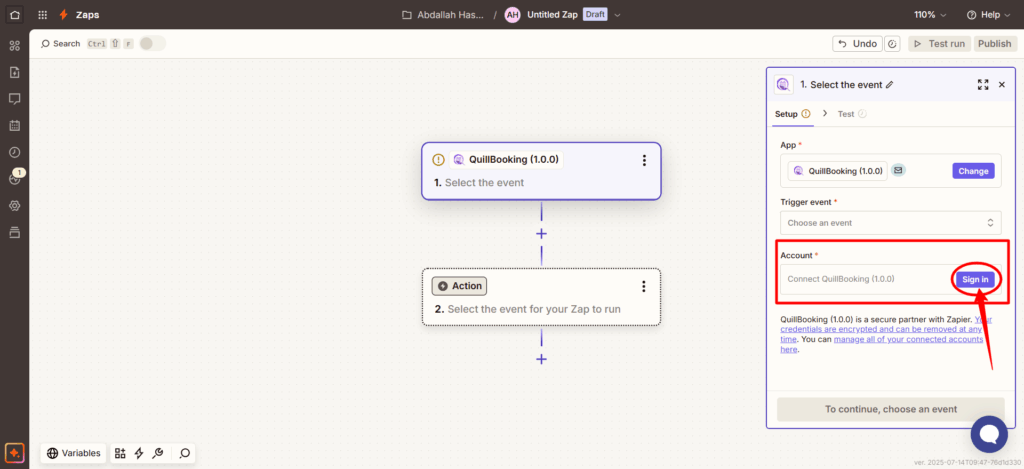
3. Next, in the Account field on the right-hand menu, click Sign In to connect your QuillBooking account.
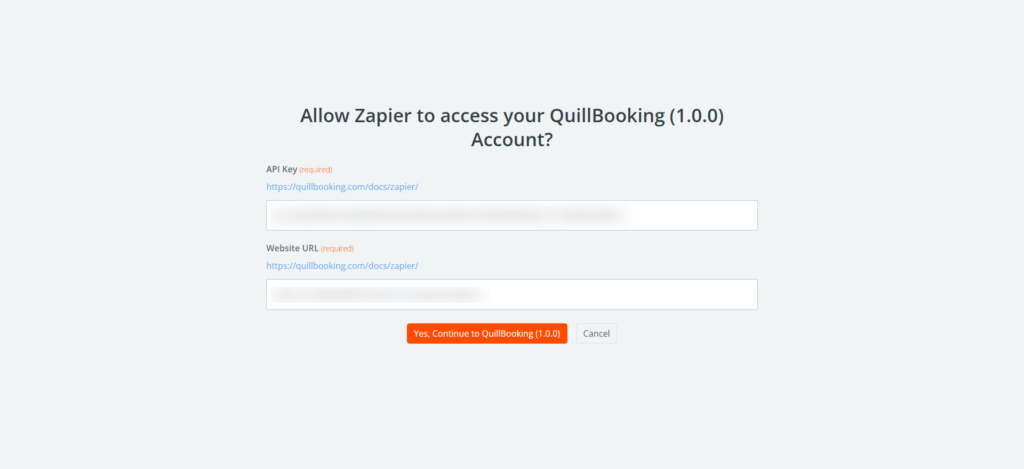
4. Then, paste the information you copied earlier into the Website URL and API Key fields, and click the “Yes, Continue” button.
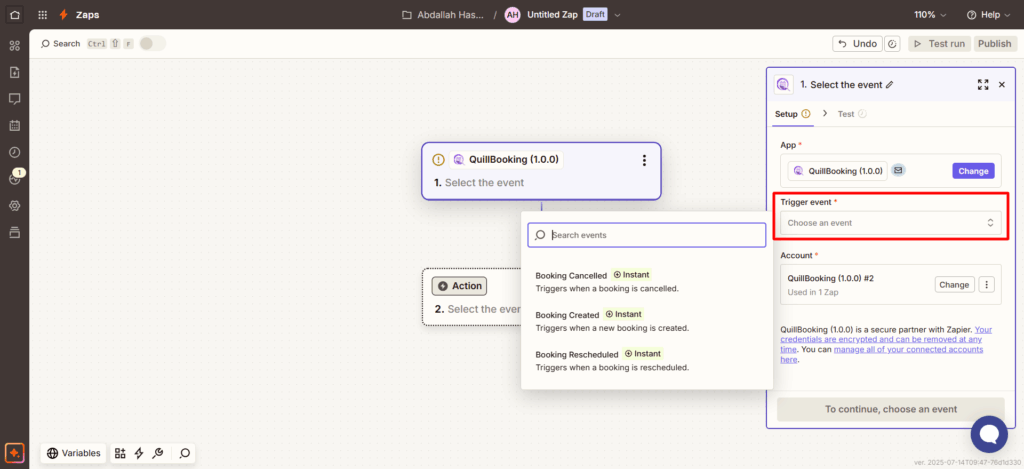
5. Your QuillBooking account has now been successfully connected to Zapier. Next, click on the Trigger Event dropdown menu and select the event you’d like to use—such as Booking Created, Booking Cancelled, or Booking Rescheduled.
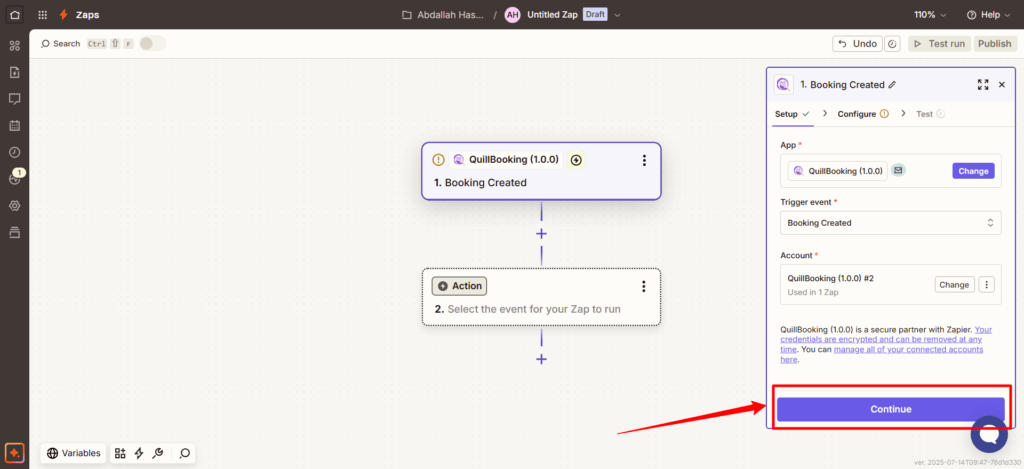
6. After that, click Continue, then choose the specific event you want to listen for by selecting it from the Event Name field.
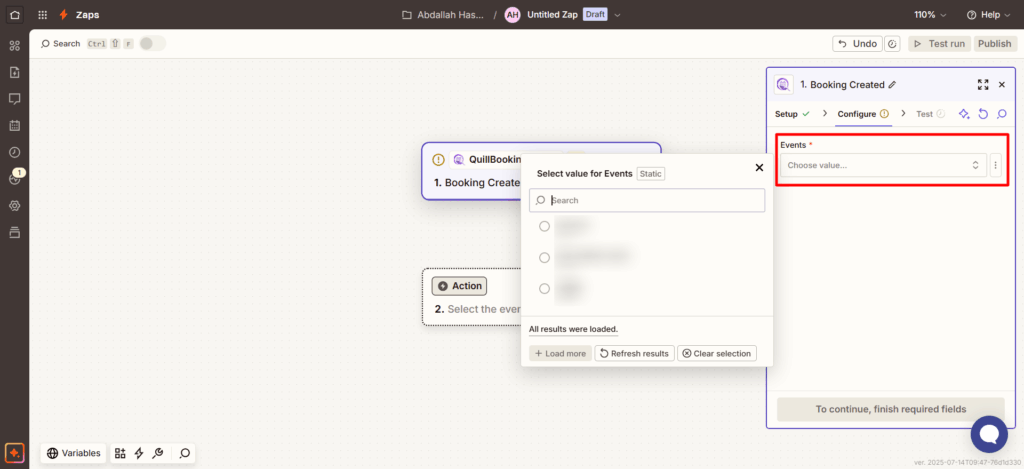
7. Select your desired event from the list, then click the Continue button to proceed.
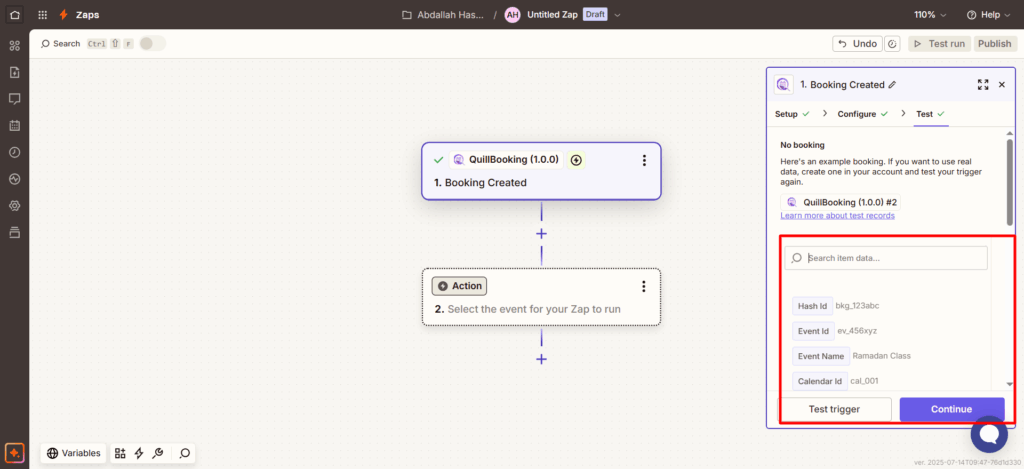
8. In the Test tab, you’ll be able to view the sample response data returned from a recent booking. This allows you to confirm that the trigger is working correctly and to preview the information that will be passed to the next step. Once verified, click the Continue button to proceed.
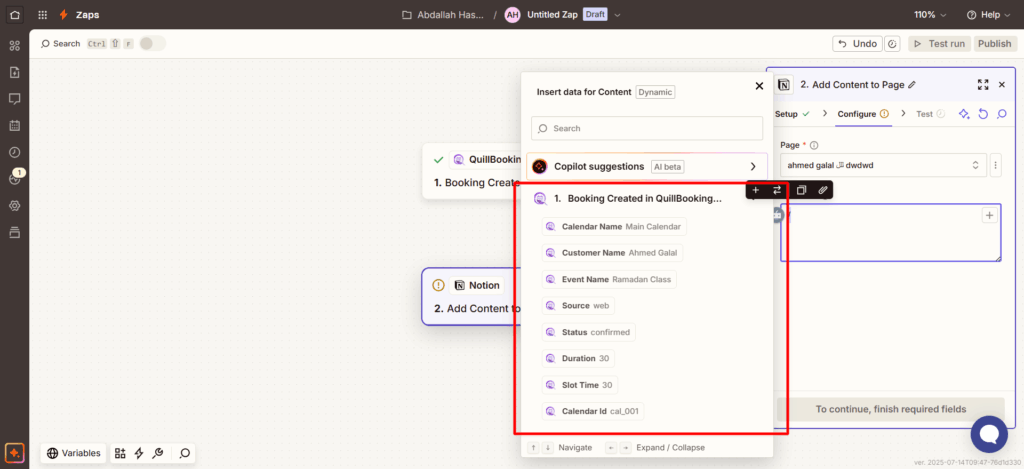
9. After this, you can choose which fields you want to use from the booking data. Select the ones that are relevant to your workflow and will be used in the next action step.
Conclusion
With the QuillBooking Zapier Integration, automating your workflows becomes simple and seamless. By connecting your booking forms to thousands of popular apps through Zapier, you eliminate manual tasks, reduce errors, and ensure every action is triggered automatically—from sending emails to updating spreadsheets or notifying your team. This powerful integration streamlines your entire booking process, improves efficiency, and helps you deliver a faster, more professional experience to your clients. Save time, stay organized, and let Zapier handle the repetitive work—so you can focus on what matters most.