Collect Multi-Payments
QuillBooking allows you to charge multiple pricing options for a booking based on the meeting duration, ensuring you get paid fairly for your time. It also gives your clients the flexibility to choose their preferred session length for a booking service.
This article will guide you through the process of setting up the Multi-Payments feature in the Booking Event.
Enable Payment Modules
Before starting the process of adding the multi-payment feature in your booking services, make sure that your payment modules are enabled.
Plus, to collect payments through booking, ensure the payment platforms are configured with QuillBooking as well.
To learn more detailed guidelines about Enabling Payment Modules and Configuring Payment Platforms, refer to the following documentation:
Set up Multi-Payments in a Booking Event
To learn how to set up multi-payments in a booking event within QuillBooking, follow the steps with the screenshots below.
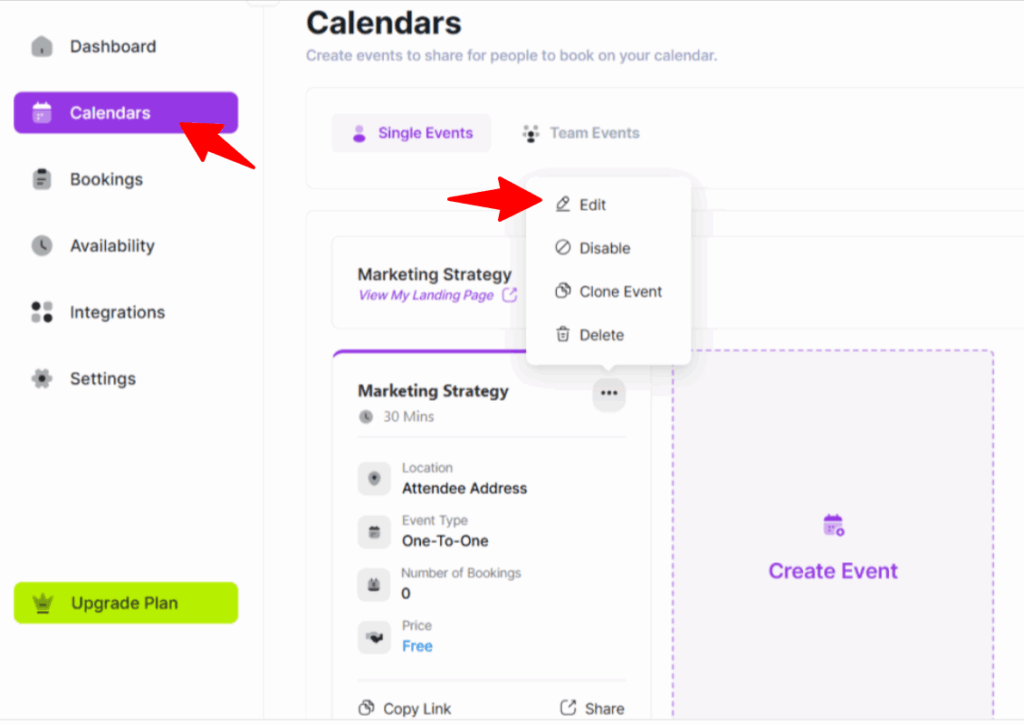
First, go to Calendars from the WordPress Left Sidebar or the QuillBooking Navbar, select the Booking Event where you want to add the multi-payment option, and click the Edit button
Once you are on your desired booking event, open the Event Details option, scroll down to Set Duration, and turn on the Allow Attendee to select duration toggle.
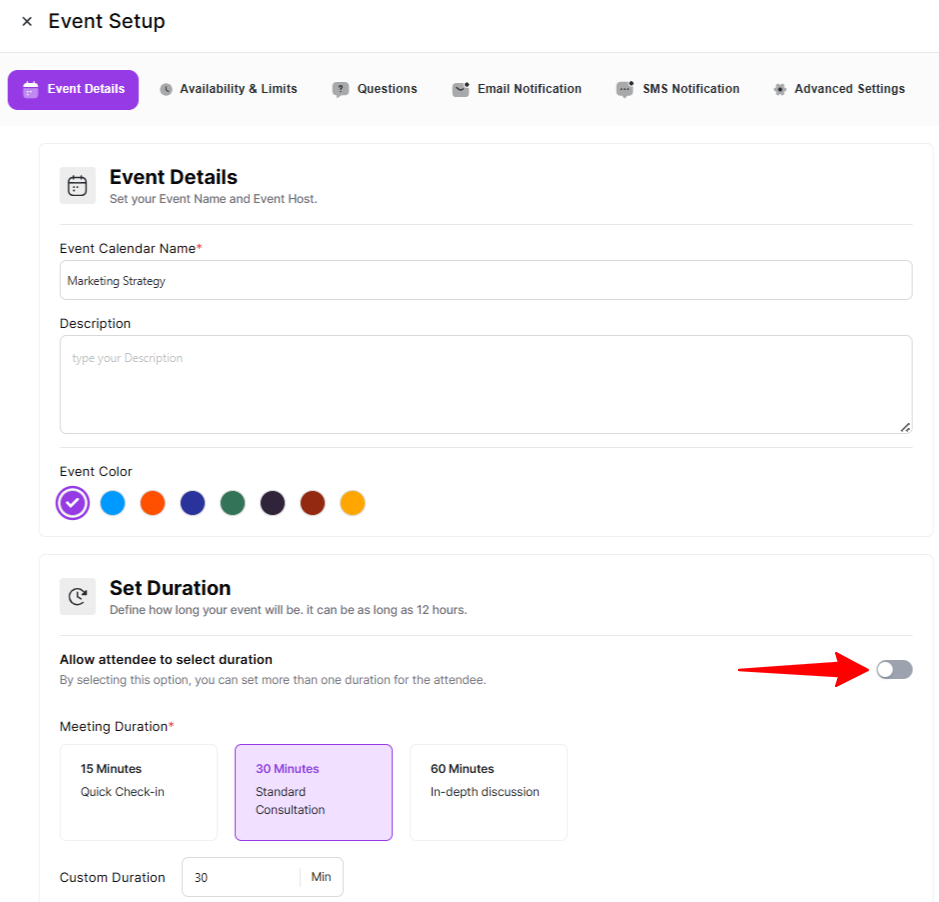
Now, you will get two options for setting up the Meeting Duration. These are:
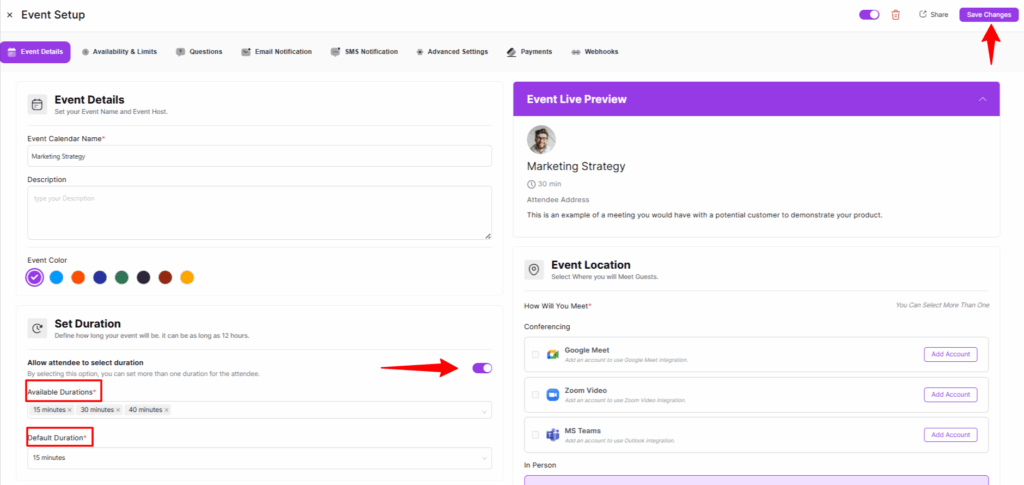
- Available Durations: Using this option, you can select your desired time sessions for your booking from the dropdown list by clicking the Arrow Icon on the right side. For example, I set three different time durations (15, 30, and 40 minutes).
- Default Duration: Here, you can set one time duration as a default duration (i.e., when clients open the booking link, the default duration will automatically be selected, which they can change later if needed).
Once you complete the setup, click the Save Changes button to save all your changes.
Configure Payment Settings
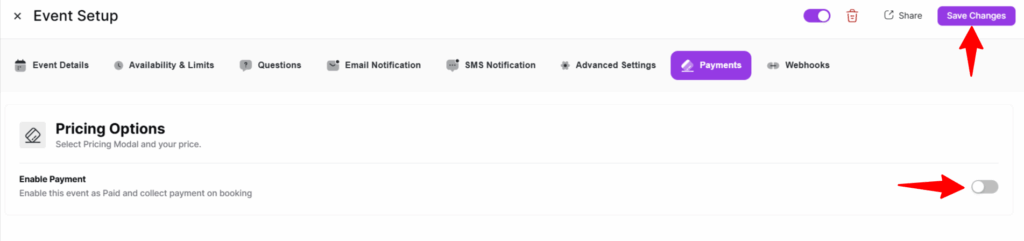
Now, go to the Payment Settings option in the left menu, and check the “toggle this event as Paid and collect payment on booking” box.
Then, check the “Enable multiple payment options based on duration” box.
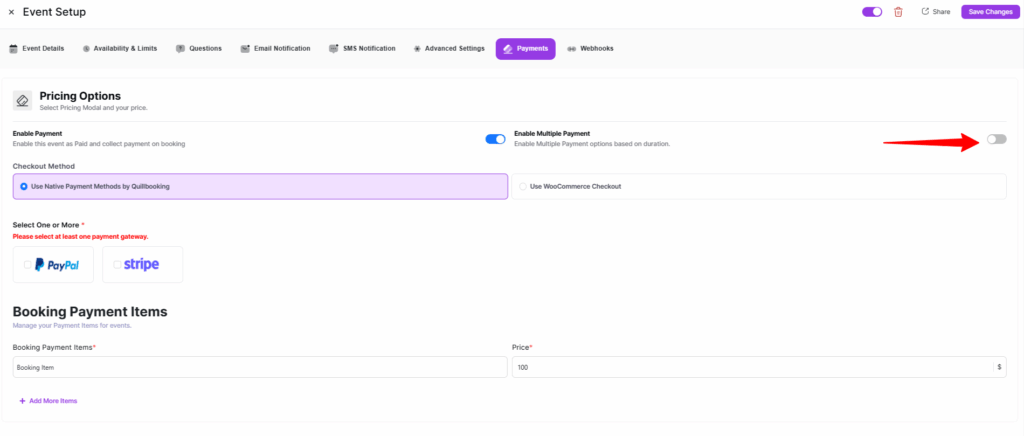
Finally, the option will appear to set up multi-payments.
- Checkout Method: Here, you can select the Payment Method through which you want to collect payments from your client.
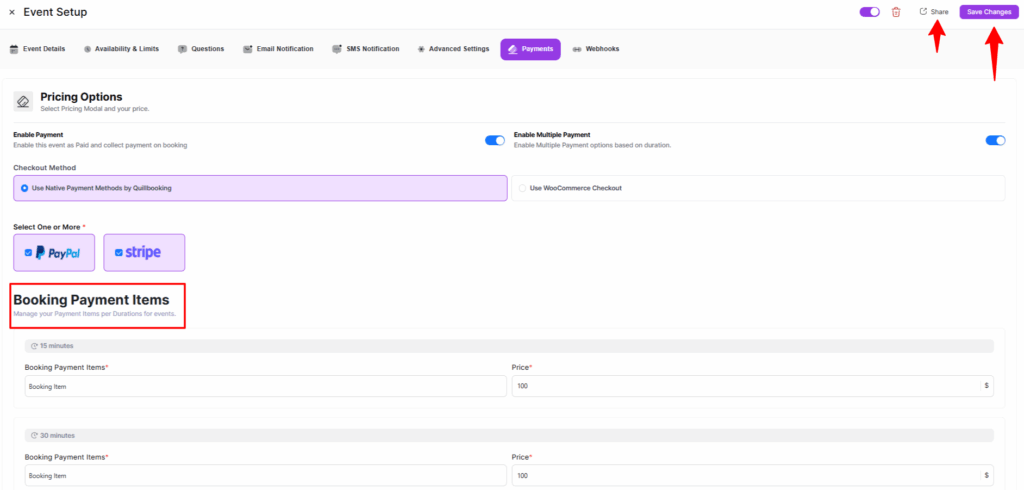
- Booking Payment Items: Here, you can set different prices for each time duration in the corresponding fields under the Amount column.
Once you are done, click the Save Changes button, and the multi-payments feature will be added to the booking event.
Additionally, click the Share button to view the functionalities of this multi-payment feature.
Preview of Multi-Payment Feature
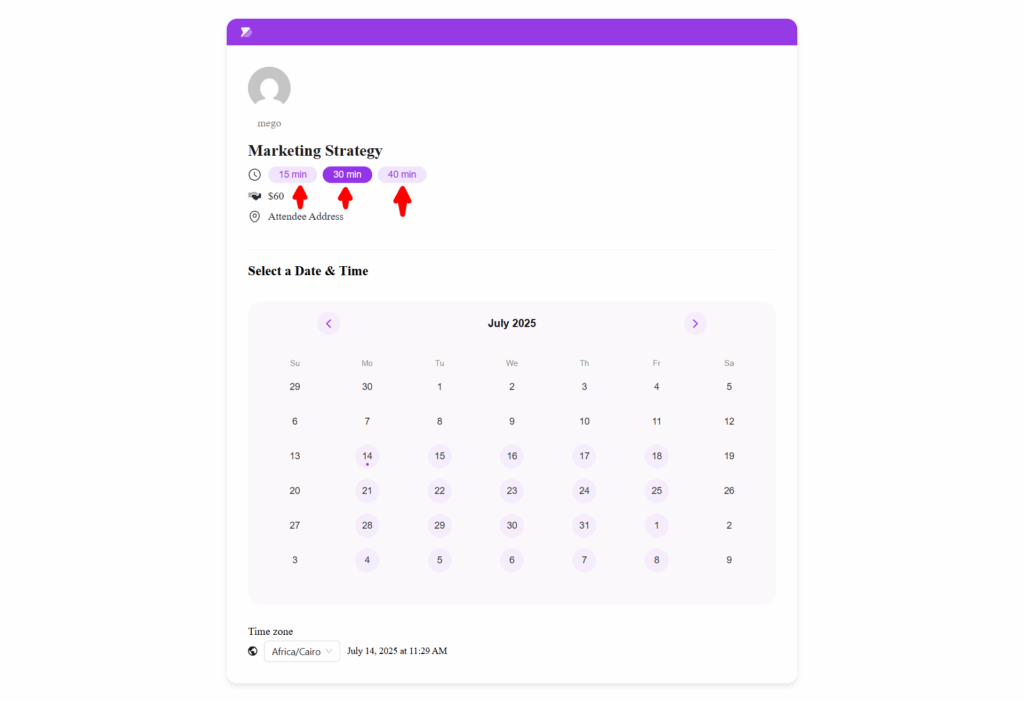
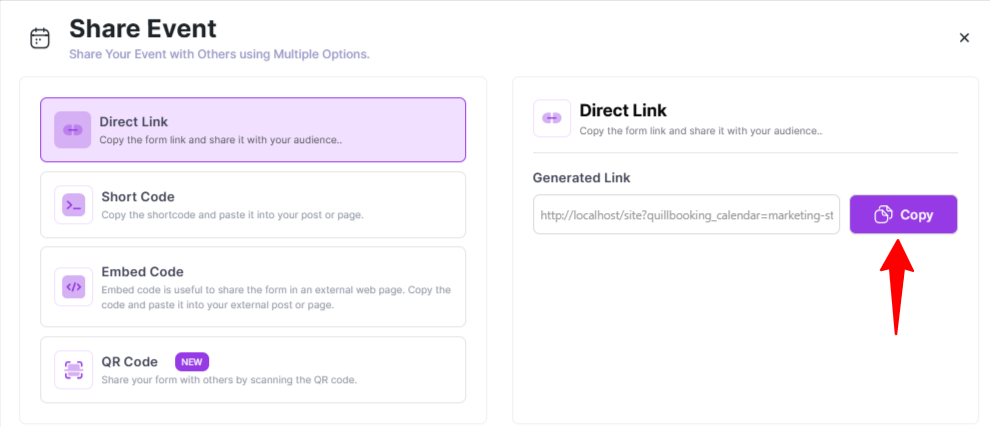
Once you click the Share button, you will get four options to display your booking events on the front end of your WordPress Site.
Finally, as you can see in the example below, the event offers three different booking options with their set pricing based on meeting duration.