Zoom
Intro
Want to simplify your booking process and streamline your virtual meetings? Introducing the QuillBooking Zoom , a seamless integration that automatically creates Zoom meetings for every booking made through your WordPress site. QuillBooking is a modern and flexible booking system built on top of QuillForms, designed to make appointment and event management effortless. Zoom, one of the most trusted video conferencing platforms worldwide, helps you connect with clients and teams from anywhere.
With the QuillBooking Zoom, every new booking automatically generates a Zoom meeting—complete with meeting links, time slots, and client details. Whether you’re managing coaching calls, consultations, or virtual sessions, this integration ensures you’re always prepared and connected.
By connecting QuillBooking with Zoom, you eliminate the hassle of manually creating meeting links, reduce scheduling errors, and provide a seamless experience for your clients and team. Everything works together—efficiently and automatically.
In this guide, we’ll walk you through how to set up the QuillBooking Zoom and show you how to use it to automate meeting creation, enhance client engagement, and boost your virtual productivity.
How to setup
- You have two ways to set up your account:
- The first method is global — it applies to any WordPress user who logs in. If the user has a calendar, it will be added to their account.
- The second way is specific—you can set it for individual calendars.
First way:
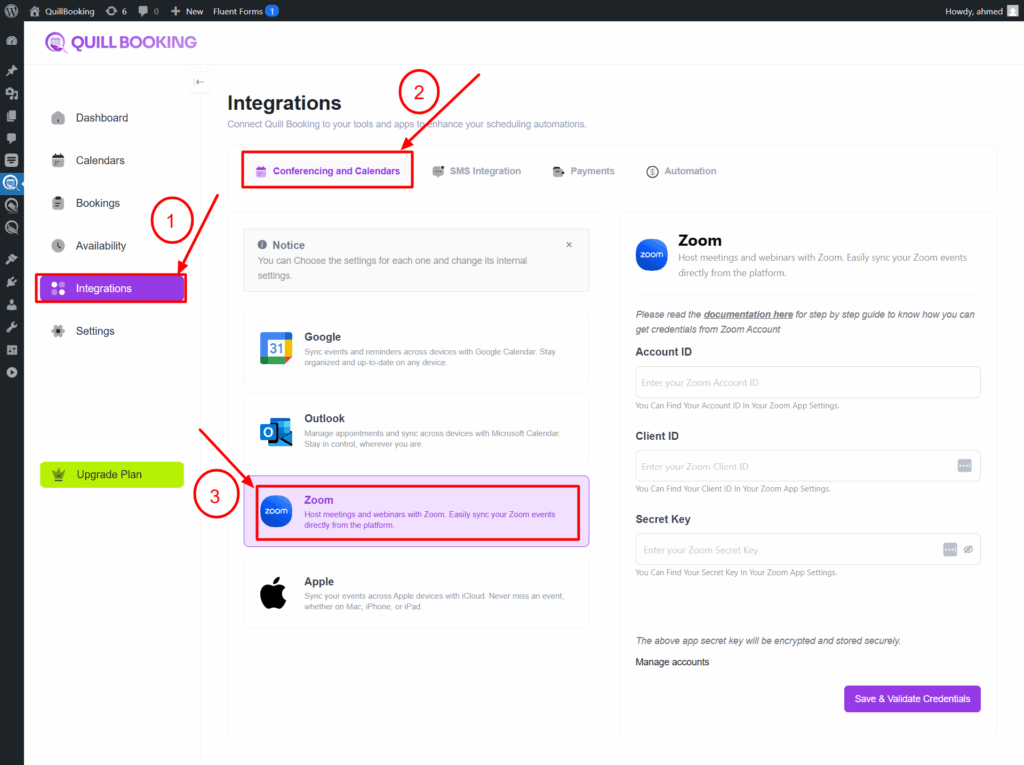
1. Go to the Integration tab and select the Zoom option.
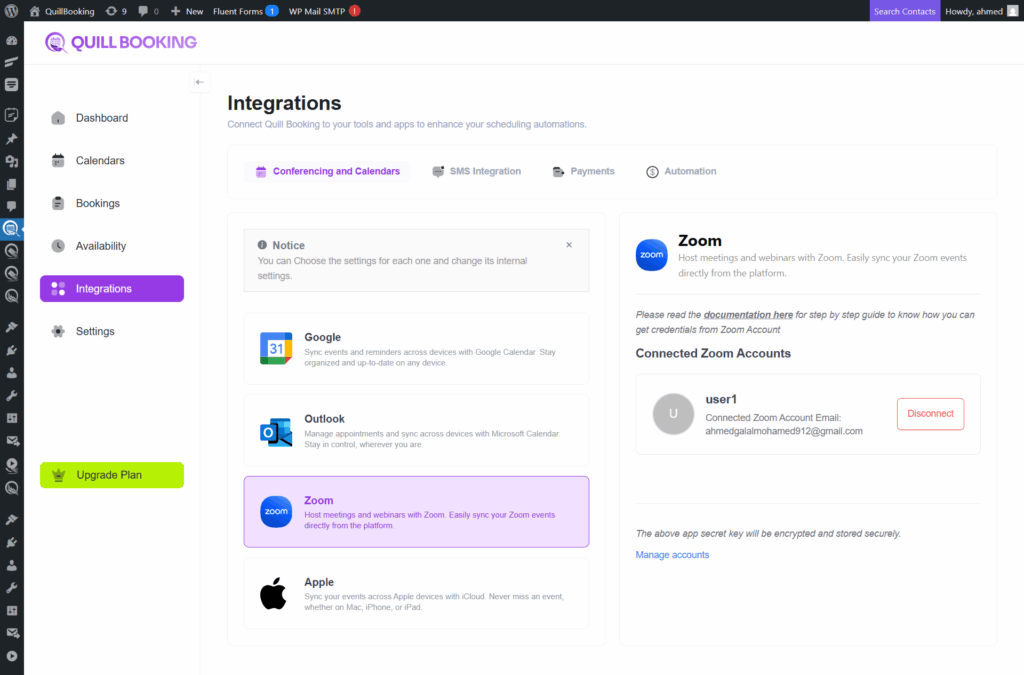
Any zoom account you add to a calendar will be displayed here.
Second way:
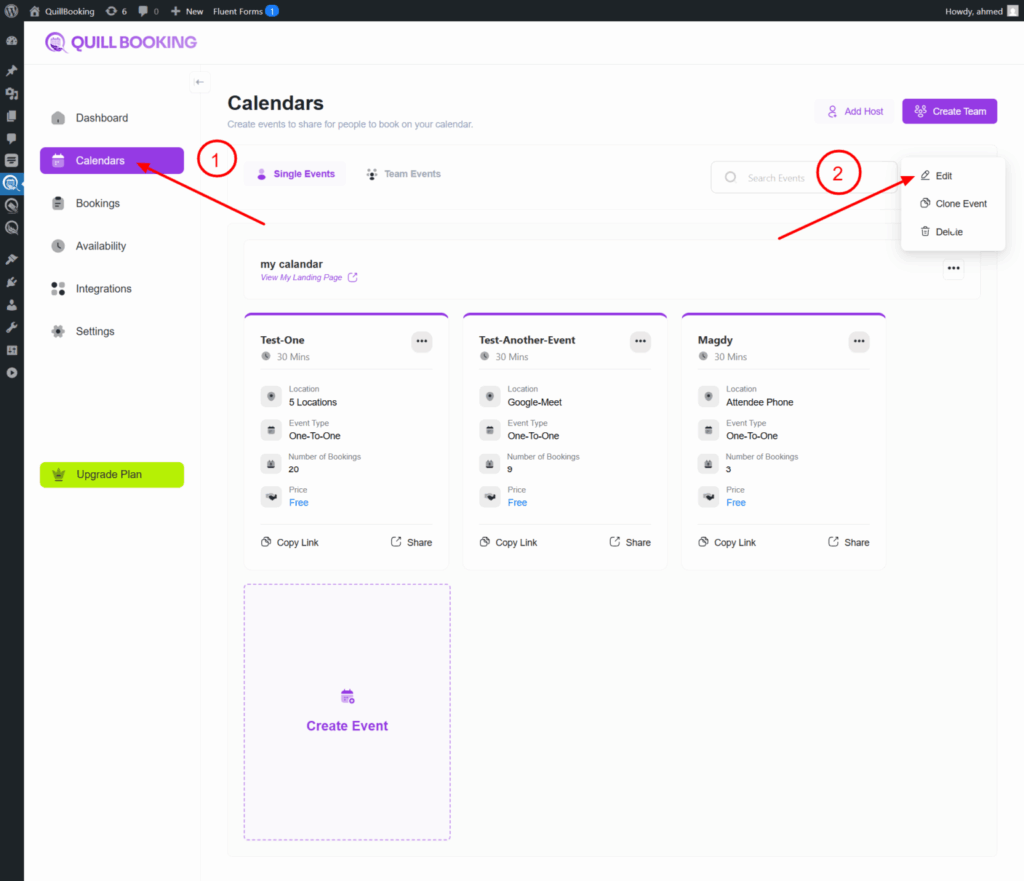
1. Go to the Calendars tab, select the calendar you want to connect to your Zoom account, and click the Edit button.
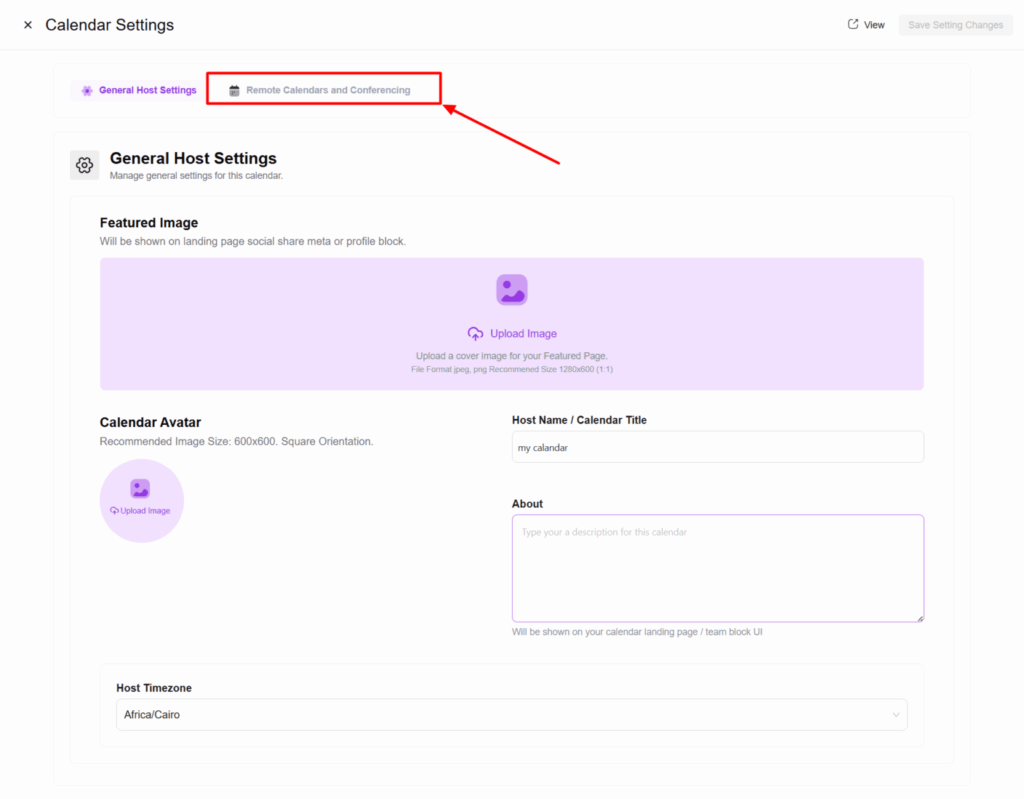
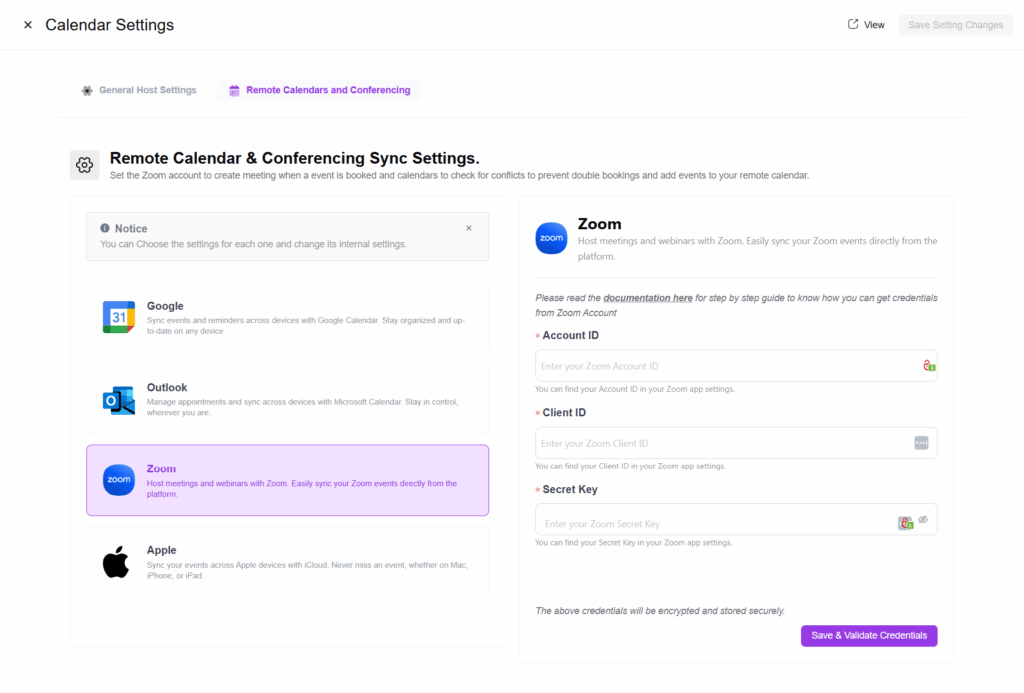
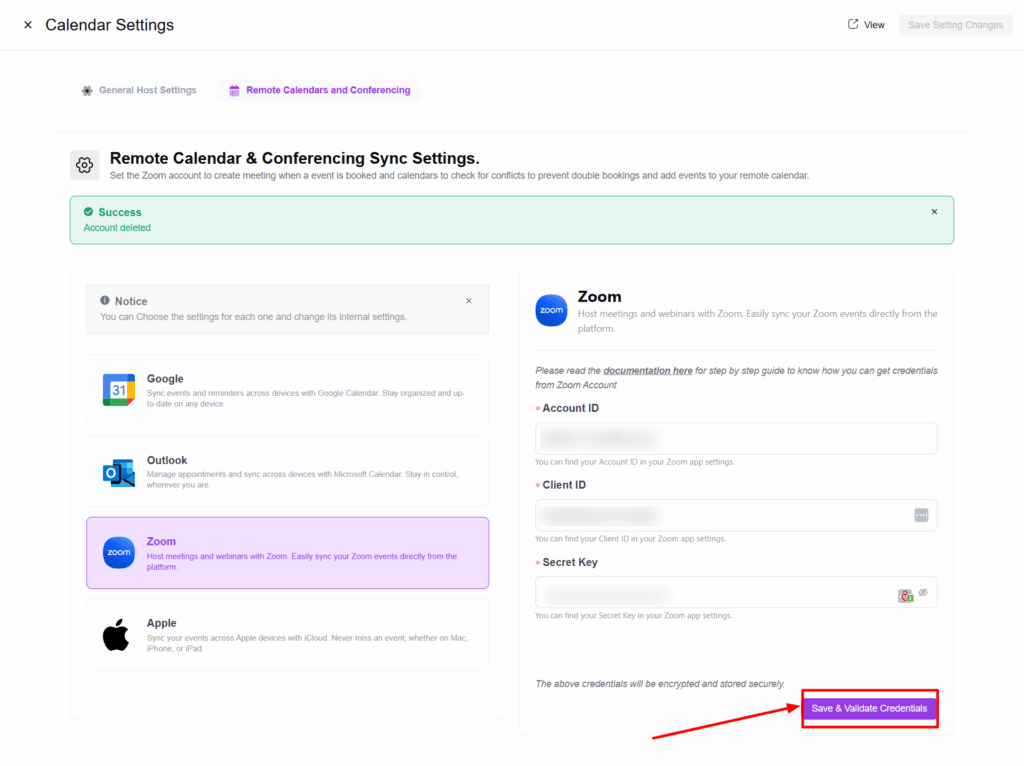
2. Select the Remote Calendars and Conferencing tab. A new section will appear showing all the integrations you can connect with.
3. Select the Zoom tab, then go to https://marketplace.zoom.us/ to create an app and obtain your Account ID, Client ID, and Secret Key.
4. Then, from the Develop dropdown menu, select Build App.

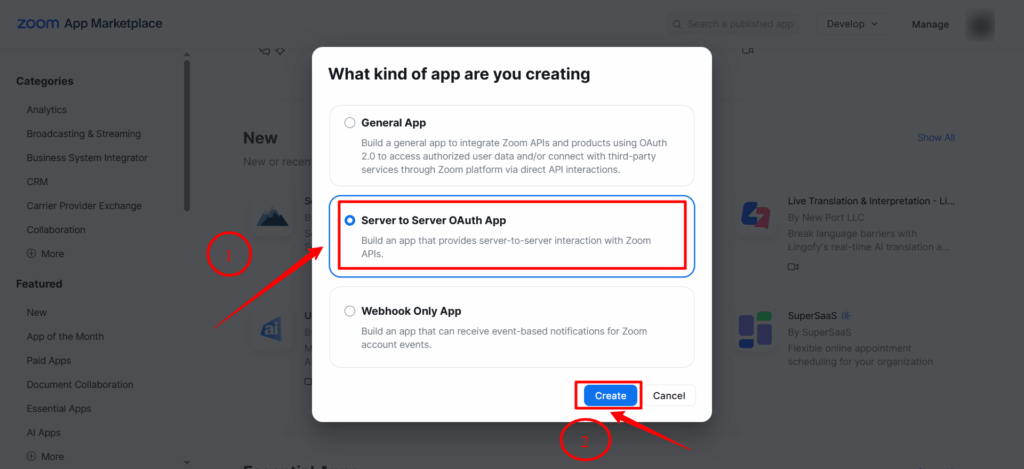
5. Then select Server-to-Server OAuth as the app type and click the Create button.
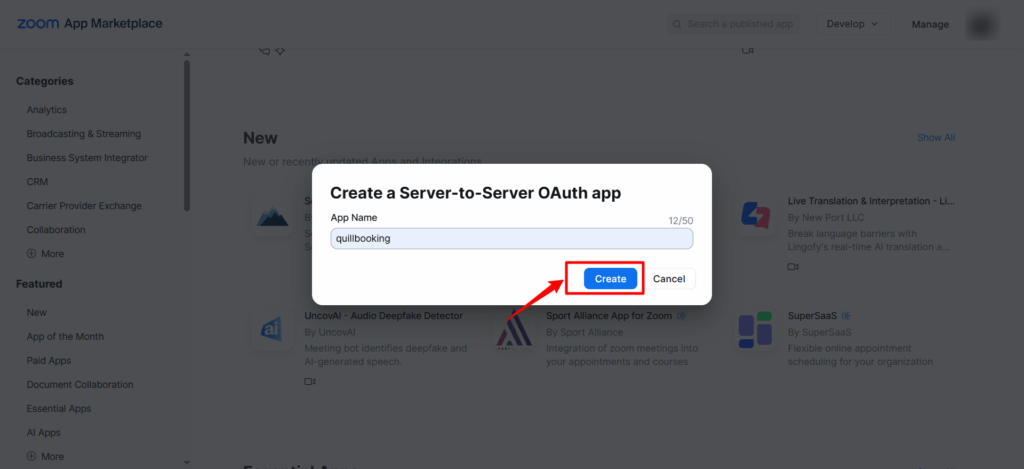
6. Set the app name (e.g., QuillBooking), then click the Create button.
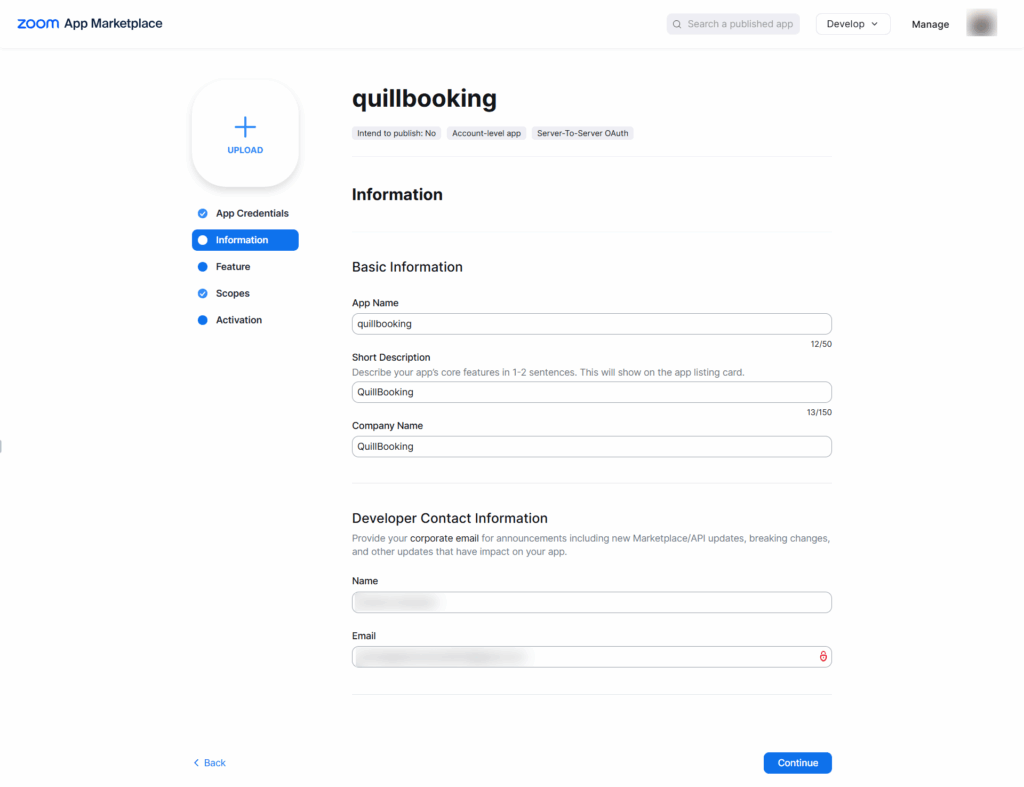
6. Go to the Information tab below, fill in the app name and other required details, then click the Continue button.
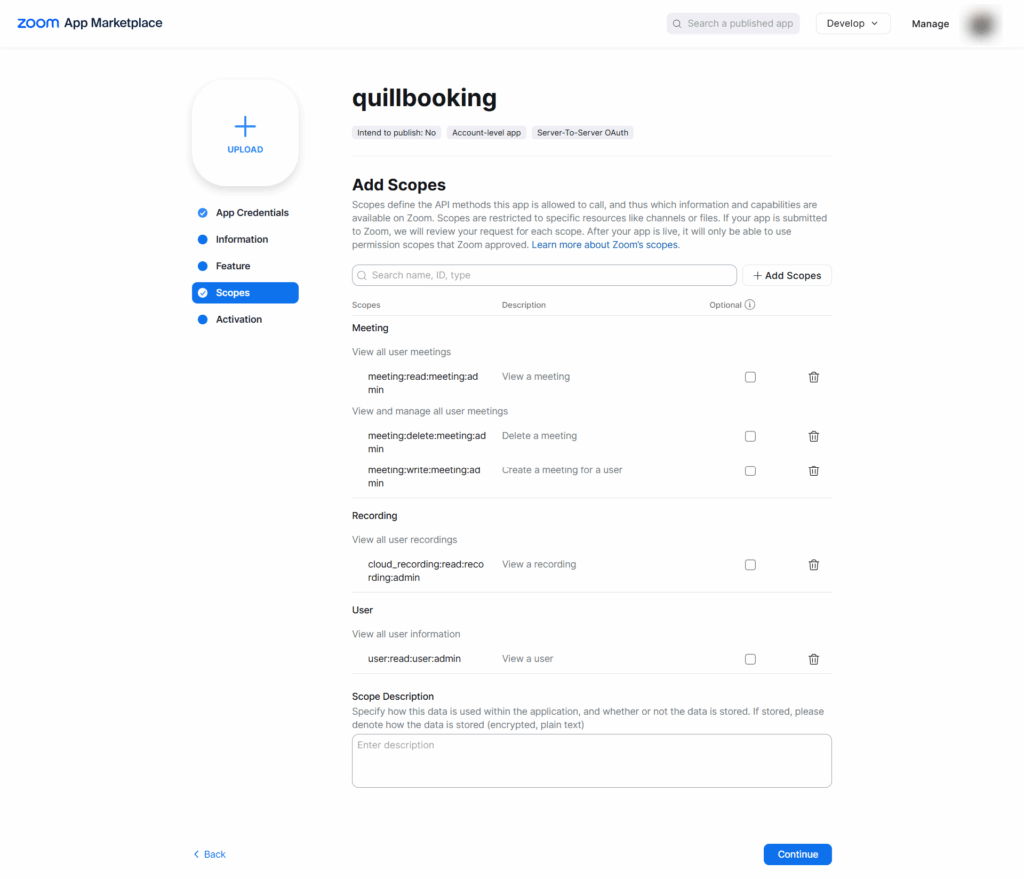
7. In the Scopes tab, add the necessary scopes to give QuillBooking permission to create and delete events and meetings.
- meeting:read:meeting:admin
- meeting:delete:meeting:admin
- meeting:write:meeting:admin
- cloud_recording:read:recording:admin
- user:read:user:admin
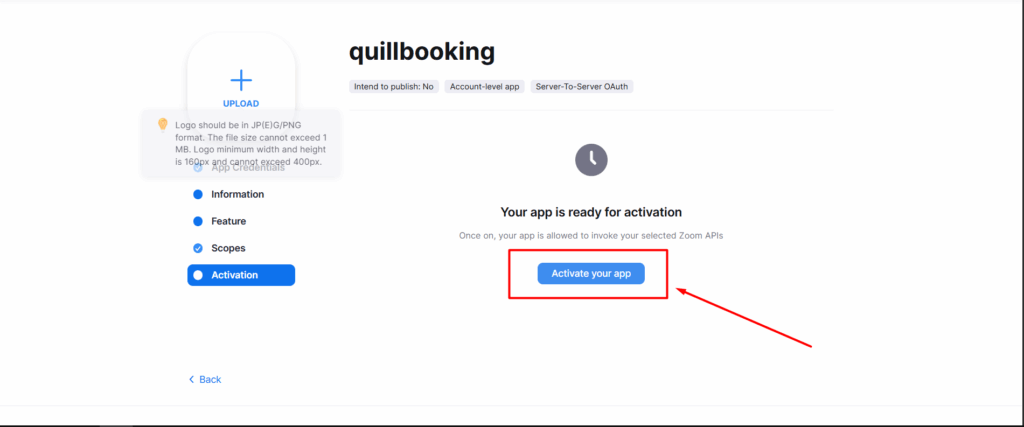
8. Finally, make sure the app is activated.
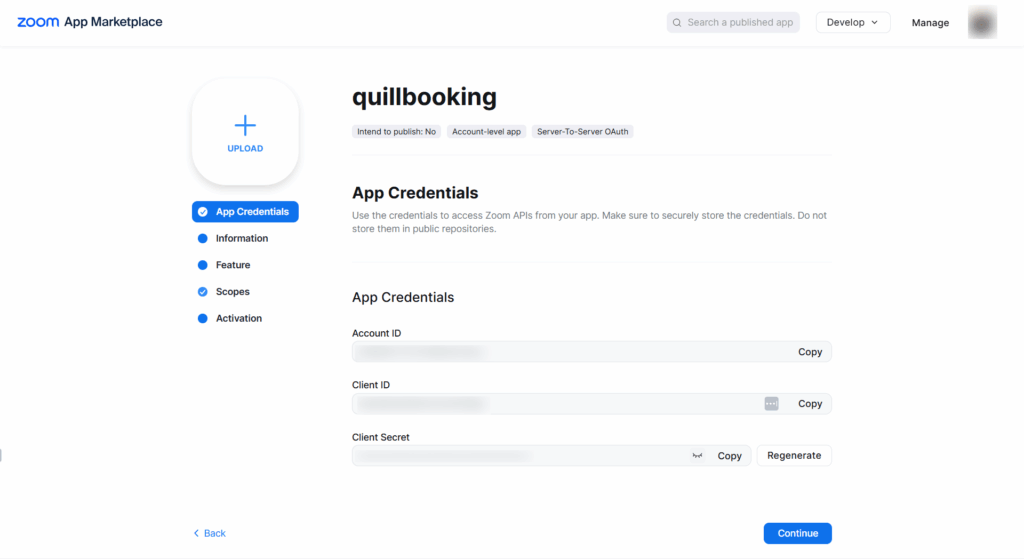
10. Then, go to the App Credentials tab and copy the Account ID, Client ID, and Client Secret.
11. Paste all this information into the appropriate input fields, then click Save & Validate Credentials.
Conclusion
With the QuillBooking Zoom, managing your virtual meetings becomes effortless and automated. By seamlessly connecting your booking forms to Zoom, you ensure that every appointment instantly generates a Zoom meeting—no more manual link creation, missed invites, or scheduling confusion. This powerful integration helps you stay organized, improve client communication, and deliver a seamless virtual experience. Stay prepared, reduce no-shows, and keep your workflow running smoothly—all through the video platform you already trust.